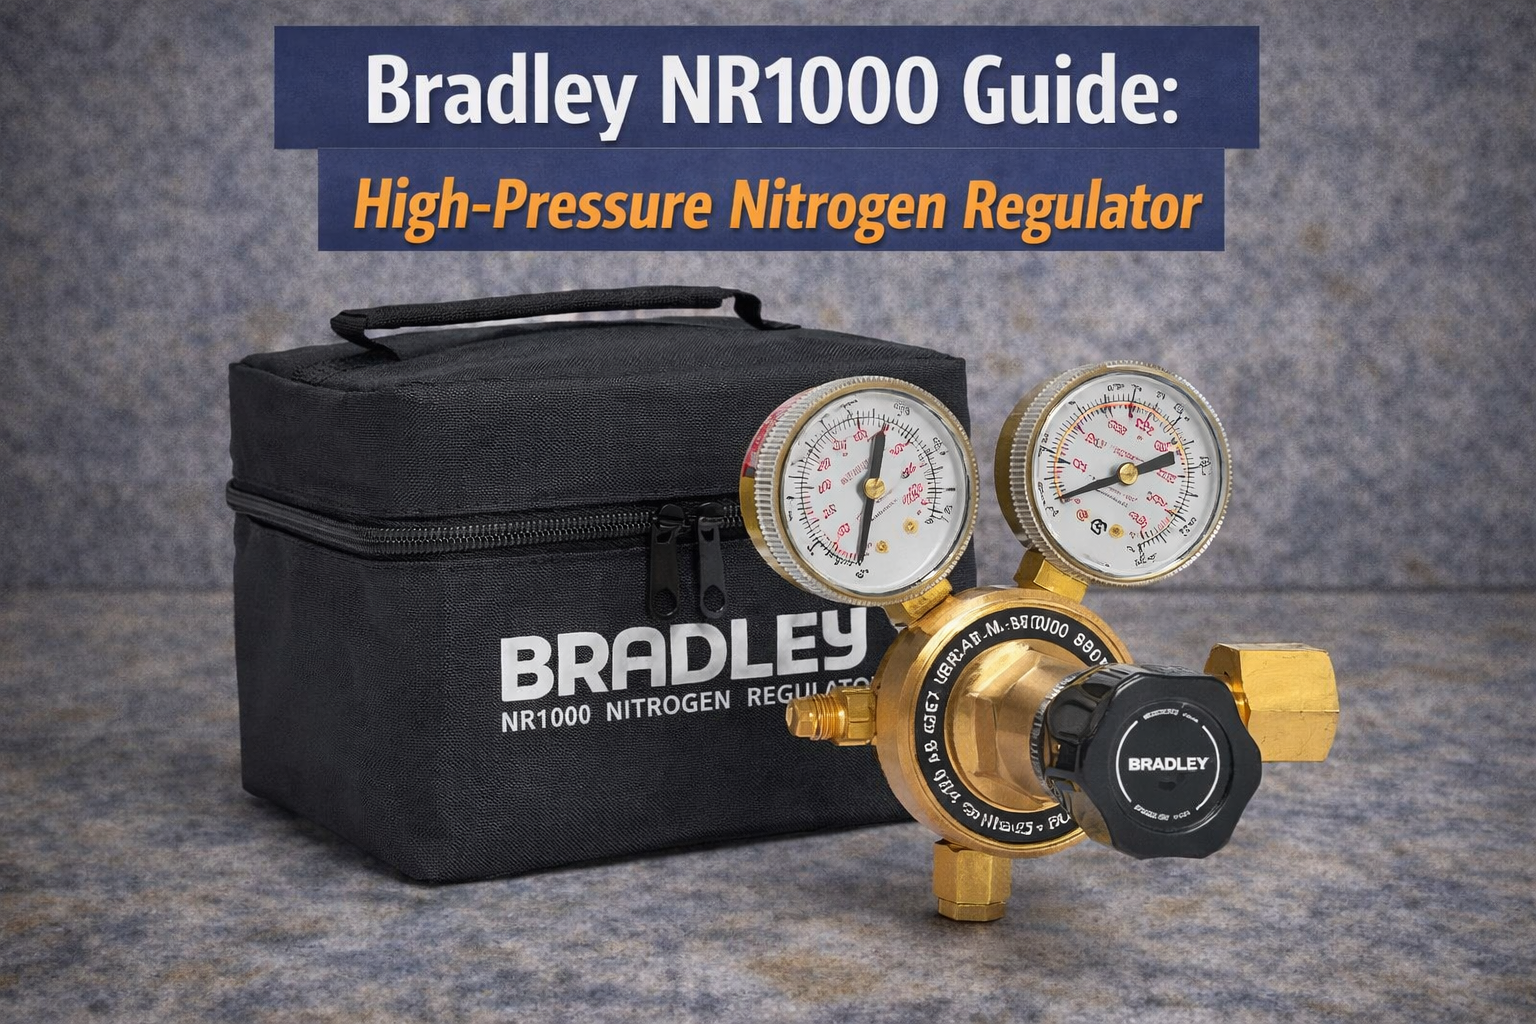
Professional Pressure Control
If you are searching for a bradley nitrogen regulator, you are usually trying to solve one trade problem: you want pressure control you can trust. Accurate pressure testing is one of those “quiet” steps that prevents loud call-backs later. When a system leaks, it costs time, reputation, and often a second trip that should never have happened.
The issue is that not all regulators behave the same. Cheap regulators can drift. Some creep in pressure when you stop adjusting them. Some leak at the connection. Some gauges are hard to read when you are sweating on a roof in Brisbane humidity, or when Sydney coastal air has been chewing at threads and fittings, or when Melbourne cold snaps make everything feel a bit tighter and less forgiving.
This guide is built around one model: the Bradley NR1000. Think of it as a practical Bradley NR1000 guide for HVAC and refrigeration techs in Australia. We will cover what the NR1000 is, what it is commonly specified to do, how the pressure control works, how it compares to other options, how to use it on real jobs, and how to keep it reliable over years of trade life.
If you want the broader brand context first, you can start with our Bradley HVAC tools overview so you can see where the NR1000 sits in the wider Bradley kit.
If you are already comparing options and want the listing open while you read, here is the Bradley NR1000 nitrogen regulator page. That is the best place to confirm the current included parts and the latest specification notes for Australia.
We will keep this educational. No hype. No invented warranty terms. No made-up specs. Where numbers are mentioned, treat them as “commonly listed” on product pages and always confirm what applies to your exact job and your exact model.
Bradley NR1000: Overview and Features
The Bradley NR1000 is positioned as a high-pressure nitrogen regulator for HVAC and refrigeration work. In plain terms, it is meant to give you stable, adjustable output pressure from a high-pressure nitrogen cylinder so you can pressure test, purge, and run controlled nitrogen tasks without guessing.
It helps to set expectations. A regulator is not magic. It does not replace good technique. But when a regulator is consistent, it makes your technique consistent. That is the real value. Your pressure test becomes calmer. Your leak checks become easier to trust. Your commissioning process becomes more repeatable.
If you are building a Bradley-based setup, you can see the wider brand context in the Bradley professional tools range. The point is not to buy everything. The point is to build a setup where the critical steps are controlled.
0–800 PSI pressure range
The NR1000 is commonly listed with a pressure range up to around 800 PSI. In HVAC work, the practical question is not the “max number”. The practical question is whether the regulator gives you stable control in the range you actually use on the job.
High pressure capacity matters because modern systems can require higher test pressures than people expect, especially when you work across different refrigerants and system types. But your safety habit should always be the same: never assume a test pressure. Confirm the correct target from the equipment documentation and your safe work process, then set and monitor pressure in a controlled way.
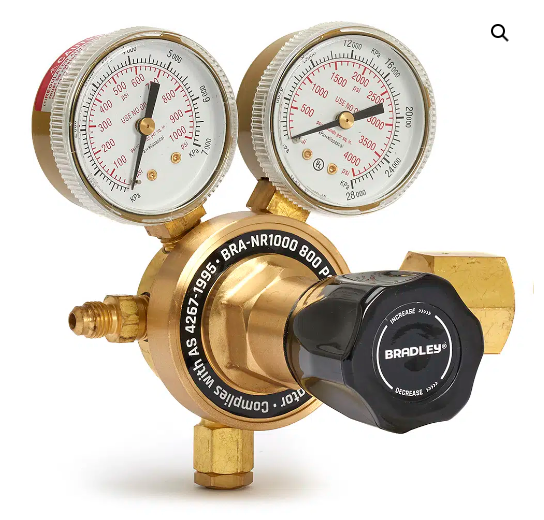
Dual 50 mm gauges (PSI / kPa)
Dual gauges are mainly about visibility and cross-checking. One gauge is generally showing the cylinder (inlet) pressure, and the other is showing the regulated (outlet) pressure. Many techs prefer gauges that show both PSI and kPa because you see both unit systems in the field and it reduces mental maths when you are moving fast.
The “50 mm” idea is also practical. Bigger gauge faces are easier to read at a glance. That matters when you are watching for stability over time and you do not want to be squinting or second-guessing what you saw ten minutes ago.
Piston-actuated seat design
The NR1000 is commonly described as using a piston-actuated seat design. You do not need to be an engineer to understand why that matters. In high-pressure regulation, the seat design influences how smoothly pressure is controlled and how stable the output remains once you set it.
In job terms, a stable seat design helps reduce the “creep” feeling where output pressure slowly changes after you set it. It also supports smoother adjustment when you are fine-tuning pressure for a test or a purge flow.
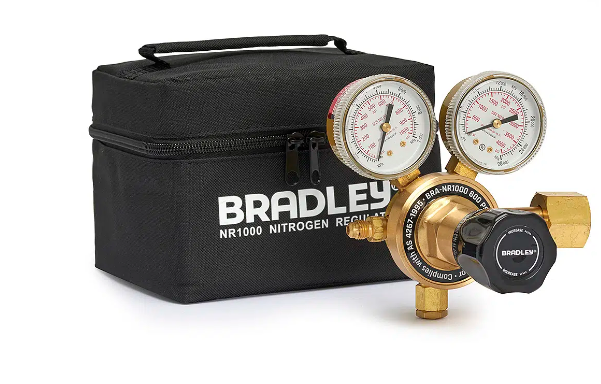
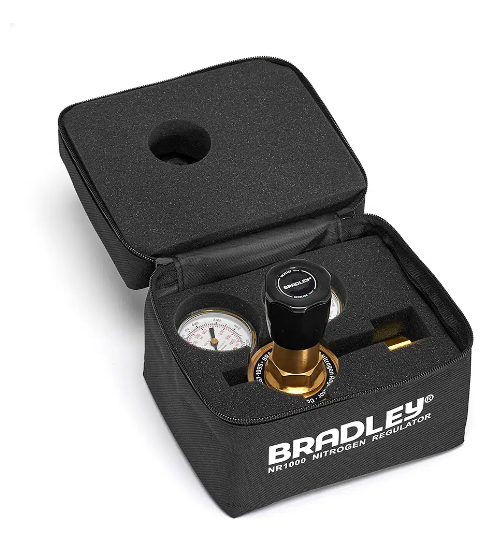
Protective EVA carry case
A carry case sounds like a small thing until you have used tools in Australian conditions for long enough. Dust gets into threads. Salt air starts surface corrosion. Tool bags get wet. Gauges get knocked around in the van. A protective case reduces those problems.
It also changes your daily routine. When a tool has a home, it is easier to pack down properly, easier to keep clean, and less likely to be thrown under heavy gear where the gauges or fittings get damaged.
Quality brass construction
Brass is commonly used in regulators because it handles gas service well and resists corrosion better than some cheaper metals. In practice, what you are looking for is durability where it counts: threads that do not feel rough, seals that remain consistent, and fittings that do not become a leak point after normal handling.
Remember though: even quality construction can be ruined by poor habits. Over-tightening, cross-threading, storing the tool dirty, or leaving it exposed to salt air will shorten the life of any regulator. Good gear still needs good routines.
Australian specifications
When a product is described as “Australian spec”, what most tradies really mean is that it suits common Australian workflows, units, and supply expectations. It does not mean you can skip checking compatibility.
The practical “how to confirm” step is simple. Before you buy or use any regulator, confirm three things. Confirm your cylinder valve type and fitting requirements. Confirm the regulator inlet fitting matches or is correctly adapted. Confirm the outlet connection suits your hose and manifold setup. If any of those are unclear, it is better to ask and confirm than to force parts together.
Tech Specs
A nitrogen regulator’s “spec” is not only the top pressure. On real jobs, performance is mostly about stable output, smooth adjustment, readable gauges, and connection reliability. If you want certainty, always confirm the current NR1000 listing details and match fittings to your cylinder and hose setup before you put it into service.
How the Bradley NR1000 Works
Understanding how the NR1000 works helps you use it better and troubleshoot faster. Most regulator problems in the field come from the same few causes: dirty connections, worn seals, damaged threads, or incorrect setup.
The goal of a nitrogen regulator is simple. It takes high, changing cylinder pressure and turns it into a controlled, adjustable output pressure that remains steady enough for testing and controlled flow tasks.
Piston-actuated pressure control
In a piston-actuated design, the regulator uses a piston and seat arrangement to manage gas flow as you adjust the control knob. When you increase the set pressure, you allow more flow through the seat until the regulated side reaches the set point.
In practical terms, this is why adjustment should feel smooth. If it feels jumpy, gritty, or inconsistent, something is off. It might be contamination, a seal issue, or wear. The “feel” of a regulator is often an early warning that maintenance is needed.
High-pressure inlet design
High-pressure nitrogen cylinders can be very high on the inlet side. The inlet side of the regulator is built to cope with that, but it still relies on correct connection and correct handling. If the inlet thread is damaged or dirty, you can create leaks and unstable readings.
On a job, inlet pressure also helps you notice cylinder status. If the inlet gauge is dropping faster than expected, you may be running low. That matters because a low cylinder can change flow behaviour and make your purge or test routine inconsistent.
Adjustable output regulation
The output side is what you set for the job. For pressure testing, that output is the test pressure you apply to the system. For purging, it is the controlled pressure and flow you use to support safe, clean brazing practices.
The key habit is to adjust slowly and deliberately. Fast adjustments can overshoot. Overshoot can create stress on hoses, connections, and the system under test. Calm adjustment is not “slow”. It is professional.
Dual gauge monitoring system
Two gauges help you monitor both sides of the regulator. The inlet gauge helps you understand cylinder pressure and supply stability. The outlet gauge helps you set and confirm the regulated pressure you are actually sending into the system.
On pressure tests, your eyes live on the outlet gauge. You are watching for stability. On long holds, you are watching for drift. On leak checks, you are watching for changes that match what you are seeing with bubbles or electronic detection.
Safety relief features
High-pressure regulators commonly include relief features designed to reduce risk if pressure builds where it should not. The safest way to talk about this is practical: do not rely on relief features as a normal operating method. They are not there so you can push limits. They are there as a safety layer if something goes wrong.
The professional approach is always to set the correct pressure for the job and keep the entire setup in good condition so unexpected pressure events are less likely.
CGA580 nitrogen fittings
The NR1000 is commonly described as using a CGA580 nitrogen inlet fitting. What matters is that your cylinder valve type and your regulator inlet match correctly for your local supply.
In Australia, cylinder valves and supply standards can vary by supplier and application. The safest habit is to confirm your cylinder valve type and confirm the exact regulator inlet fitting before you purchase or turn the cylinder on. If you need an adapter, treat that as a compatibility decision, not a “make it fit” moment.
Bradley NR1000 vs Competitors
This is the section many people are really looking for when they search “Bradley nitrogen regulator vs Mastercool” or “Bradley NR1000 review”. They want to know what changes in real use, not in marketing words.
One important note before the table. Pricing, warranty, and availability can change by supplier and time. The safe way to compare is to treat the table as a buyer guide, then confirm the exact models and supplier terms at the time you buy.
If you want a broader market overview before you compare any single model, our nitrogen regulator brand comparison is a useful foundation for how different regulator brands typically position themselves.
And if you want the “basics first” explanation of what matters in any regulator, our guide to understanding nitrogen regulators is a strong reference for the key buying points without getting lost in brand noise.
| Comparison point | Bradley NR1000 | Mastercool (typical trade options) | Tesuco (typical trade options) |
|---|---|---|---|
| Core job fit | High-pressure HVAC pressure testing and purging with a focus on controlled output | Often used across HVAC testing and service workflows; model choice matters | Commonly selected for trade testing needs; model choice matters |
| Pressure range | Commonly listed up to around 800 PSI (confirm current listing) | Varies by model; confirm the exact regulator range | Varies by model; confirm the exact regulator range |
| Gauge readability | Dual gauges commonly described as 50 mm with PSI/kPa marking | Depends on model; some focus on larger gauges for quick reads | Depends on model; check gauge size and units that suit your workflow |
| Build and durability feel | Commonly described as brass construction with protective carry case | Durability varies by series; confirm construction and case/storage approach | Durability varies by series; confirm construction and service support |
| Output stability | Designed for professional testing control; user habits still matter | Model-dependent; stability is influenced by maintenance and seal condition | Model-dependent; stability is influenced by maintenance and connection quality |
| Australian availability | Widely sold through HVAC supply channels; confirm stock and parts support | Availability varies by supplier; confirm model and parts support | Availability varies by supplier; confirm model and parts support |
| Warranty and support | Varies by supplier; confirm current warranty terms before purchase | Varies by supplier; confirm current warranty terms before purchase | Varies by supplier; confirm current warranty terms before purchase |
| Best fit buyer | Techs wanting a dedicated, trade-grade regulator with organised storage | Techs who already run that platform or need a specific model feature set | Techs wanting a practical trade option with local supply support |
The simple takeaway is this. If you want “set it and trust it” behaviour, you should compare regulators on stability, gauge readability, connection reliability, and support. If you only compare on the maximum pressure number, you can still end up with a tool that feels annoying every day.
For many Australian techs, the best regulator is the one that reduces uncertainty. If you can pressure test, isolate, and watch the gauge with confidence, your whole commissioning process improves. That is why a dedicated professional nitrogen regulator Bradley option is often chosen when a tech has been burned by drift and leaks in the past.
Using the Bradley NR1000 for HVAC Work
This is where the NR1000 moves from “product talk” to “job talk”. Most buyers want to know how the regulator fits real work: split installs, commercial testing, purge flows, and the modern refrigerant reality where pressures can be high and mistakes can be expensive.
If you want a step-by-step method for using a nitrogen regulator safely and consistently, our guide on how to use nitrogen regulators is the best companion piece to this article. It is written as a practical how-to, not a brochure.
It also helps to understand where nitrogen fits across the whole HVAC job. Our overview of nitrogen HVAC applications explains why pros use nitrogen for pressure testing, purging, and commissioning support.
Before we talk applications, one safety note. Pressure testing and gas handling is not “casual”. Your job needs safe work practices, correct PPE, and correct procedures. SafeWork Australia has clear guidance that is worth keeping in mind when you plan hot work and gas tasks, including storage and handling of flammables. pressure testing safety
R410A pressure testing (up to 650 PSI)
R410A systems can involve higher pressures than older refrigerants, and that is why pressure testing is taken seriously. The key point is not the exact number someone quotes online. The key point is to follow the equipment maker’s test requirements and never exceed the rating of the system or your tools.
Where the NR1000 helps is controlled pressure rise and stable holding. Instead of “pumping it up and hoping”, you can increase pressure deliberately, watch the gauge behaviour, then hold and observe without constant fiddling.
On real jobs, stability is what helps you interpret results. If pressure drops, you can start leak detection with a clear baseline. If pressure holds steady, you move forward with more confidence.
R32 system testing
R32 work has its own safety and handling considerations, and your process should always follow the system requirements and your safe work method. The regulator’s job is still the same: provide controlled nitrogen pressure for testing.
The practical tip here is to treat every job like a controlled routine. Set up cleanly. Confirm connections. Check for leaks at your regulator and hose connections before you even think about the system leaking. A sloppy setup creates false problems and wasted time.
Split system commissioning
On split installs, the regulator is part of a “quality chain”. Copper prep and flare quality matter. Torque consistency matters. Pressure testing and leak checks matter. If any one step is weak, the whole job becomes a gamble.
A consistent regulator helps because it reduces variables. When you run a pressure test, you want to trust that the test is showing you the system, not the tool. That is how you prevent the classic call-back where the unit ran fine on day one, then a small leak shows up after vibration and temperature cycling.
Commercial chiller testing
Commercial and chiller work often raises the stakes. The systems are larger, the downtime costs more, and access can be harder. Pressure testing and verification becomes a bigger part of the job because you cannot afford uncertainty later.
This is where stable control matters even more. Bigger pipework and larger volumes can change how pressure behaves during testing. A regulator that feels smooth and predictable makes it easier to manage that behaviour without overshooting or constantly chasing a set point.
Nitrogen purging during brazing
Nitrogen purging is a common professional practice to reduce internal oxidation during brazing. The detail that matters is control. You are not “blasting” nitrogen through. You are maintaining an appropriate low flow for the job, in line with your method and your training.
This is also where compatibility and safe setup matters. Purging often involves extra hoses, tees, and connections. Every extra connection is a potential leak point. That is why it is worth understanding regulator safety and compatibility so you are not mixing fittings in a way that creates risk or unstable flow.
Australian testing standards
In Australia, your testing and commissioning work should follow the system manufacturer requirements, your workplace procedures, and relevant standards and safety rules. This article is not legal advice, and it is not a substitute for your formal requirements. The practical point is simple: use the regulator to support a controlled, repeatable process that aligns with the job’s documented needs.
When a job goes wrong, it is rarely because “nitrogen is bad”. It is usually because pressure control was sloppy, connections were dirty, or a test was rushed. A trade-grade regulator helps, but the winning combo is a good regulator plus a calm routine.
Pro Tip
If your pressure test feels “messy”, stop blaming the system first. Check your own setup. Clean threads, correct seating, and a quick leak check at the regulator connection often fixes “mystery drops” that are actually coming from your gear, not the customer’s unit.
Maintenance and Care
A regulator that lasts years is usually not “lucky”. It is maintained. Regulators live in vans, tool bags, and plant rooms. They get dust, moisture, knocks, and rough handling. If you want a Bradley regulator to stay consistent, treat maintenance as part of the tool, not an optional extra.
Daily inspection routine
Before you connect a cylinder, check the threads and the sealing face. If you see grit, wipe it off. If you see damage, do not force it. Forcing damaged threads is how you turn a small problem into a leak problem.
Check the gauges visually as well. You are looking for cracked lenses, bent needles, fogging, or anything that suggests the gauge has taken a hard knock. Gauges are your eyes. If your eyes are damaged, your decisions suffer.
Gauge calibration
Calibration is a sensitive topic because it depends on how your business operates and how critical your measurement needs are. The practical point is that if your gauge readings seem inconsistent with reality, you should treat that as a warning sign.
If you are looking for broader context around calibration and support pathways, the discussion around regulator calibration services can help you understand what options are commonly available and what questions to ask.
In the field, a simple check is pattern-based. Does the regulator behave the same way it used to? Does it hold steady the same way it used to? If something feels off, do not ignore it. Pressure testing is not the place for “close enough”.
Valve maintenance
Valve feel matters. A smooth valve is a controlled valve. If the adjustment feels gritty or sticky, clean the outside areas first and make sure dirt is not being dragged into moving parts through handling.
Do not improvise with random lubricants. Gas equipment needs the right approach. If you are unsure about maintenance steps for the exact model, confirm service guidance through the supplier and product documentation.
Protective case storage
The carry case is not just for neatness. It is a protection system. Use it. In Brisbane humidity, it helps reduce corrosion. In Sydney coastal air, it helps reduce salt exposure. In dusty areas, it reduces grit in threads and fittings.
A simple habit is to wipe the regulator down before it goes back into the case. It takes seconds and it keeps dirt out of the places that matter most.
When to service
If the regulator shows consistent creep, if it cannot hold a stable output, if connections start leaking despite clean threads and correct seating, or if gauges behave oddly after knocks, it is time to service or replace the suspect components.
Do not treat pressure equipment faults as minor. A regulator that behaves unpredictably creates risk and wasted time. The best trade move is to take it out of service until it is reliable again.
Australian service options
Service pathways vary depending on supplier and model. The practical goal is always the same: keep the tool reliable with minimal downtime. That is why it matters where you buy. Buying from a specialist HVAC supplier makes it easier to get parts support and model-specific guidance when you need it.
Did You Know?
A lot of “regulator problems” are actually storage problems. Salt air, dust, and moisture attack threads and seals first. If your regulator lives loose in the van, it will feel older faster than the same model stored cleanly in its case.
Bradley NR1000: Price and Value
When people search “Bradley NR1000 price Australia”, they are usually not only asking for a dollar number. They are really asking whether it is worth it.
The NR1000 is commonly seen in a price band around the mid hundreds in Australia, and people often quote a typical range like $400–$500. Treat that as a general guide only. Prices move. Availability changes. Promotions come and go. Always check the current listing and your supplier’s terms for the real number today.
The better question is value. Value is not the cheapest purchase. Value is the tool cost compared with the time and call-backs it prevents.
ROI on accurate testing
If accurate pressure testing prevents even one or two call-backs, it can cover a big chunk of the cost of the regulator in real trade terms. A call-back is not just fuel and travel. It is time, stress, and schedule disruption. It can also mean a customer who loses trust.
When a regulator is stable, it helps you make decisions faster. You spend less time second-guessing a slow gauge drop. You spend less time chasing “maybe leaks” that were actually poor seating at your own connection.
Prevented callback costs
Call-backs often come from predictable weak points. Tiny flare leaks. Missed joint leaks. Damage created by rushed installation. A stable pressure test process helps you catch the leaks before you waste time on evacuation and charging.
It also improves confidence. When you know the system held, you work differently. You stop doing “just in case” re-checks that eat time and still do not give certainty.
Professional warranty value
Warranty terms vary by product and supplier, so do not assume. Confirm what applies when you purchase. The practical part of “warranty value” is support. Can you get help if something fails? Can you get parts or service guidance? Can you keep the tool in service?
That is one reason many techs choose established trade channels. Support is part of the product, even when it is not written in big letters.
Longevity and durability
Longevity is usually a mix of build and habit. A sturdy regulator stored properly can last years. The same regulator thrown in a dirty van tray can feel worn fast. Your storage and handling habits are a real part of “value for money”.
If you want a simple way to judge value, ask this: will this regulator make my testing routine calmer, faster, and more repeatable? If yes, it is not just a tool purchase. It is a workflow upgrade.
Choose Bradley NR1000 Quality
The Bradley NR1000 is aimed at one main outcome: reliable pressure control for professional HVAC testing work. It is most often chosen by techs who are tired of drifting gauges, inconsistent output, and leak checks that feel uncertain because the tool itself is another variable.
If you want a simple summary, it looks like this. The NR1000 is commonly specified as a high-pressure regulator with readable dual gauges, a design aimed at stable control, and storage that protects the tool in real Australian conditions. It supports the work that prevents call-backs: pressure testing, commissioning confidence, and controlled nitrogen tasks.
If you are still deciding, the best move is to confirm compatibility first. Confirm your cylinder fitting requirements. Confirm your hose and connection setup. Confirm the exact included parts on the listing. If anything is unclear, talk to a supplier who understands HVAC workflows so you are not guessing.
If you are ready to match the NR1000 to your workflow, you can view and buy Bradley NR1000. If you want a low-pressure next step, talk to our team to confirm compatibility with your cylinder and hoses, or contact us for a quote if you are fitting out a van or upgrading a full commissioning kit.