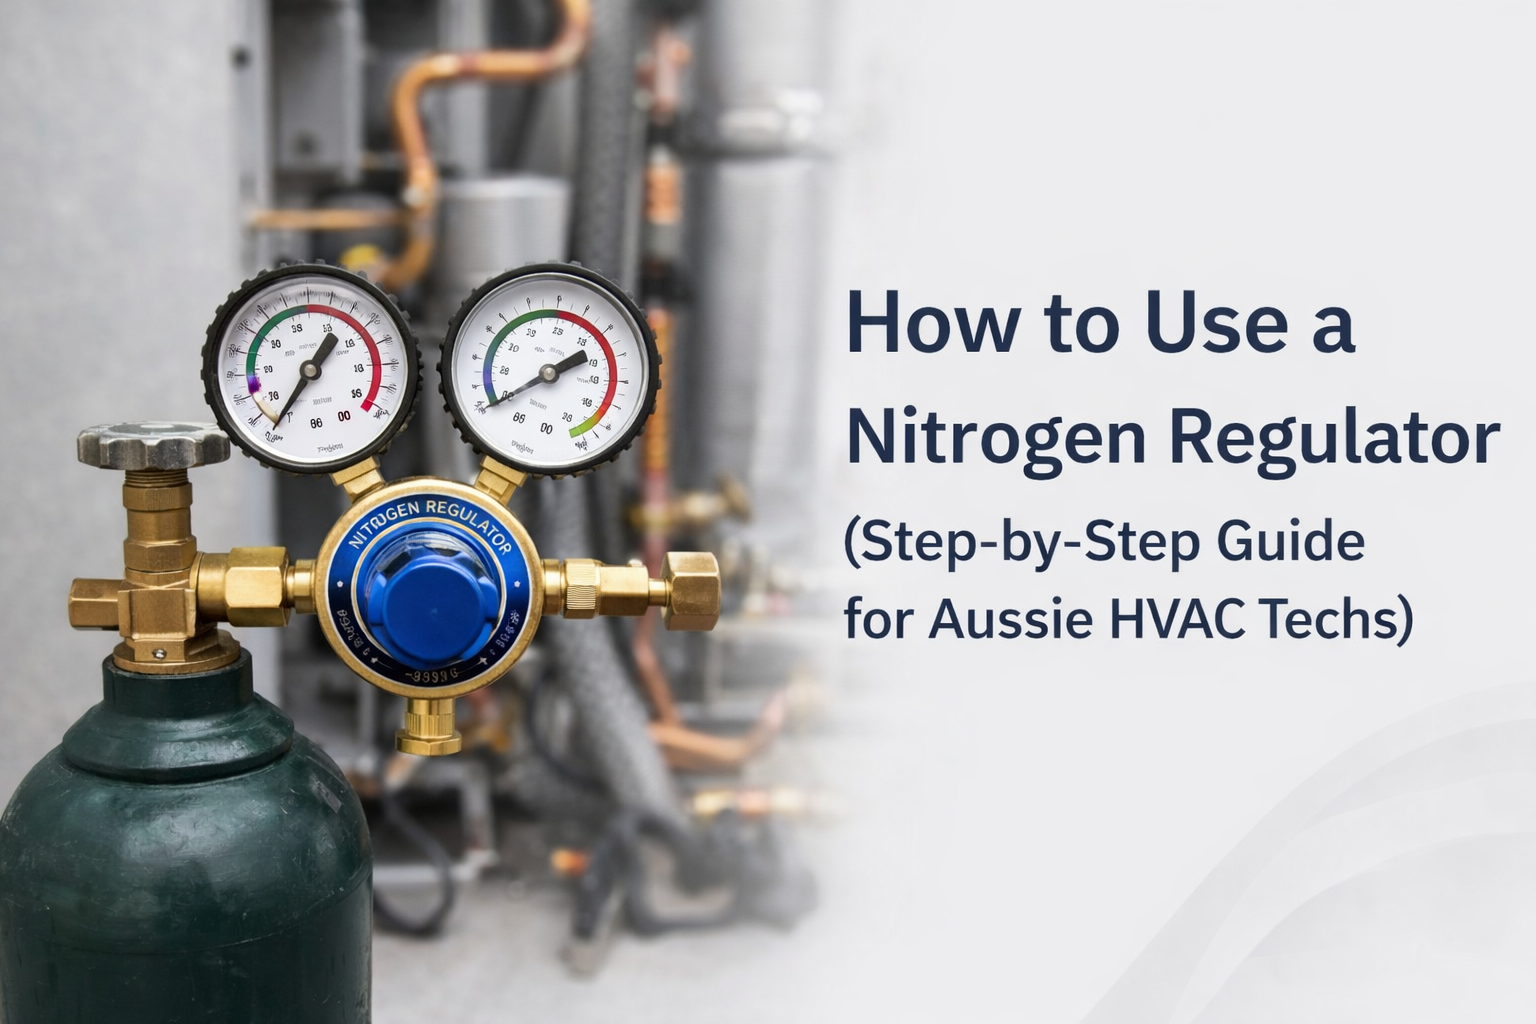
Master Nitrogen Control
If you’ve ever pressure tested a system and thought, “Why is this not holding?”, there’s a good chance the issue wasn’t the unit. It was the setup. And most of that setup comes back to one tool: the nitrogen regulator.
A nitrogen bottle is not a gentle tool. It’s a high-pressure cylinder. If you rush, crank the knob, or open the cylinder too fast, you can damage gear, blow weak joints, or chase false leaks for hours. It’s the kind of mistake that feels “fine” in the moment, then turns into a call-back later.
This is a step-by-step guide on how to use a nitrogen regulator for real HVAC work in Australia. We’ll cover safe handling, proper setup, pressure settings for common jobs, brazing purge flow, leak testing, and the mistakes that catch tradies out. We’ll keep it clear and practical, like you’re standing next to a senior tech who actually wants you to get it right.
If you want the full pillar overview first, you can read our complete nitrogen regulator guide to get the bigger picture on types, features, and what to check before you buy. And if you’re building or upgrading your kit, our nitrogen regulator equipment range lets you compare the common setups used on Aussie jobs.
One important thing before we start. A regulator controls pressure. It does not magically control flow. Flow depends on what you connect downstream. That one detail explains a lot of “why is my purge too strong?” and “why did my pressure jump?” moments. We’ll make it simple as we go.
We’ll also keep this firmly in the HVAC lane. This is not about industrial gas systems, 12V setups, or random workshop hacks. It’s about the exact work you do as a fridgie: brazing copper lines, leak testing a new install, and pressure testing before you pull a vacuum and charge.
Safety First: Before You Begin
Before you even touch the cylinder valve, get your safety sorted. Nitrogen is inert, but the pressure is no joke. A rushed setup can hurt you, damage equipment, or turn a jobsite into a mess.
Start with workplace rules. On many sites, you’ll have a permit system, basic risk controls, and clear expectations around gas handling. Even on domestic work, you still have duties to work safely and control hazards. For a clear Australian reference used across workplaces, see WorkSafe gas handling requirements.
Now, PPE. Keep it simple. Wear safety glasses as a minimum. Use gloves that make sense for the job. Not giant oven mitts that stop you feeling the controls, but gloves that protect you from sharp edges and sudden cold gas blasts. If you’re doing brazing or working near hot gear, dress for that too. You don’t want synthetic clothing melting if you get a flare-up.
Next is cylinder handling. Treat the nitrogen bottle like a heavy, pressurised tool, because that’s what it is. Move it properly. Keep it upright. Don’t drag it by the valve. Don’t let it bounce around in the van. Secure it so it can’t fall over. A knocked valve can turn a bottle into a dangerous rocket in the wrong situation.

Work area prep matters as well. If you’re pressure testing indoors, think ventilation and trip hazards. If you’re on a roof, think wind, edge protection, and how you’ll stop hoses pulling your bottle over. If you’re in a plant room, think hot surfaces and tight access.
It also helps to think one step ahead. If you are going to pressurise to a higher test pressure, ask yourself: “If this hose blows off, where is it going to whip?” Keep your face and body out of that line. Don’t lean over gauges and fittings while you open valves. Stand to the side and keep it controlled.
Now leak checks. Before you pressurise anything, check your connections. Most “nitrogen leaks” are not mysterious. They are loose flare nuts, worn hose seals, fittings that were never tightened properly, or test gear that has seen too many years in the back of the ute. A calm leak check routine saves time and stops panic. Build it into the setup every time.
Finally, remember Aussie conditions. Brisbane humidity can make fittings feel slippery and hands sweaty, which can lead to rushed tightening. Sydney coastal air can push corrosion into threads and flare faces, which can cause small sealing issues. Melbourne cold snaps can make seals feel stiff and can slow your hands down. None of this is a reason to rush. It’s a reason to slow down and do the setup properly.
Did You Know?
Most “pressure test failures” start before the test. A loose hose seal or a half-seated connection can look like a system leak. If you don’t trust your setup, you can’t trust your result.
One more safety point that saves dramas. Venting nitrogen makes noise and can stir dust. If you dump pressure fast in a ceiling space or plant room, you can blow debris into open lines. Release pressure in a controlled way, keep the end of the hose pointed safely, and keep people out of the line of fire.
Step-by-Step Setup Instructions
This is the core nitrogen regulator setup. Do these steps in order, every time. This is the part that makes your work repeatable. It also reduces the risk of over-pressurising and damaging equipment.
Step one is to secure the nitrogen cylinder upright. Strap it to a trolley or secure it to something stable. If it can tip, it will tip at the worst time. Don’t balance it “for a minute” while you sort hoses. Make it safe first.
Step two is to back off the regulator adjustment knob. This is the classic mistake. If the knob is wound in when you open the cylinder, you can slam high outlet pressure downstream fast. Backing it off first keeps the outlet pressure low until you deliberately set it.
Step three is to connect the regulator to the cylinder. Make sure the connection is clean and seated properly. Do not cross-thread. Do not force it. If it feels wrong, stop and check. A damaged thread is not a “work around” problem. It’s a safety problem.
When you seat the regulator, pay attention to the feel. A good connection feels smooth and “right”. A bad one feels gritty, crooked, or forced. If you have to muscle it, something is wrong. In the real world, the wrong move here often happens when someone is tired at the end of the day and just wants to finish the test. That’s exactly when you need to slow down.
Step four is to open the cylinder valve slowly. Do not crack it hard like you’re opening a tap. Open it slowly and smoothly. Let the high-pressure gauge rise. Listen and feel. If anything sounds like leaking, stop and re-check before you go further.
If you hear a hiss, don’t ignore it. Nitrogen is quiet compared to a refrigerant leak sometimes, but you can still hear it. Shut the cylinder, vent the line safely, and fix the seal before you continue. It is faster to fix a seal now than to “finish the test” and then wonder why it won’t hold.
Step five is to adjust the output pressure. Turn the adjustment knob in slowly while watching the low-pressure gauge. Bring it up to the pressure you need for the job. If you overshoot, back it off and re-set calmly. Don’t yank it around.
Step six is to connect to the HVAC system. Make sure your downstream hoses, fittings, and valves are rated for the pressure you’re about to use. Don’t assume. Confirm. This is where “how do nitrogen regulators work?” matters in a practical way. The regulator reduces pressure, but your hose and manifold setup is what delivers that pressure. If your downstream gear is weak, the regulator can’t save it.
Also remember that your test setup is a chain. Cylinder, regulator, hose, fittings, service port, valves, and the system itself. The chain is only as strong as the weakest part. If you’re using old hoses with tired seals, your “system test” is really a “hose seal test” whether you like it or not.
Pro Tip
Before you connect to the system, set your outlet pressure with the downstream line closed. Then open the downstream valve slowly. This stops pressure surges and makes your readings steadier.
Here’s a simple comparison table you can follow on site. It shows the step, what you do, and the typical pressure goal depending on your task. The exact pressure still depends on the system you’re working on. Always confirm the unit’s test limits and your job spec.
| Step | What you do | Why it matters | Typical output pressure goal |
|---|---|---|---|
|
1 |
Secure cylinder upright and stable. |
Stops tip-over, valve damage, and hose pull incidents. |
Not pressure related yet. Safety first. |
|
2 |
Back off the adjustment knob fully. |
Prevents sudden outlet pressure spikes when the bottle opens. |
Outlet pressure at zero before you set it. |
|
3 |
Connect regulator to cylinder cleanly. |
A poor seal here makes every test unreliable and wastes time. |
Not pressure related yet. Connection quality matters. |
|
4 |
Open cylinder valve slowly and smoothly. |
Stops sudden shock and lets you hear/spot leaks early. |
Outlet still at zero until you adjust it. |
|
5 |
Set outlet pressure while watching the low gauge. |
This is where control happens. Calm settings reduce mistakes. |
Purge: 2–5 PSI. Testing: set per system limits. |
|
6 |
Connect to system and introduce pressure slowly. |
Prevents over-pressurising and makes leaks easier to find. |
Leak testing often sits 150–450 PSI, but confirm. |
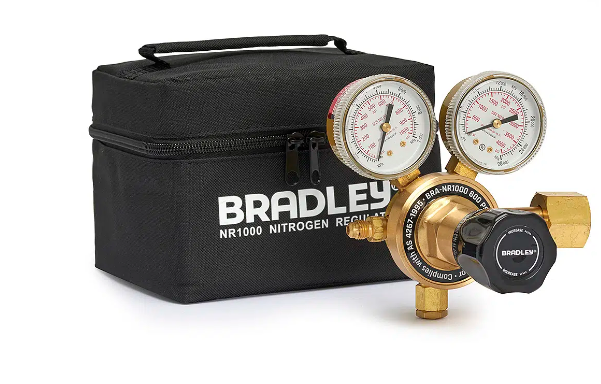
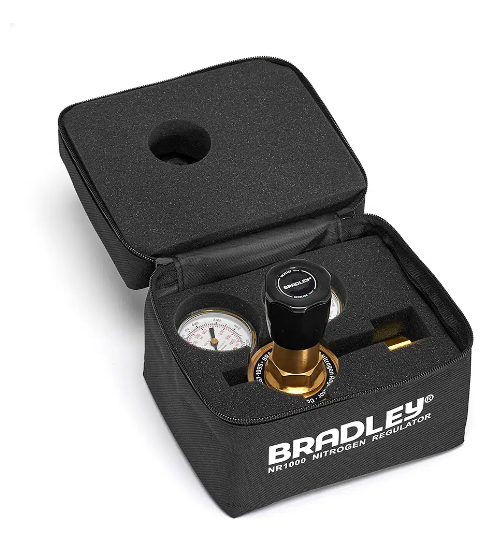
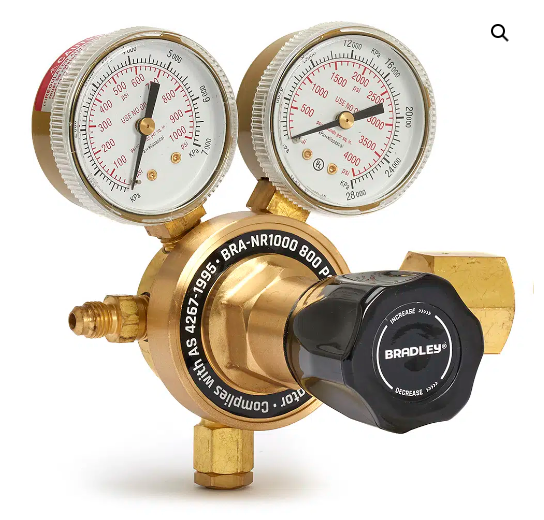
When you’re choosing gear for this workflow, use equipment that gives you stable control and clear gauges. If you want to see examples built for HVAC use, you can look at quality nitrogen regulators. If you’re doing higher pressure work regularly, you may also want a more robust option like Bradley professional regulators, but always match the regulator to your job requirements and the systems you service.
The goal is not “the biggest regulator”. The goal is a setup that adjusts smoothly, reads clearly, and holds steady so you can trust the numbers. That is what makes your nitrogen regulator setup feel professional.
Setting Pressure for Different Applications
This is where most people get nervous. “What pressure should I set?” The honest answer is: it depends on what you’re doing and what you’re working on. The safe approach is to set pressure based on the task, then confirm the system’s limits before you pressurise.
For a brazing purge, you do not need high pressure. You want a gentle flow through the pipe so oxygen stays out while you heat. A common working range is 2 to 5 PSI at the regulator. That gives enough push to move gas through the line without blasting the joint. If you crank purge pressure too high, you can disturb the flame, cool the joint, and waste time.
For leak testing and pressure testing, pressures are higher. Many HVAC techs use a working range like 150 to 450 PSI depending on the system type, pipework, and job requirements. For higher pressure refrigerant systems, some techs commonly cite higher testing ranges, including figures up to around 650 PSI on many R410A-rated systems. The key words are “commonly cited” and “rated”. Do not guess. Confirm the unit’s allowable test pressure and your site or company procedure before you go to higher pressures.
If you’re unsure how to confirm limits, use practical checkpoints. Check the outdoor unit data plate or manual where available. Check service documentation for allowable test pressure. Consider the weakest part of the system. That might be a coil, a valve body, a flare connection, or a section of hose if you’re testing through service gear. If you can’t confirm, don’t crank pressure “to be safe”. Higher pressure is not safer. It can be riskier.
Here’s a simple way to think about it. Purge work is about gentle movement of gas. Testing work is about reaching a target pressure, then stopping flow so you can watch what happens. If you keep feeding nitrogen in while you “monitor”, you are not really testing. You are topping up.
Now, about flowing nitrogen continuously. For purge work, yes, you flow continuously while brazing. For pressure testing, no, you don’t keep flowing. You pressurise, isolate, and monitor. Isolation is how you get a true result.
Monitoring gauges during use is the difference between a confident test and guesswork. Watch the outlet gauge as you build pressure. Increase in steps. Let it settle. Then isolate and watch for change. If the pressure drops fast, you likely have a significant leak or an open valve. If it drops slowly, it could be a small leak, a temperature change, or a setup issue. If it rises, that can happen with temperature increases or regulator creep.
This is also where “how do nitrogen regulators work?” becomes useful. A regulator uses a seat and diaphragm to control outlet pressure. If the seat is worn, you can get pressure creep. That means the outlet pressure slowly rises even when you are not touching the knob. If you don’t know that, you can misread a test and think “the system is doing something weird.” In reality, your regulator is leaking past its own seat.
If you see odd behaviour, isolate the regulator from the system and watch the outlet gauge. If the outlet changes while isolated, the behaviour is in the regulator or downstream test rig, not in the HVAC unit.
Tech Specs
Treat pressure ranges as job guidance, not a promise. Always confirm system limits, use test-rated hoses and fittings, and increase pressure in steps so you can stop early if something isn’t right.
Australian conditions can also affect readings. A pressure test done in morning shade can read differently once the sun hits the pipework. A ducted unit line set on a roof can heat up quickly in summer, and pressure can rise without any added nitrogen. On the flip side, a cool change or a breeze can drop the temperature and pull pressure down. That’s not always a leak. It’s physics. The fix is to let temperature settle where possible and record conditions so you interpret the result properly.
If you’re training apprentices, this is a good lesson to teach early. Pressure is not just “a number”. It is a number that moves with temperature. Good techs don’t panic at the first movement. They isolate, stabilise, and confirm before they call it a leak.
Brazing with Nitrogen Flow
If you want clean internals, nitrogen purge is the habit that gets you there. When you braze without nitrogen, oxygen inside the pipe reacts under heat. That creates black oxide scale inside the copper. That scale can break loose later and travel through the system.
On a small split, you might not notice today. But on a system with tight metering, or where oil and debris start to move, that contamination can show up later as restriction, noisy operation, or odd faults that waste service time. The purge is not about “making the joint hold”. It’s about keeping the inside of the system clean.
Here’s the simple purge approach. Set your nitrogen regulator low, usually around 2 to 5 PSI. Connect nitrogen to the line in a way that allows gas to flow through the section you are brazing. You need an exit path. That might be an open end, a controlled vent, or a suitable purge arrangement. If there is no exit, you’ll build pressure, not flow.

Flow nitrogen during the entire braze. That includes the heat-up, the filler flow, and the short time as things settle. You don’t need a gale-force blast. You want a steady, gentle movement of gas that pushes oxygen out. If you can hear it roaring, it’s probably too much for purge work.
A practical check is flame stability. If your purge flow is too high, it can cool the joint and make the torch feel “weak”. It can also disturb the filler flow. Low and steady is what you want.
Also keep purge gas clean. Don’t leave hoses open on the ground where dust can get in. In WA dry dust, you can pick up fine grit quickly. In coastal areas, salty air can leave a light film on fittings if gear is stored poorly. Keep caps on, keep fittings clean, and treat your purge hose like part of your system cleanliness.
Then check your work. A clean purge tends to leave the inside of the pipe bright rather than heavily scaled. You won’t always see inside easily, but you can often tell by the feel of the work. If your joints are clean, your filler flows smoothly, and you’re not fighting weird heat behaviour, your setup is probably right.
If you want a deeper skill guide on technique, joint prep, and heat control, read professional copper brazing techniques. And if your brazing work uses MAP-Pro style fuel and you want to understand the fuel basics, the guide on MAPP gas for brazing work helps you match flame and workflow without guessing.
One more Australian job reality: a lot of brazing is done in awkward places. Ceiling spaces, plant rooms, behind condensers, and under ducted units. That’s where purge habits get sloppy. People skip purge “just this once” because access is hard. That “once” is often the job that comes back with restriction or contamination problems later. If you can’t purge properly due to access, it’s a sign you need to rethink the setup, not a sign you should skip it.
When you finish brazing, don’t shut nitrogen off mid-cool just because you’re impatient. Let it run through the hot phase and settle. Then shut down in a controlled order, vent safely, and keep your fittings clean for the next joint.
Leak Testing Procedures
Leak testing with nitrogen is where your regulator setup pays off. The regulator lets you build pressure safely and repeatably, then isolate the system so you can trust the result.
Start by confirming what you’re testing. Is it a section of line set? A full system? A coil? A new install before vacuum? The test pressure should match the job and the system limits. If you’re unsure, don’t guess high. Confirm first.
Build pressure in steps. This is a simple technique that prevents damage and makes leaks easier to find. Increase pressure, pause, and listen. Check joints. Then increase again. If something is loose, it’s better to find it at a lower pressure than to find it at a pressure that makes a loud bang or blows a weak flare.
As you step up, watch your gauges and your behaviour. If your low-pressure gauge jumps around or struggles to settle, it can point to a restriction in your test rig, a valve half open, or a regulator that needs attention. Calm readings usually come from a calm setup.
Once you reach your target pressure, isolate the system. Close the downstream valve and isolate the regulator. Now you are testing the system, not the bottle.
Monitor the gauge for pressure drop. A quick drop suggests a significant leak or an open path. A slow drop can be a small leak, temperature change, or a tiny seep in your test setup. This is where patience matters. Give it time to stabilise.
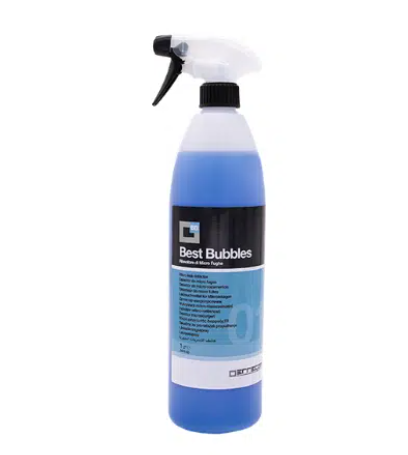
Use a leak detector and bubble testing where it makes sense. Bubble solution is still one of the fastest ways to find leaks at flare joints, brazed connections, and service valves. Apply it carefully, watch for bubble growth, and don't wipe it off too quickly. Some small leaks take a moment to show. If you're also choosing or upgrading your electronic leak detector, the Inficon TEK-Mate complete guide covers how heated diode detection works and where it fits into a pressure testing workflow.
Holding time requirements depend on your workplace procedure and the job type. Some jobs require documentation, especially commercial work. Even on smaller jobs, it’s smart to note the test pressure and the time held. It protects you and it helps if you need to troubleshoot later.
A common “false leak” on installs is the test gear itself. Schrader depressors, quick couplers, and tired hose seals can leak. If you see a slow drop and you can’t find it on the unit, isolate your rig and test it separately. You can do this by closing valves and watching if the pressure still changes. If the rig leaks, fix the rig before you blame the unit.
If you want a more detailed workflow that covers nitrogen use across testing and commissioning, read nitrogen leak testing procedures. It helps you see where nitrogen fits in the full job sequence so you’re not doing steps out of order.
When you finish, vent nitrogen safely. Don’t dump pressure suddenly in a way that stirs debris or startles anyone nearby. Control the release. Then disconnect calmly, cap fittings if needed, and keep your setup clean for the next job.
Common Mistakes and Troubleshooting
This is the section that saves you hours. Most nitrogen regulator problems are not “mystery failures”. They are common setup mistakes. Fix the habit, and the problem disappears.
Over-pressurising systems: This happens when people crank pressure without checking limits. It can damage coils, blow weak joints, or create leaks that were not there before. If you can’t confirm allowable test pressure, stop and confirm. Don’t guess.
Forgetting to back off the adjustment knob: If the knob is wound in and you open the cylinder, outlet pressure can jump fast. This is one of the easiest ways to shock the system and scare yourself. Back it off first. Always.
Opening the cylinder valve too fast: Cracking the bottle hard can slam pressure into the regulator and downstream lines. Open slowly. A calm open gives you time to spot leaks and keeps gauges steadier.
Gauge reading errors: People sometimes watch the wrong gauge. The high gauge shows cylinder pressure. The low gauge shows outlet pressure. If you don’t know which is which in the moment, stop and look. Don’t keep winding knobs while guessing.
Leaking connections in the test rig: Hoses and fittings leak more often than people admit. If the pressure drops, isolate parts of the setup. Test the rig by itself. Then test the system. This is how you stop chasing a “system leak” that is really a hose seal.
Frozen regulators in cold weather: In colder conditions, especially during Melbourne cold snaps, you can get stiff seals and sluggish gauge behaviour. It’s not always “frozen” like ice, but it can feel slow and sticky. Keep the regulator protected, avoid sudden high flow, and let the system settle before you decide you have a leak.
Pressure changes with temperature: If the pipework warms in the sun, pressure can rise. If it cools, pressure can drop. That’s not always a leak. The fix is to stabilise temperature where possible and record conditions so you interpret the result properly.
Regulator creep: If your outlet pressure rises on its own while you are not adjusting anything, the regulator may be creeping. The way to confirm is to isolate the regulator from the system and watch the low gauge. If it still rises, the regulator is not sealing perfectly. That can make pressure tests confusing because the number changes without the system doing anything.
Compatibility mistakes: Wrong fittings, worn seals, and mismatched connections can cause leaks and wasted time. If you keep seeing odd issues, you may be dealing with fitment problems rather than operator error. Our guide on regulator compatibility issues helps you diagnose what’s going wrong and how to confirm correct connections before you pressurise.
If troubleshooting still feels messy, go back to basics. Secure cylinder. Back off knob. Open slowly. Build in steps. Isolate. Monitor. Test the rig. Then test the system. That process is boring, but it works.
It also helps to remember what the regulator is doing. It is taking very high cylinder pressure and stepping it down to a controlled outlet. If your control feels jumpy, your gauge is hard to read, or your outlet pressure won’t hold steady, it’s worth inspecting the regulator and considering whether it’s time for service or replacement. A regulator that can’t hold steady makes every job harder than it needs to be.
FAQs: Nitrogen Regulator Use
Do I set pressure with the system connected or disconnected? The safer habit is to set outlet pressure with the downstream line closed, then open the downstream valve slowly. That reduces surges and keeps readings steadier.
What’s the difference between pressure testing and leak testing? In practice they overlap. You build to a known target, isolate, and monitor. The key is matching the target pressure and hold requirements to the job and the system limits.
Why is my purge “too strong” even at low pressure? A regulator controls pressure, but downstream restriction controls flow behaviour. Your hose size, valves, and exit path all affect how the purge feels. Make sure you have an exit path and keep the regulator low.
Can my test rig cause a false fail? Yes. Hoses, quick couplers, Schrader tools, and tired seals are common leak points. Isolate and test the rig separately if results don’t match what you see on the unit.
Should I dump pressure quickly when I’m done? No. Vent in a controlled way so you don’t whip hoses, blast dust, or startle people nearby. Keep the hose end pointed safely and keep people out of the line of fire.
Master Nitrogen Regulation
If you want to master how to use a nitrogen regulator, don’t chase shortcuts. Build a repeatable process. Most quality work is just good habits done every time.
Secure the cylinder upright. Back off the adjustment knob. Connect cleanly. Open the cylinder slowly. Set the outlet pressure carefully. Connect to the system and introduce pressure in steps. Then isolate and monitor so you can trust what the gauges tell you.
For brazing purge, keep it low and steady. Around 2 to 5 PSI is a common working range for a gentle purge flow, but what matters most is that you have flow, not pressure build-up. Purge the whole time you braze so you protect the inside of the copper.
For leak testing, set pressure based on the system and job requirements, not on bravado. Build pressure in steps. Isolate. Give it time. Use bubble testing and proper detection. Document what you did so you can prove your work and troubleshoot faster.
If you’re ready to upgrade your setup, or you want a regulator that suits your day-to-day work, you can view our nitrogen regulator equipment range and shortlist options. If you’re not sure what fits your cylinder supply, your test pressures, or your workflow, talk to our team to confirm compatibility and contact us for a quote. The right advice up front saves time on every job after.