Essential Tool for Brake and HVAC Work
A good flaring tool looks simple, but it does a job that sits right at the heart of leak prevention. In brake systems, a poor flare can lead to fluid loss, soft pedal feel, and a dangerous failure under pressure. In HVAC work, a bad flare can leak refrigerant, pull air and moisture into the system, and turn a clean install into a call-back. That is why this tool matters so much. It is not just about shaping metal. It is about making a safe, tight, repeatable connection on jobs where failure costs time, money, and trust.
If you are new to the trade, it is easy to think all flaring tools are basically the same. They are not. The wrong tool, the wrong angle, or the wrong flare type can ruin a line quickly. That matters whether you are repairing brake lines on an older vehicle, working on metric automotive systems, or installing refrigeration pipe on a split system in Brisbane humidity, Sydney coastal air, or a cold Melbourne winter morning. The pressure may be different from one job to the next, but the rule stays the same: the flare must match the application.
This guide explains what a flaring tool does, the main types you will see in Australia, how brake flaring and HVAC flaring differ, and how to choose your first kit without wasting money on the wrong setup. If you want to see the main options in one place, start with our flaring tool collection. We will keep this practical, job-focused, and easy to follow so you can choose the right tool for your work rather than guess and hope.
We will cover both automotive and HVAC use because that is where most confusion happens. A tradie might hear "flaring tool" and think brake line work. A fridgie might hear the same phrase and think 45-degree copper flares on refrigeration tube. Both are right in their own lane, but the tools, flare styles, and mistakes are not interchangeable. Knowing that early helps you avoid buying a tool that sits in the van because it does not match the jobs you actually do.
It is also worth saying that a flare is never just about the tool itself. Tube condition, cut quality, deburring, correct projection height, clamp grip, and finishing pressure all affect the final result. On refrigeration work, contamination control matters too. On brake work, the consequence of a weak or cracked flare is more serious than most people realise. Under the Australian Design Rules, braking systems on registered vehicles must meet specific safety and performance standards, and a poor flare can put that compliance at risk. For vehicle-specific braking requirements, the Australian Design Rules published by the Department of Infrastructure are the authoritative reference.
What is a Flaring Tool?
A flaring tool is used to form the end of a tube so it can seal against a matching fitting. Instead of joining by thread alone, the tube end is shaped into a flare that sits neatly against a seat. Once the nut is tightened, the seal is made at that formed surface. That is why the shape has to be clean, centred, and correct for the fitting style. If the flare is off-centre, too thin, split, or the wrong profile, the joint may tighten but it will not seal properly for long.
In brake line applications, the tool is usually used on steel, coated steel, or copper-nickel tube. These systems see hydraulic pressure, vibration, road grime, and temperature changes. A proper brake flaring tool helps produce a flare that can handle those conditions without cracking or folding. In many automotive jobs, that means a double flare or a bubble flare, depending on the vehicle and fitting design. You are not just making the line fit. You are making it safe to operate on the road.
In HVAC refrigeration applications, the tool is most often used on soft copper tube. The aim is to create a neat 45-degree flare that matches refrigeration flare fittings. This is common on split systems, mini splits, and other line-set connections where brazing is not used for that joint. A copper flaring tool for HVAC needs to produce a smooth sealing face without chatter marks, thin edges, or tube slip. A rough flare may pass a quick look, but it often shows up later as a leak during pressure testing or, worse, after commissioning.
This is one reason flaring tools are often misunderstood outside the trade. In general plumbing, people may talk about flares, compression joins, or other pipe-end forming methods as though they are interchangeable. They are not. Automotive flares, refrigeration flares, and industrial 37-degree flares are built around different connection styles and pressure expectations. The tool you use has to match the fitting standard, the tube material, and the job type. Treating all flaring work as "close enough" is how leaks and failures start.
The big picture is simple. A flaring tool exists to create a safe, repeatable mechanical seal. On a car, that protects braking performance. On an air conditioning system, it protects system tightness, refrigerant charge, and long-term reliability. In both cases, the flare itself becomes a critical part of the connection, not just a step in the process. That is why pros do not rush it.
It also helps to remember that the flare does not work alone. The nut, the fitting seat, the tubing wall, and the condition of the line all matter. A clean flare on damaged tube is still a poor joint. A correct bubble flare on the wrong seat is still the wrong repair. That is why experienced tradies check the full connection path rather than staring only at the shiny new flare they just made.
Types of Flaring Tools Overview
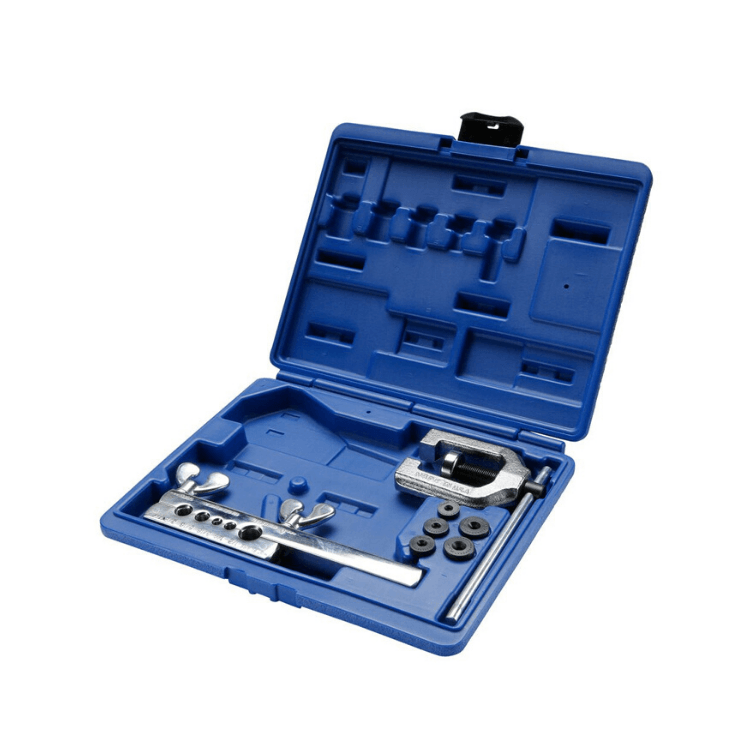
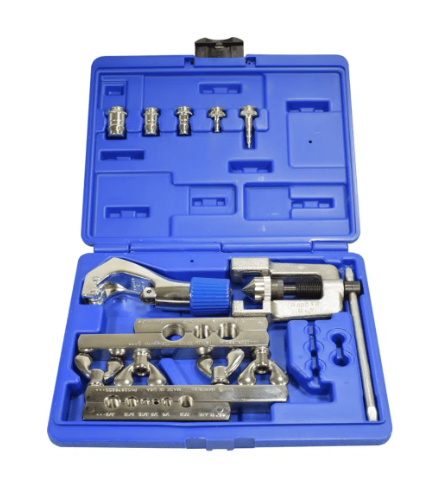
There is no single "best flaring tool" for every trade because flare type depends on the job. That is the first thing to understand before you buy. Some tools are built for a single flare style only. Others come as a flaring tool kit with dies, bars, and adapters for multiple flare types. Some are aimed at mechanics doing brake line repairs. Others are built for HVAC techs working mostly on copper tube. If you are buying in Australia, knowing the common flare styles will save you from ending up with the wrong case in the van.
The main types you will hear about are single flare, double flare, bubble flare, 45-degree flare, and 37-degree flare. Each has a place. Some are more common in automotive work. Some belong mostly in HVAC and refrigeration. Some appear more in industrial or hydraulic systems. The table below gives a practical view rather than a catalogue description.
Brake lines are a safety-critical system under the Australian Design Rules (ADR). The braking system on any registered vehicle must remain sealed, pressure-rated, and fit for service. Using the wrong flare type, wrong tool, or poor tube prep on a brake line is not just a workmanship issue — it is a compliance and safety risk. If you are not confident the flare is spot on, do not put the vehicle back on the road. Redo it or refer it to a qualified mechanic.
| Flare Type | Typical Application | Best Use Case | What to Watch For |
|---|---|---|---|
| Single flare | Light-duty or low-pressure applications | Basic tube-end forming where pressure demands are modest | Usually not the right choice for brake line safety-critical work |
| Double flare | Automotive brake lines | High-pressure hydraulic systems needing extra strength at the tube end | Wrong tube prep or poor fold can crack or leak |
| Bubble flare | Many European and metric vehicle brake systems | Metric brake line repair where the fitting seat calls for a bubble profile | Common mistake is using a double flare tool on a bubble flare seat |
| 45-degree flare | HVAC and refrigeration copper tubing | Split system and refrigeration pipe connections | Over-flaring or uneven tube projection causes sealing problems |
| 37-degree flare | Industrial and instrumentation work | Specialised hydraulic or industrial connection systems | Not a normal substitute for HVAC or standard brake line jobs |
Single flares are simple, but they are not the answer to every problem. In safety-critical brake work, single flares are generally not the first choice because the formed edge can be weaker under pressure and vibration. Double flares fold the tube material back on itself, which gives a stronger sealing edge and is why they are common on brake lines. Bubble flares, meanwhile, are common on metric automotive systems and need the right die and process. These are not "close enough" jobs. The flare style must match the seat.
For refrigeration and air conditioning, the 45-degree flare is the familiar standard on copper tubing. This is where the phrase professional flaring tool really matters. Cheap bars can slip, mark the tube, or leave a flare face that looks passable but will not hold under torque and vibration. A better tool gives more consistent tube grip, smoother forming, and less waste. That matters on site when you are trying to finish a clean install instead of remaking the same connection twice.
The 37-degree flare is worth mentioning because it comes up in broader trade supply searches, but it is not usually the tool path for mainstream brake or HVAC work. If that is your world, you already know it. If it is not, do not let a general online listing distract you. Stick to the flare type your fittings require.
That is also why a lot of "best flaring tool" round-ups online feel messy. They mix hobby kits, brake tools, refrigeration tools, and industrial flare systems into one page. For a tradie, that is not helpful. You want to know what flare type fits the work in front of you, what tubing it suits, and where the weak points are if the job is rushed.

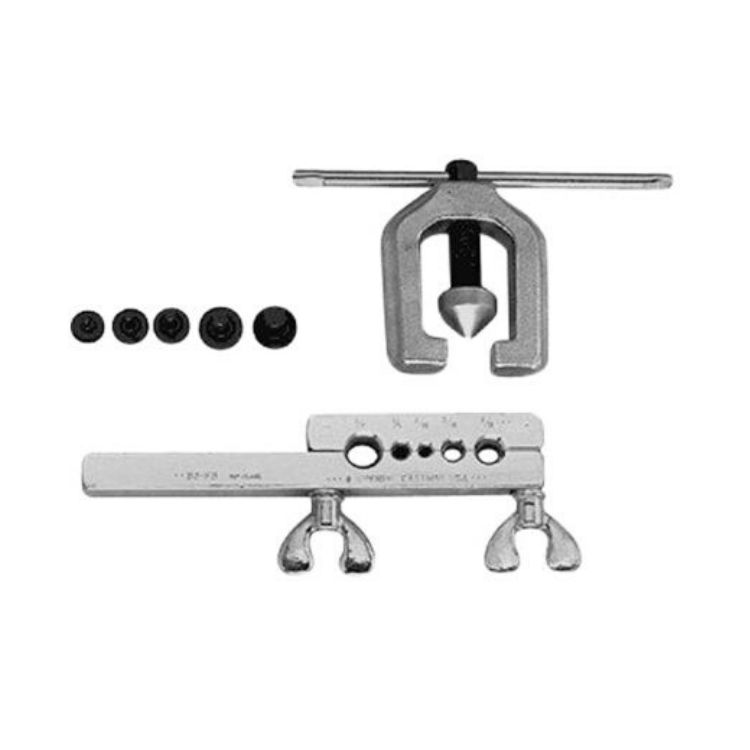
An eccentric-style copper flaring tool is popular with HVAC techs because it can produce a smoother, more even flare face.
Flaring Tools for Brake Lines
A brake flaring tool has one job above all others: make a safe, pressure-ready connection that matches the vehicle's brake fitting. In practice, that usually means double flares for many systems and bubble flares for a lot of metric and European applications. This is why an automotive flaring tool is not something to choose by price alone. If you are doing brake work, the risk of using the wrong tool is far bigger than the cost of buying the right one the first time.
Double flares are widely used because they give added strength at the end of the tube. The fold in the flare reduces the chance of the sealing edge splitting under hydraulic pressure. That matters on vehicles that see road shock, vibration, and years of thermal cycling. It is one reason tools like the Imperial 93-FB double flaring tool are so relevant in brake line work. The value is not just that it "makes a flare". The value is that it is built around the correct brake-line task.
Bubble flares matter just as much. Many techs get caught when they move from older or more familiar brake jobs into metric systems and assume a double flare will do. It will not. If the fitting seat is designed for a bubble flare, you need a tool that produces that exact profile. That is where a dedicated option such as the Imperial 293-F bubble flare tool earns its keep. It helps you match the vehicle rather than force the tube to suit whatever tool is in the drawer.
Brake line material matters too. Modern repair work often uses coated line or copper-nickel because it bends well and resists corrosion better than plain steel. On coastal jobs around Sydney or anywhere road grime and moisture are constant, corrosion around fittings is common. A strong flare starts with sound material and a square cut. If the tube is already pitted, ovalled, or damaged near the end, no flaring tool will save it. Cut it back or replace the section properly — no worries about losing a bit of extra tube if it means the repair is built tough enough to last.
Preparation is where good mechanics separate themselves from rushed repairs. Cut the tube cleanly. Deburr the inside without thinning the wall. Slide the nut on before you flare. Set the correct tube projection in the bar. Keep the clamp tight enough that the tube cannot creep. Then form the flare in stages rather than trying to muscle it through. If the finished flare is lopsided, marked, or cracked, do it again. A remade brake flare in the workshop is cheap. A failed flare on the road is not.
On brake jobs, always check the old fitting seat before choosing the flare type. A lot of wasted time comes from assuming the tool should decide the flare. It is the seat and system design that decide it. The tool simply makes the correct shape.
If you want a deeper look at process and common mistakes, our brake line flaring guide breaks down the basics in more detail, and our double flaring tool guide explains why the extra fold matters in pressure applications. Those guides are useful if you are training an apprentice or comparing whether a general automotive flaring tool is enough for the kind of brake work you actually do.
If you are comparing individual brake tools against the broader flaring tool collection, this is the section where you should slow down and match the tool to the vehicle system. That is especially true when a customer asks for a quick repair and the temptation is to reach for whatever case is nearest. Brake work is where "near enough" turns into a comeback or a safety risk.
It is also worth mentioning that not every "best flaring tool" search result online is written for Australian buyers. Some guides lean toward US brake line habits, some gloss over metric bubble flare needs, and some skip material differences entirely. In Australia, availability matters. If you need parts, dies, or replacements quickly, the tool has to fit your workflow and what you can source locally. A fancy case means very little if it does not match the line systems you see every week.
Flaring Tools for HVAC Work
For HVAC and refrigeration, the flaring conversation changes. Here the standard job is usually a 45-degree flare on copper tube. The aim is a clean, smooth, centred flare that seals properly against the mating fitting without over-thinning the edge. This is where a copper flaring tool becomes a daily-use item for many fridgies. It is not just a once-in-a-while tool. On split systems and refrigeration installs, it is part of producing tight line connections that hold vacuum and pressure over time.
The 45-degree refrigeration flare is common because it works well with standard flare fittings used on many systems. But "common" does not mean "easy". A poor HVAC flare can leak for several reasons: the cut was rough, the tube slipped in the bar, the flare was over-formed, the face was scratched, the nut was not aligned, or the copper was work-hardened from rough handling. This is why professional HVAC techs usually do not trust the cheapest bars they can find. Consistency matters more than bargain pricing when the cost of a leak includes lost refrigerant, moisture ingress, vacuum failure, and return visits.
Tool choice matters, but so does process. The copper should be cut square, reamed carefully, and kept clean. Many techs like to clamp the tube so the projection is exact and repeatable every time. On humid Queensland jobs, keeping moisture out of open pipe ends matters just as much as the flare itself. On colder Melbourne mornings, copper can feel less forgiving if it has already been knocked around in the van. On coastal installs, corrosion around exposed fittings can shorten the life of a marginal connection. Good habits make a difference in all of those conditions.
If you are comparing methods, our article on types of flaring tools for HVAC explains where different flaring setups fit in refrigeration work, while our HVAC flaring tool guide goes deeper into line-set practice, flare quality, and what a neat finished connection should look like.
For product choice, an HVAC-focused kit such as the Imperial 275-FSC HVAC kit suits tradies who want a dedicated setup for refrigeration copper rather than a brake-only tool. Imperial is well known in the trade, and Bradley tools are also relevant in the HVAC space where tradies want gear aimed at refrigeration line work rather than general automotive repair. The big point is this: HVAC flaring wants a tool built around copper tubing and 45-degree outcomes, not just any tool that happens to form metal.
One of the most common errors in refrigeration work is assuming a flare that "held pressure for now" is a good flare. That is not always true. A weak flare might pass an initial check and still cause trouble after vibration, thermal movement, or service work. That is why experienced techs look closely at the flare face, the thickness at the edge, and how naturally the nut seats before torque. A tidy, even flare usually tells a story of proper prep. A rough one usually tells a story of rushing.
When people search for a professional flaring tool, this is often what they really mean. They want a tool that delivers repeatable HVAC flares on copper, not a generic kit that leaves them cleaning up mistakes. In practice, that means stronger clamping, smoother forming, good alignment, and a design that suits site work rather than bench-only use. That is especially important for installers who do multiple systems a week and cannot afford call-backs from flare leaks.
If you are working through options from the broader hub, it helps to compare the dedicated product against the educational pieces and the main collection together. That way the product page, the usage article, and the hub all support the same decision. It is a better way to buy than jumping between random listings and hoping the terms all mean the same thing.


Choosing Your First Flaring Tool
If you are buying your first flaring tool in Australia, start with one question: what jobs are you actually doing? Brake line work and HVAC work can both involve flaring, but the tool path is not the same. If you mainly repair vehicle brake systems, you should be looking at double flare and bubble flare capability first. If you mainly work on air conditioning and refrigeration, you should be focused on a copper flaring tool built for 45-degree HVAC work. A tool that tries to be everything to everyone often ends up being average at the job you need most.
That is why the phrase best flaring tool can be misleading. The best one for a mechanic repairing brake lines is not necessarily the best one for a fridgie doing split installs. For brake jobs, accurate double and bubble flare performance matters most. For HVAC jobs, copper grip, finish quality, and 45-degree consistency matter most. Before you spend anything, write down the line materials, fittings, and systems you see every week. That will usually tell you the answer fast.
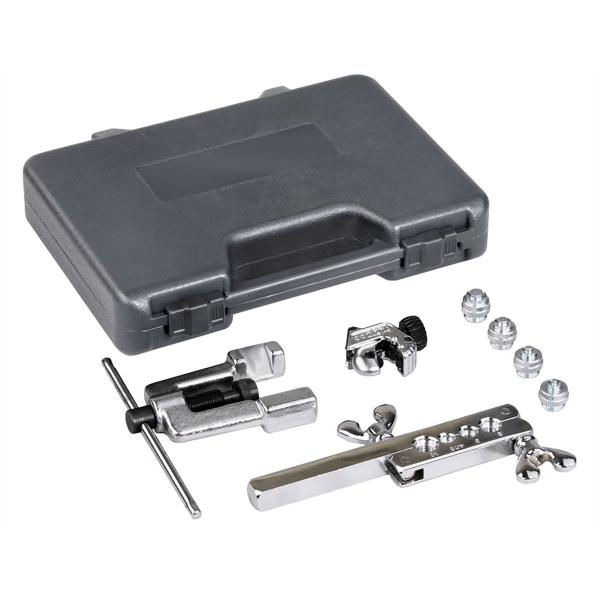
You also need to decide whether a kit or an individual tool makes more sense. A flaring tool kit is useful if you need several sizes, work across different jobs, or want everything in one case. That can be a good fit for workshops, apprentices building a base kit, or service businesses that want flexibility. An individual tool can make more sense if your work is narrow and repetitive. Many HVAC techs would rather own one solid 45-degree setup than a larger case full of dies they rarely use. The same logic applies in automotive work if you mainly do one type of repair.
Budget matters, but it should be read properly. Cheap tools can look attractive, especially when people search for "flaring tool Bunnings" or other retail options. For light occasional use, a basic retail kit may seem fine. But on trade work, the hidden costs show up quickly: slipping tube, uneven clamping, more remakes, lost time, and lower confidence in the finished seal. A specialist tool often costs more upfront because it is built to hold alignment and produce consistent results. On real jobs, that difference is not theory. It is time saved and waste avoided.
Australian availability matters too. A flaring tool Australia search should not just be about who has stock today. It should also be about whether the tool suits the fittings and systems common here, whether you can get support or replacement parts, and whether the seller understands the application. Specialist trade supply usually wins there because the advice is tied to actual use, not just shelf space.
If you are unsure, use a simple decision path. If you do brake lines, choose based on double flare or bubble flare requirements first. If you do refrigeration copper, choose based on HVAC 45-degree performance first. If you cross over both areas, you may be better off owning more than one tool rather than forcing one kit into jobs it was not designed for. That costs less in the long run than remaking lines, chasing leaks, or second-guessing every connection.
For apprentices, there is another angle: you need a tool that teaches good habits instead of hiding poor ones. A sloppy bar that slips tube can make a beginner think flaring is harder than it really is. A steadier tool gives clearer feedback and helps them learn projection, clamp pressure, and finish quality properly. That matters in both workshop training and field work.
Flaring Tool Brands in Australia
When tradies compare flaring tool brands in Australia, the decision usually comes down to application, consistency, and local availability. Some brands are better known in brake and automotive work. Some are stronger in HVAC and refrigeration. Some sit across both spaces. Rather than chasing a brand name on its own, it is smarter to ask what each brand is good at and whether that matches your daily work.
Imperial has strong recognition in both automotive and HVAC circles because it has long been associated with trade-grade tube-working gear. For mechanics, Imperial tools are a common reference point when people talk about proper double flare and bubble flare work. For fridgies, Imperial also comes up in copper tube and refrigeration tool discussions. That broad relevance is why searches for an imperial flaring tool are so common. The brand is familiar because it sits close to real trade applications, not just hobby use.
Bradley is relevant where HVAC specialists want tools that fit refrigeration work and everyday copper line jobs. The draw here is often practical value for tradies who want dedicated HVAC capability without drifting into automotive-only kits. For someone doing split installs or regular service work, Bradley can make more sense than a general-purpose case that includes features they will never use.
Mastercool often appears in the overlap zone between HVAC and automotive. That can appeal to businesses doing mixed work or buyers who want broader kit coverage. The key is still the same, though: check the actual flare types and job suitability rather than assume the name alone guarantees the right fit.
Robinair is widely recognised in automotive service, and options such as the Robinair 6503 double flaring set speak directly to brake-line style applications where double flaring is a core requirement. If your search starts with "automotive flaring tool", this is the kind of product path that makes sense to review closely.
Then there is the retail comparison. People often search for "flaring tool Bunnings" because they want something fast and local. There is nothing wrong with checking retail availability, but it helps to be honest about the type of work you do. A casual, light-use buyer may be fine with a basic retail option. A tradie doing brake repairs or HVAC installs regularly usually needs more consistency than an entry-level shelf kit can give. Specialist supply tends to offer better application matching, better support, and tools chosen for actual trade tasks rather than general hardware traffic.
A lot of "brand comparisons" online are really tool-type comparisons in disguise. Many buyers think they are choosing between brands, but the real mistake is choosing between the wrong flare systems. Get the flare type right first. Then compare brands inside that category.
In Australia, the smart move is usually to compare brands inside your application lane. Compare brake-focused tools against other brake-focused tools. Compare HVAC copper flaring tools against other HVAC copper flaring tools. That keeps the decision clean. It also stops you getting pulled into generic "best flaring tool" articles that mix workshop, hobby, automotive, and refrigeration jobs into one messy recommendation list.
If you want the short version, Imperial is a ripper option for professional-grade work across the categories discussed here. Bradley is worth attention for HVAC-focused buyers. Mastercool can suit mixed-use needs. Robinair is a familiar automotive name. Bunnings-style retail options may help for light occasional jobs, but specialist tools usually make more sense once repeat work, reliability, and finish quality start to matter.
This is also where local stock and real application advice matter. A brand can look great in a general search, but if the tool is hard to source, poorly supported, or not suited to the flare style you actually need, the brand name will not save the job. Tradies usually end up valuing repeatable results and practical support more than a fancy badge on the case.
Get the Right Flaring Tool
A flaring tool is not a glamorous purchase, but it is one of those tools that quietly decides whether a connection holds or fails. On brake lines, it helps protect a safety-critical system that cannot afford poor workmanship. On HVAC copper, it helps protect system tightness, commissioning quality, and your reputation on the job. That is why the right choice starts with application, not hype. Know whether you need brake flaring, bubble flare capability, or 45-degree HVAC work. Once you know that, the right tool becomes much easier to spot.
This guide has covered the main flare types, the difference between automotive and refrigeration work, what makes a good first purchase, and how the main brands fit the Australian market. The most important takeaway is simple: do not try to force one flare style or one generic case into every job. A brake flaring tool needs to match brake fittings. A copper flaring tool needs to match HVAC copper and 45-degree flare requirements. That is how you avoid leaks, remakes, and call-backs.
If you are still narrowing it down, go back to the actual jobs you do each week. Think about line material, fitting style, frequency of use, and whether you need a kit or a dedicated tool. That is far more useful than chasing the loudest "best flaring tool" headline online. It also helps you buy once instead of buying twice after the first tool proves too light, too vague, or too inconsistent for trade work.
To compare current options, browse our shop flaring tools range and match the tool to the job you actually do. If you need help choosing between brake-line gear, HVAC copper options, or a broader flaring tool kit, talk to our team to confirm compatibility or contact us for a quote. A few minutes of guidance up front is usually cheaper than remaking lines later.