
Types of Flaring Tools for Plumbing
When it comes to plumbing and mechanical pipework, small mistakes at the end of a tube can turn into big problems later. A poor flare can leak, crack, distort under pressure, or fail after vibration and thermal movement. That is why flaring tools still matter. They are not just old-school hand tools. They are the difference between a neat, reliable connection and a joint that causes trouble the first time the system is pushed hard.
For plumbers, HVAC installers, refrigeration techs, and hands-on maintenance teams, understanding the main types of flaring tools helps you choose the right setup for the material, the application, and the finish you need. Some tools are basic and dependable. Some are designed to create cleaner, more consistent flares with less effort. Others are more specialised and better suited to specific work such as automotive lines, softer copper, or repetitive production-style jobs.
If you want to compare suitable options while reading, the cleanest starting point is the main range of flaring and swaging kits. That gives you a better feel for what is available across spin flaring tools, eccentric tools, and traditional bar-style kits.
This guide explains what flaring tools do, the main types used in plumbing and related trades, where each type fits best, and how to choose one that makes sense for your actual work rather than just the cheapest option on the shelf.
A leak blamed on the fitting is often really a flare problem. If the tube was not deburred properly, clamped square, or formed evenly, the joint can fail even when the fitting itself is fine.
What Is a Flaring Tool?
A flaring tool forms the end of tubing into a widened flare that mates cleanly with a flare fitting. That flare creates the sealing face. In practical terms, the tool reshapes the tube end so it can seat correctly under pressure without relying on thread sealants or guesswork.
Flaring is common in plumbing, gas work, refrigeration, air conditioning, and automotive systems. The exact flare type and angle depend on the application, but the principle stays the same: create a controlled, even flare that seals properly and resists damage.
The better the tool, the easier it is to produce consistent results. That matters when you are working with softer copper, thin-wall tubing, awkward site conditions, or repetitive jobs where one bad flare can cost you time and materials.
Why Tool Type Matters More Than People Think
It is tempting to think a flaring tool is just a flaring tool. In reality, different tools create the flare in very different ways. That affects finish quality, ease of use, repeatability, and how forgiving the tool is when the operator is moving quickly.
A basic bar-and-yoke tool can absolutely do the job. Many tradespeople have used them for years. But they generally demand better prep, more care, and a bit more technique to get a consistent finish. A better-designed eccentric or spin-style tool can reduce the effort, produce a smoother flare, and lower the risk of splitting softer tube.
That is why choosing the tool type matters. You are not just buying metal and threads. You are buying consistency.
Main Types of Flaring Tools
1. Standard bar-style flaring tools
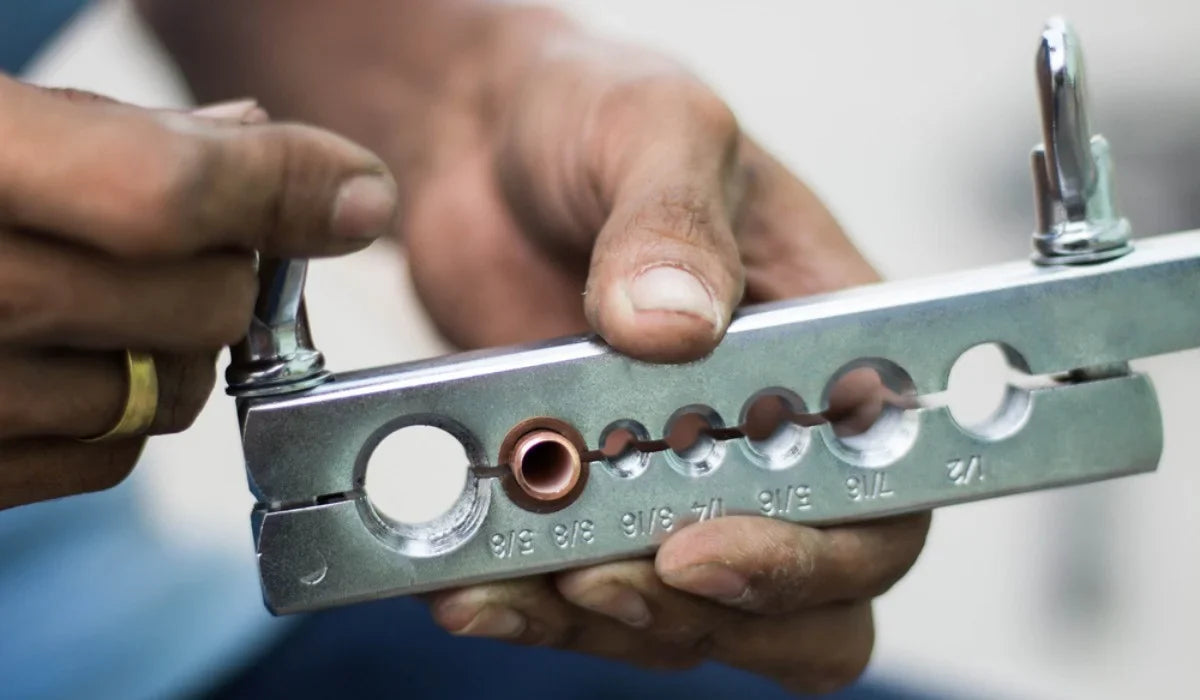
Standard flaring tools are the most familiar type. They usually use a clamping bar with hole sizes for different tube diameters and a yoke with a cone that presses into the tube to form the flare. They are widely used because they are straightforward, proven, and available in many kit styles.
For general plumbing and mechanical work, standard tools still have a place. They are especially useful when you want a traditional tool that handles common sizes and does not require a learning curve beyond good setup and prep. They are also a sensible entry point for someone building out a basic kit.

The main drawback is that standard tools can be less forgiving. If the tube is not cut square, deburred properly, or clamped evenly, the flare can end up off-centre, rough, or cracked. They work best when the operator is methodical.
2. Bubble flaring tools
Bubble flaring tools are designed to create a bubble flare rather than a standard 45-degree flare. These are more common in automotive brake line work than in everyday plumbing, but they still matter when the application calls for that exact joint type. This is one of those areas where using the wrong tool does not just create a poor finish. It creates the wrong flare entirely.
If your work crosses between plumbing, mechanical servicing, and light automotive or hydraulic-style repair, understanding bubble tools helps avoid costly confusion. They are a specialist option, not the universal answer.
3. Eccentric flaring tools
Eccentric flaring tools are a major step up in finish quality for many users. Instead of driving the cone in a more basic straight action, they use an off-centre, rolling motion that forms the flare more progressively. That usually means a smoother, more even flare with less marking and less chance of damaging softer tube.
This is why eccentric tools are popular with refrigeration and HVAC techs, and why they also make sense for plumbing work where copper tube quality and flare consistency matter. They are particularly useful when you are making multiple flares in a day and want cleaner results with less fighting.
For many professionals, an eccentric flaring tool option is the best balance between precision and everyday usability. It is not just about making a flare. It is about making a good one repeatedly.
4. Double flaring tools
Double flaring tools are used where a stronger double flare is required. This style is more common in brake and higher-pressure line applications than in standard plumbing, but it is still worth understanding because many people hear the term and assume it is interchangeable with normal flaring. It is not.
A double flare folds the tube back on itself before the final flare is formed. That creates a thicker sealing face and better strength in the right application. If your work includes systems that call for it, you need the correct tool and the correct process. Otherwise, it is unnecessary complexity for standard plumbing jobs.

5. Spin flaring tool sets
Spin flaring tools work differently again. Rather than relying on a traditional clamp-and-cone approach, these tools use friction and rotation to form the flare quickly. They are often used with a drill or driver and are especially popular in air conditioning and refrigeration work where copper tube speed and consistency matter.
For plumbing readers, the value of a spin flaring tool set is speed and workflow. If you are working repeatedly with soft copper and want fast, neat expansion or flare-style prep on site, these tools can save real time. They are not a replacement for every traditional flaring method, but they are highly useful in the right part of the trade.
If that is the direction you are leaning, it makes sense to compare the available spin flaring tool set options alongside more traditional kits so you can match the tool to the style of work you actually do.
6. Swaging tools
Swaging tools are not technically the same as flaring tools, but they are often considered part of the same buying decision because they solve a related tube-prep problem. Instead of widening the end into a flare for a fitting, a swaging tool expands the tube so another tube can fit into it. That is useful for joining without a coupling in the right application.
This is why many buyers end up browsing full flaring and swaging kits rather than looking at flaring tools alone. In real job planning, the work often overlaps.
How to Choose the Right Flaring Tool
Consider the tube material
The material of the tubing makes a big difference. Softer copper is more forgiving, but it can also mark, split, or distort if the tool is rough or the prep is poor. Harder materials can tolerate more force but still need the right alignment and finish. Eccentric tools are often a better choice on softer materials because the forming action is more controlled.
Match the tool to the application
If you are doing straightforward plumbing work, a good standard or eccentric tool is usually the main choice. If you are dealing with specialised brake or automotive line work, bubble or double flaring tools may be relevant. If you are doing repetitive copper prep in HVAC-style work, spin tools may offer a real speed advantage.
Think about repeatability
One clean flare on the bench is not the real test. The real test is whether the tool helps you make consistent flares across multiple jobs, multiple sizes, and less-than-perfect site conditions. A more forgiving tool often saves money over time because it reduces rework.
Ease of use matters
If a tool is awkward to clamp, hard to align, or slow to reset between sizes, it becomes frustrating fast. That matters more than many people admit. A tool that is genuinely easier to use often ends up being used better.
Durability and build quality
Cheap flaring tools usually tell on themselves quickly. Threads feel rough, clamping is inconsistent, and the finished flare quality starts to vary. Better tools generally hold alignment better, wear more slowly, and stay reliable across repeated use.
Inline Demo: What to Look For in a Better Flaring Tool
If you were watching a practical demo side by side, the differences would be easy to spot. A better flaring tool usually produces a smoother flare face, holds the tube more securely, needs less corrective effort, and leaves less marking around the finished joint. It also tends to be faster once you are doing repeat work because setup feels more controlled.
For this article’s product focus, the two most relevant upgrade paths are a spin flaring tool set for speed and workflow, and an eccentric flaring tool for cleaner, more consistent flare quality.
Need a better flaring setup?
Compare spin flaring tool sets and eccentric flaring tools in one place and choose the setup that suits your tubing, workflow, and finish requirements.
Common Reasons Flares Fail
Bad flares usually come back to the same handful of problems. The tube was not cut square. The inside edge was not deburred. The tube slipped in the clamp. The flare was overdriven. The tool was misaligned. Or the operator tried to rush the job with a tool that does not hold the tube consistently.
Another common issue is using the wrong flare style for the fitting. Even a neat-looking flare is still wrong if it does not match the system requirement. This is why tool choice and application knowledge go together.
If you keep getting cracked or uneven flares, do not just blame the tube. Look at the prep, the clamping, and whether the tool itself is really suited to the work.
Real-World Buying Logic: Who Should Choose What?
A homeowner or casual DIY user doing occasional light work may be perfectly fine with a traditional quality kit, provided they are willing to work carefully and practise. A professional plumber or service technician doing repeated flare joints is more likely to appreciate the time and finish benefits of a better tool design.
If your work is heavily copper-based and speed matters, spin tools become more attractive. If clean flare quality matters most and you want something more controlled than a basic bar-and-yoke kit, eccentric tools are often the stronger move. If your work crosses between flare and expansion prep, a broader kit view makes more sense than buying too narrowly.
That is why the safest buying path for most readers is to review the full flaring and swaging kit range first, then narrow down based on how you actually work.
Maintenance and Care for Flaring Tools
Cleaning
After each use, wipe down the tool and remove any debris, oil, or metal residue. Dirt left in the clamp faces or cone area affects alignment and finish quality.
Lubrication
Keep moving parts lightly lubricated where appropriate. Smooth threads and pivot points make the tool easier to use and help maintain consistent flare pressure.
Storage
Store flaring tools in a dry place, ideally in their case. A tool that gets thrown loosely into a box with other metal gear tends to get knocked around, and that does not help alignment or lifespan.
Inspection
Check the clamping surfaces, cone condition, and threads periodically. If parts are worn or damaged, the flare quality will suffer before the tool fully fails.
If flare quality suddenly becomes inconsistent, inspect the tube prep first, then the clamping surfaces and cone condition. Small wear or contamination in the tool can show up as repeat leak issues later.
Conclusion
Flaring tools are still one of those trade basics that reward good buying decisions. The right tool makes the flare cleaner, the joint more reliable, and the job less frustrating. The wrong tool or the wrong flare type makes even simple tube work harder than it needs to be.
For general plumbing and copper work, standard flaring tools still have a place. For cleaner and more repeatable results, eccentric tools are often the smarter upgrade. For faster workflow in the right copper applications, spin flaring tool sets are worth serious consideration. The best choice comes down to your material, your application, and how often you need consistent results under real job conditions.
If you want to compare the most relevant options in one place, start with the full range of flaring and swaging kits here and narrow the choice based on your actual work rather than guesswork.