How to Double Flare Without a Tool: Safer Brake Line Repair Alternatives
Emergency Brake Line Situations
If you are searching how to double flare without tool, there is usually a story behind it. Maybe the flaring kit is missing. Maybe the tool broke halfway through a job. Maybe you are stuck with a leaking brake line on a weekend, far from the shop, trying to work out whether there is any way to finish the repair without waiting for the proper gear. In that moment, it is tempting to think there must be a clever workaround — no worries, surely someone figured this out.
The hard truth is that brake line work is one of the last places where improvised methods make sense. A bad flare on a low-pressure line is annoying. A bad flare on a brake system can mean leaks, poor pedal feel, repeat call-backs, or worse. That is why this guide is not going to pretend there is a magic backyard trick that turns a screwdriver, hammer, or vice into a safe brake flaring system. There are alternatives to talk about, but they need to be talked about honestly.
This article is built around that honest answer. We will look at whether you can really flare without a tool, why proper tools exist, what the common makeshift methods actually look like in real life, which budget options in Australia make more sense than gambling with a brake line, and what to do if you are facing an emergency brake line repair right now. If you want the wider background first, our flaring tool overview explains how different flare tools fit different jobs and why the right flare shape matters so much.
The key point from the start is simple. A proper double flare is not just a shape. It is a safety-critical part of a hydraulic brake system. So yes, we will explore flaring tool alternatives, but we are going to do it in a way that keeps the risk front and centre, not hidden behind wishful thinking. That is the only useful way to answer this topic.
Can You Really Flare Without a Tool?
The short answer is no, not in any way that should be recommended for a proper brake repair. You may find forum posts, old shed stories, or emergency roadside tales about people forcing a flare with makeshift methods, but that is very different from saying the method is safe, repeatable, or fit for a braking system. When people ask how to double flare a brake line without tool, they are usually hoping for a reliable workaround. For brake lines, that reliable workaround does not really exist — fair dinkum.
A proper double flare depends on controlled tube positioning, a correct first-stage form, and a clean second-stage fold. That is hard enough with the right tool. Without one, you lose the parts that make the flare uniform and centred. The tubing can split, the lip can come out uneven, the seat can distort, and the finished connection can look usable even when it is not. That is why experienced mechanics usually answer this question with a warning rather than a trick.
That does not mean every emergency has the same answer. There is a difference between an emergency situation and a permanent repair. If a vehicle is disabled and you are trying to work out how to move forward safely, the smarter path is usually not to invent a flare. It is to think about safer alternatives such as towing, a mobile mechanic, or using the correct tool as soon as possible. The risk assessment changes completely when the line is part of the brake system.
In other words, can you force metal into something that resembles a flare without the right tool? Maybe. Can you call that a dependable brake repair? That is where the honest answer becomes no. This is especially true on older vehicles or corroded lines where the tube material is already under stress. A makeshift flare on compromised tubing is stacking one risk on top of another.
A brake flare can fail even when it looks nearly right. Off-centre folds, thin lips, poor seating, and tiny cracks often show up only once the line is tightened and pressure is applied. Australian Design Rules require brake systems to perform reliably under all load and temperature conditions — a dodgy flare puts that compliance at risk.
This is why proper brake repair advice sounds less exciting than DIY workarounds. The safe answer is often "do not do that" rather than "here is a shortcut." That is not because tradies love expensive tools. It is because hydraulic brake systems punish bad shortcuts fast.
So if the question is "can you really flare without a tool?", the answer is that it is not recommended, not professional, and not something to treat as a normal repair method. The better question is what you should do instead when the proper tool is missing. That is where the rest of this guide becomes useful.
Why Proper Flaring Tools Exist
Proper flaring tools exist because brake systems need uniform flare formation. A brake flare has to sit correctly in the fitting, hold shape under pressure, and stay sealed through vibration, heat cycles, road shock, and repeated servicing. That is asking a lot from a small piece of formed tubing. The reason professional tools exist is to make that level of repeatability possible — and in Australian workshops, that repeatability is not optional.
Pressure requirements are the first reason. Brake lines are not carrying gentle flow. They are part of a hydraulic system that depends on sealed pressure transfer. If the flare is thin, uneven, split, or poorly seated, the line can leak or lose confidence under use. A proper flaring tool controls the height of the tube in the bar, the shape of the first stage, and the final fold of the second stage. Those steps are what turn brake tubing into a flare that matches the fitting properly.
Safety-critical applications are the second reason. People sometimes talk about flaring tools as if they are just convenience items. They are not. In brake work, the tool is part of the process that helps make the repair dependable. That is why professional shops do not replace a flaring bar with whatever happens to be on the shelf. They use the correct tool because they need the result to be repeatable, not hopeful. Spot on workmanship is the standard — not just good enough.
There is also the difference between professional and makeshift work. Makeshift methods usually fail in one of two ways. Either they cannot shape the flare evenly in the first place, or they create something that looks close enough until it is tightened and tested. The real cost is not just the wasted tube. It is the time lost remaking the job, the risk of a leak, and the chance of sending a vehicle out with a brake repair that should never have passed inspection.
Australian vehicle standards and roadworthy expectations reinforce the same point, even without turning this into a legal lecture. The practical expectation is that a brake repair must be safe, fit for service, and properly executed. A makeshift flare made without the correct tool is hard to defend against that standard. That is why the question of when you need a flaring tool is easy to answer for brake systems: if you are making a flare on a brake line, you need one.
If you want a deeper look at why the finished flare matters so much in automotive work, our proper brake flaring guide breaks down the brake-line side of the job in more detail, and our double flaring explained article shows why the two-stage process is built the way it is.
A proper double flare needs correct tube projection, a clean first-stage form, and an even second-stage fold. Those are exactly the things a real flaring tool is designed to control. If any one of those three steps is off, the whole flare is compromised — and on a brake line, you will not always know until it matters most.
Put simply, proper flaring tools exist because safe brake repairs depend on consistent results. That is not marketing talk. It is the plain reason the tools were made in the first place.
The moment you compare that with hammer-and-vice ideas, the difference becomes obvious. One path is built around controlled geometry. The other is built around wishful thinking. That is why one belongs in a professional brake repair and the other does not.
Australian Standards and ADR Compliance for Brake Systems
This is the section most DIY guides skip, but it is one of the most important things to understand before touching a brake line in Australia. The Australian Design Rules — commonly called the ADRs — set the baseline for how braking systems must perform on road-registered vehicles. Under ADR 31 and ADR 35, brake systems are required to meet specific performance standards under full load, partial load, and emergency braking conditions. A brake line repaired with a compromised or improvised flare puts that compliance at serious risk.
What does that mean in practice? It means that a vehicle presenting for a roadworthy certificate with a brake line flare that does not meet professional standards can be failed on the spot. It also means that if a brake failure occurs after a non-compliant repair, the person who performed the work — whether a licensed mechanic or a capable DIYer — can be in a difficult position when it comes to insurance, liability, and roadworthiness sign-off.
Australian state and territory vehicle inspection requirements each reference the ADRs as their baseline. New South Wales, Victoria, Queensland, and Western Australia all require brake systems to be in sound working condition with no evidence of leaks or compromised components. A poorly formed flare can create exactly the kind of evidence that flags a vehicle in a roadworthy inspection. That is not a scare tactic. It is the practical reality of brake line repair in Australia.
For tradespeople and workshop owners, the stakes are even clearer. A mechanic who signs off on a brake repair bears professional responsibility for the result. That is one reason why professional shops do not entertain improvised flaring methods — it is not just about getting the job done, it is about getting the job done in a way that can be defended if the result is ever questioned. For more detail on the relevant standards, Standards Australia is the place to look for automotive and hydraulic fitting specifications that underpin brake system work.
Built tough is the expectation for Australian road vehicles. The ADRs exist because the conditions — from outback corrugations to coastal humidity to heavy towing loads — demand it. A brake line repair that might squeak through in a more lenient environment has a much harder time meeting Australian compliance expectations. That is the standard to aim for, and it starts with using the right flaring tool.
Under Australian Design Rules (ADR 31 and ADR 35), brake systems must meet defined performance standards on all registered vehicles. An improvised or non-compliant brake line flare can result in a failed roadworthy inspection, void insurance cover, and — most importantly — a brake system that cannot be trusted when it matters most. Do not cut corners on brake line work. The consequences are too serious.
Alternative Methods Reality Check
When people search for flaring tool alternatives or diy brake flaring methods, they usually want a straight answer on what is possible and what is just internet fantasy. The table below gives that answer without dressing it up — including the flare types most commonly used in Australian automotive work, the tools that form them, and where each one actually belongs.
| Method / Flare Type | Reliability | Safety | Typical Application | Reality Check |
|---|---|---|---|---|
| Proper double flare tool | Excellent | Safe when used correctly | Australian passenger and light commercial brake lines | The right permanent repair path — ripper result every time |
| Bubble / SAE 45° flare tool | Good | Safe when matched correctly | Older Australian and imported vehicles, HVAC refrigerant lines | Must match the fitting spec — do not mix flare types |
| Hydraulic flaring kit | Excellent | Best available | Professional shops, heavy commercial, high-volume brake work | Higher cost but fastest and most consistent result |
| Hammer method (improvised) | Poor | Dangerous | No legitimate application | Uncontrolled shaping, cracked or uneven flares almost certain |
| Vice method (improvised) | Poor | Dangerous | No legitimate application | Distorts tube badly, does not control flare geometry at all |
| Buy or borrow the correct tool | Best | Best permanent option | Any brake line repair, anywhere in Australia | Usually cheaper than wasting time, tube, and confidence |
The hammer method gets talked about because people assume they can "persuade" the tube into shape. The problem is that brake flares are not just about making the tube wider. They are about making the flare centred, even, supported, and correctly matched to the seat. A hammer has no interest in doing any of that. It just hits metal. That is how you end up with thin lips, cracks, flattened sides, or a flare that looks handmade in the worst possible way.
The vice method sounds more controlled, but the same problem stays there. A vice can clamp. It does not guide the flare geometry the way a proper bar, button, and yoke do. It may grip the line. It may squash the line. What it will not do is give you the uniform result a brake fitting expects. That is why these methods belong in the "do not trust this on a brake system" category — full stop.
It is also worth understanding the difference between a double flare and a bubble flare, because mixing them up is a mistake that turns up in Australian workshops more than it should. A double flare folds the tube back on itself to create a reinforced seat. A bubble flare, sometimes called an SAE 45° flare, creates a single-stage cone. They are not interchangeable. Using a bubble flare fitting where the system calls for a double flare — or the other way around — is a mismatch that can leak under pressure even if the flare itself is perfectly formed. Always check the fitting spec before you start.
Some people ask whether these alternatives are acceptable just to get home. That is the wrong mental frame. A brake line is not a cosmetic problem. If the line has failed and the flare cannot be formed correctly, the safer move is not to create a doubtful flare. The safer move is to immobilise the vehicle, arrange a tow, or get the correct tool to the job. No worries about asking for help — it is always better than a doubtful repair on a safety-critical system.
Budget Flaring Tool Options Australia
If the real issue is money rather than access, the good news is that you do not always need a premium workshop setup to avoid dangerous improvisation. There are cheap flaring tool options and affordable paths that are still far better than trying to double flare without a tool. Mate, you can get sorted without spending a fortune.
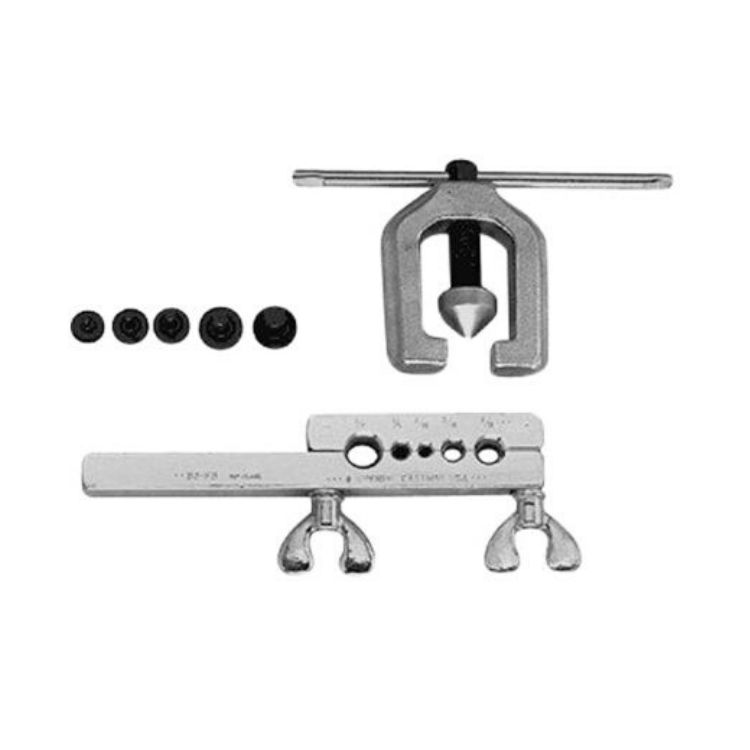
At the entry level, manual double flare tools are often the first step for DIY users and light workshop use. A simple dedicated tool such as the Imperial 93-FB entry tool is the sort of option people compare when they want a straightforward brake flaring tool without jumping straight to a larger case kit. It is a no-fuss option that does what it needs to do.
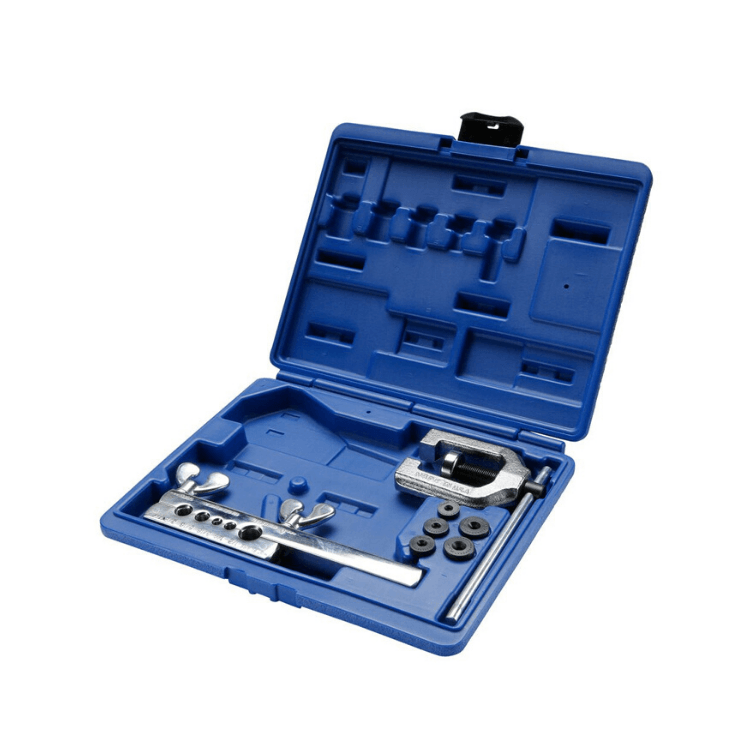
Some buyers prefer a broader case because it keeps the main parts together and reduces the chance of missing components mid-job. That is where the Robinair complete kit becomes relevant. A kit can make more sense for someone who wants the bar, yoke, and supporting pieces in one place instead of piecing together a repair setup from separate items. It is a ripper option for anyone doing regular brake work.
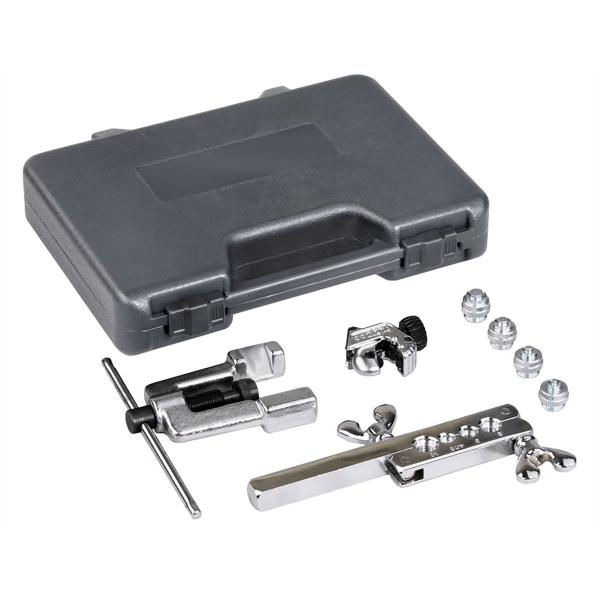
Mastercool basic kits also come up in the budget conversation. Mastercool is one of the brands buyers compare when they are looking for affordable entry into automotive flaring work. Actual pricing, coverage, and kit contents vary, so the smart move is always to confirm what is in the box and whether it matches your brake line sizes and flare needs before ordering.
The phrase "under $100" gets used a lot in searches, but pricing moves with stock, supplier, and timing. The better takeaway is that entry-level manual tools can sometimes sit in that lower budget zone, especially compared with the cost of repeated failed repairs or workshop call-backs. That is why the return on investment is stronger than people first assume. You are not just buying a piece of metal. You are buying the ability to do the job right — and that is worth it.
This is where affordable flaring tools as a collection becomes useful. Instead of guessing from random marketplace listings, you can compare proper brake flaring tools in one place and decide whether a basic dedicated tool or a more complete kit makes better sense for your workload.
Budget tools are acceptable when the expectations are realistic. If you are doing occasional brake-line work and understand the process well enough to inspect your results critically, a simpler manual tool may be perfectly sensible. If you are working in a professional shop or doing frequent brake repairs, the value of better clamping, alignment, and repeatability usually shows up quickly. That is the honest difference between an entry tool and a mid-range kit — and it is worth thinking through before you buy.
Emergency Brake Line Repair Options
When you are facing an emergency brake line repair, the safest answer is usually not to improvise a flare. It is to choose the emergency option that gets the vehicle out of service risk and into proper repair as cleanly as possible. That can mean roadside assistance, towing, or a mobile mechanic who already has the right flare tools in the van. In Australia, those options are more accessible than people realise — especially if you have roadside assist coverage through your insurer or a motoring club.
Temporary compression fittings sometimes get mentioned in emergency conversations, but this is exactly where caution matters most. Their suitability depends on the vehicle, the jurisdiction, the repair context, and whether they are actually appropriate for the brake system in question. That means they should never be treated as the default answer or a casual substitute for the correct flared repair. If there is any doubt, do not guess. The risk is too high.
Mobile mechanics can be a strong option because they often solve the real problem: not that the line is impossible to repair, but that the correct tool is not on site. The same goes for towing. If the vehicle is at home, stranded at work, or stuck somewhere far from your normal tool set, getting it moved or getting the correct tool to it is usually the smarter call than trying to invent a method on the spot.
This is also where roadside assistance earns its place. If the brake line failure means the vehicle is not safe to operate, the best emergency decision may be the least exciting one — stop, secure the vehicle, and arrange recovery. That is a much better outcome than turning one brake line problem into a larger safety problem because the repair was rushed. No worries about calling for help. That is what the services are there for.
When should you not DIY? The answer is simple. Do not DIY when you do not have the correct flare tool, do not have confidence in the flare type, do not trust the tubing condition, or do not have a safe way to pressure test the result. Brake systems are not the place to "have a go" when the consequences of getting it wrong are obvious.
If the line has failed and the correct flaring tool is not available, the smartest emergency move is to stop thinking about making a flare and start thinking about the safest way to get proper repair help to the vehicle. A tow now is far cheaper than a brake failure later.
That may feel frustrating in the moment, especially if the job looks "almost doable." But safety brake line flaring decisions are not measured by how creative the workaround was. They are measured by whether the brake system can be trusted afterwards. That is the standard that matters — full stop.
Sometimes the best emergency skill is knowing when to stop. That is not giving up. That is recognising that a doubtful repair on a brake system is not really a repair at all. Any experienced tradie will tell you the same thing.
How Brake Line Flaring Connects to HVAC Work
One thing that surprises people is how much crossover there is between automotive brake line flaring and HVAC refrigerant line work. The tools are related, the flare shapes overlap in some cases, and the principles of achieving a clean, leak-free connection are exactly the same. That is why a quality flaring tool bought for brake work can often do double duty in an HVAC setting — and vice versa.
The key difference is the pressure ratings and the tubing materials involved. HVAC copper tubing and automotive steel brake lines behave differently under the flaring process, and the flare angles are not always identical. In HVAC work, you are typically working with a 45° single flare or a specific flare shape designed for refrigerant fittings. In brake work, the double flare is the dominant standard for most Australian vehicles. Mixing up the processes or the tooling between the two applications is a mistake that shows up quickly.
For anyone who works across both trades — or a DIYer who does their own air conditioning and their own brake maintenance — understanding the flare type differences is genuinely useful. Our flaring tool complete guide and our double flaring explained article both cover this crossover territory and explain when each tool type and flare shape belongs. That context makes it much easier to buy the right tool for the full range of work you actually do.
The broader point is that investing in a quality flaring tool is rarely a single-use decision. If you are in the trades, do your own vehicle maintenance, or work on equipment that uses tubing and fittings, a good flaring kit earns its place in the tool collection quickly. That is especially true in Australia, where the range of work — from residential HVAC to outback vehicle maintenance — makes a versatile, reliable flaring tool genuinely worth having.
Investing in Proper Brake Flaring Tools
A proper flaring tool is usually a one-time investment that keeps paying for itself. That is especially true if you do your own maintenance, restore older vehicles, or work in a workshop where brake line jobs come up regularly. The up-front spend can feel annoying at first, but the long-term savings usually beat repeated wasted tube, failed repairs, and the stress of wondering whether a flare is going to seal. In the long run, buying the right tool is always the better value — fair dinkum.
There is also the safety value proposition. Brake repairs are not just another DIY task on the list. The tool is part of the process that lets you create a repeatable, centred flare with a much better chance of sealing correctly. When you compare that with the risk of improvised methods, the investment case gets pretty clear.
Long-term savings come from more than the tool price. A proper flare made once is cheaper than a bad flare remade twice. A proper tool is cheaper than the time lost diagnosing a leak that came from a poor flare. It is cheaper than the hit to confidence that comes from second-guessing every repair because you know the method was compromised from the start. Built tough tools pay for themselves — and then some.
Availability Australia-wide matters too. The point is not just that proper tools exist. It is that they are accessible enough that most people are better off buying or borrowing one than trying to work around the problem. That is why comparing the range of affordable flaring tools makes more sense than spending hours trying to make an unsafe method seem reasonable.
There is also peace of mind. Once you own a proper flaring tool and understand how to use it, the emergency question changes. Instead of asking "how do I double flare without tool?", you start asking the better question: "is the tubing good, is the fitting correct, and is my process right?" That is a much stronger position to be in — and it is where every Australian DIYer and tradie deserves to be when the brake line job comes up.
For users who want the straight brake-line angle, our proper brake flaring guide and the wider double flaring explained article are worth keeping in the same reading stack. They show what professionals are aiming for and why.
And if you are weighing cost against risk, remember this: you are not buying a flare tool because the tool is exciting. You are buying it because the brake system deserves a proper flare. Spot on is the only standard worth aiming for.
Do It Right: Get Proper Tools
If you came here hoping for a safe, dependable way to learn how to double flare without tool, the honest answer is that the safe path is to stop chasing the workaround and get the right gear. Improvised methods exist in stories, but they do not replace proper flare geometry, proper brake repair practice, or the peace of mind that comes from knowing the line was formed correctly. That is the plain truth of it, and no amount of forum creativity changes that.
That does not mean you need the fanciest setup on the market. It means you need a real flaring tool that can do the job properly. Budget options, entry tools, and complete kits all make more sense than trying to save money by risking a brake system repair. In the long run, proper tools are the cheaper option because they cut down on failed flares, wasted tubing, and dangerous guesswork. Ripper result, every time.
If you want a sensible place to start, compare the range of flaring and swaging kits and match the tool to the brake-line work you actually do. If you need help choosing between an entry tool and a broader kit, talk to the team to confirm compatibility. That is a much safer next step than hoping a makeshift flare will somehow be good enough.