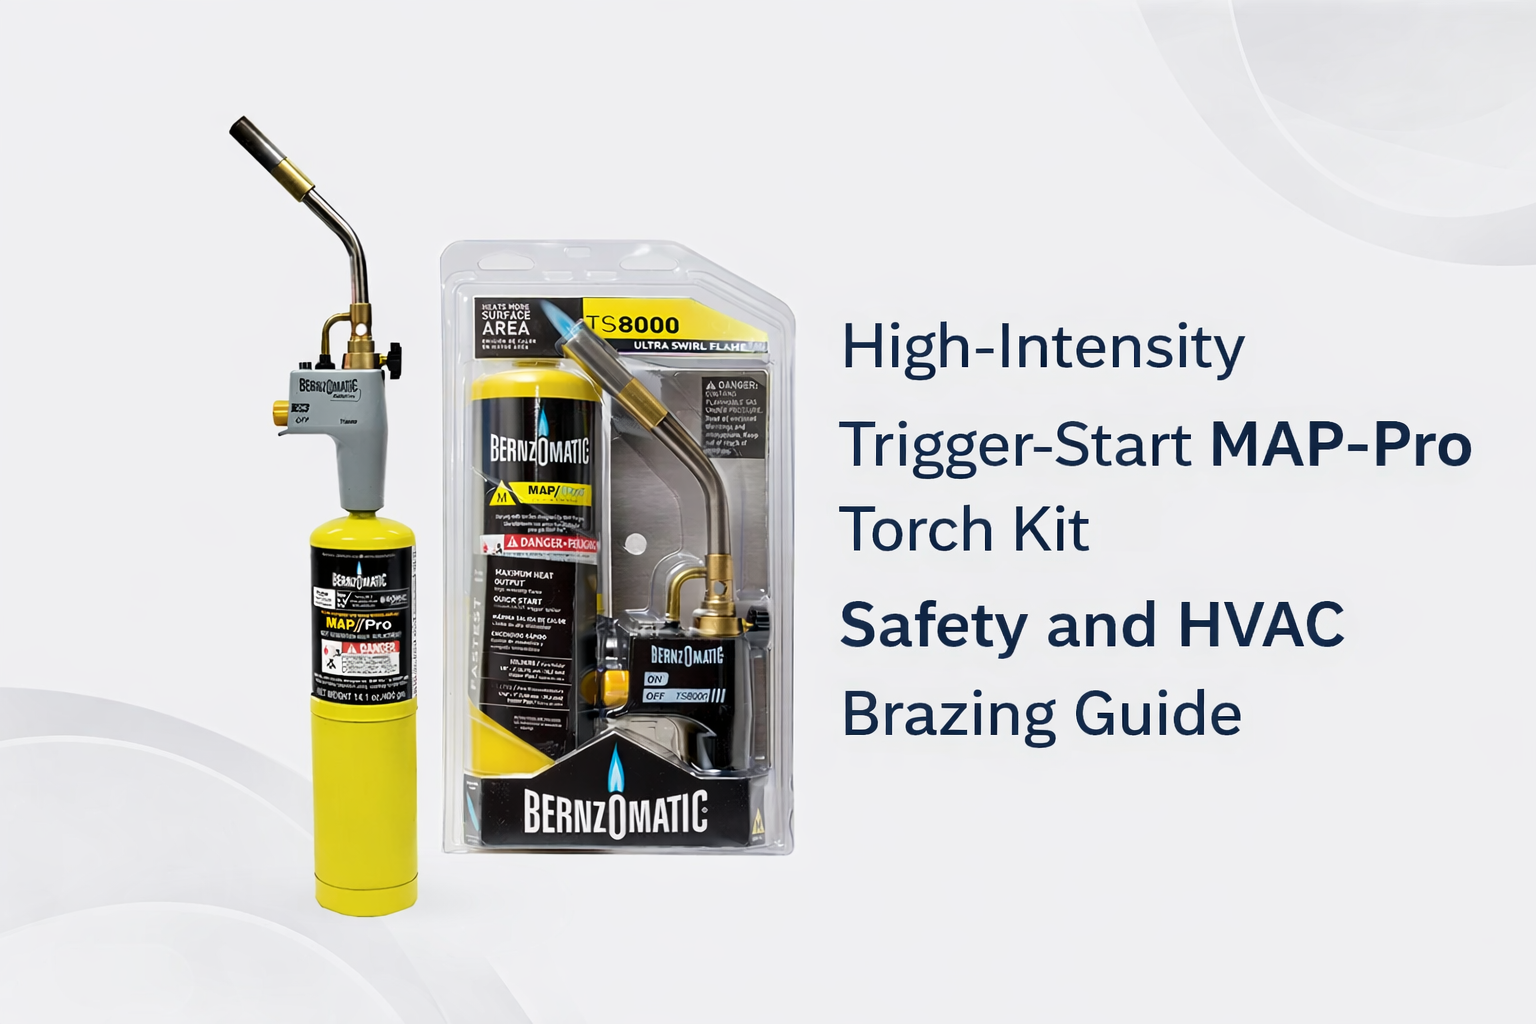
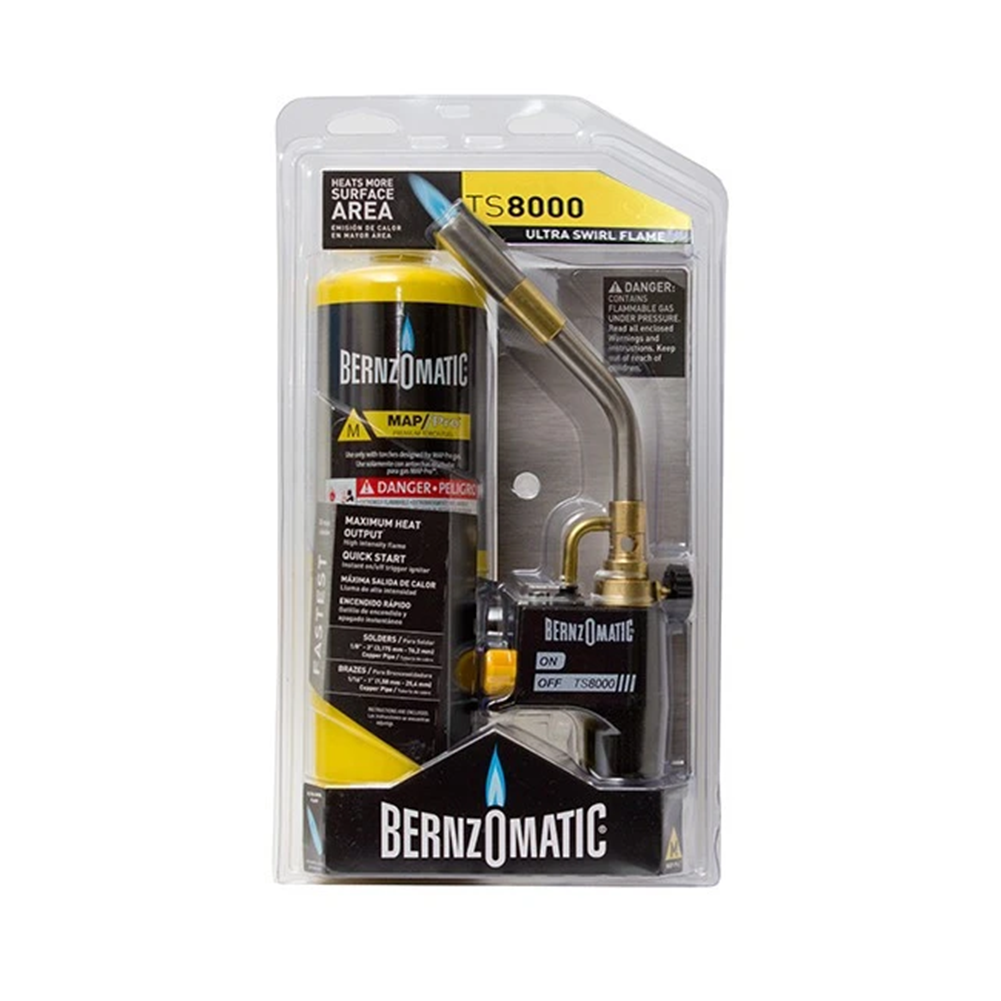
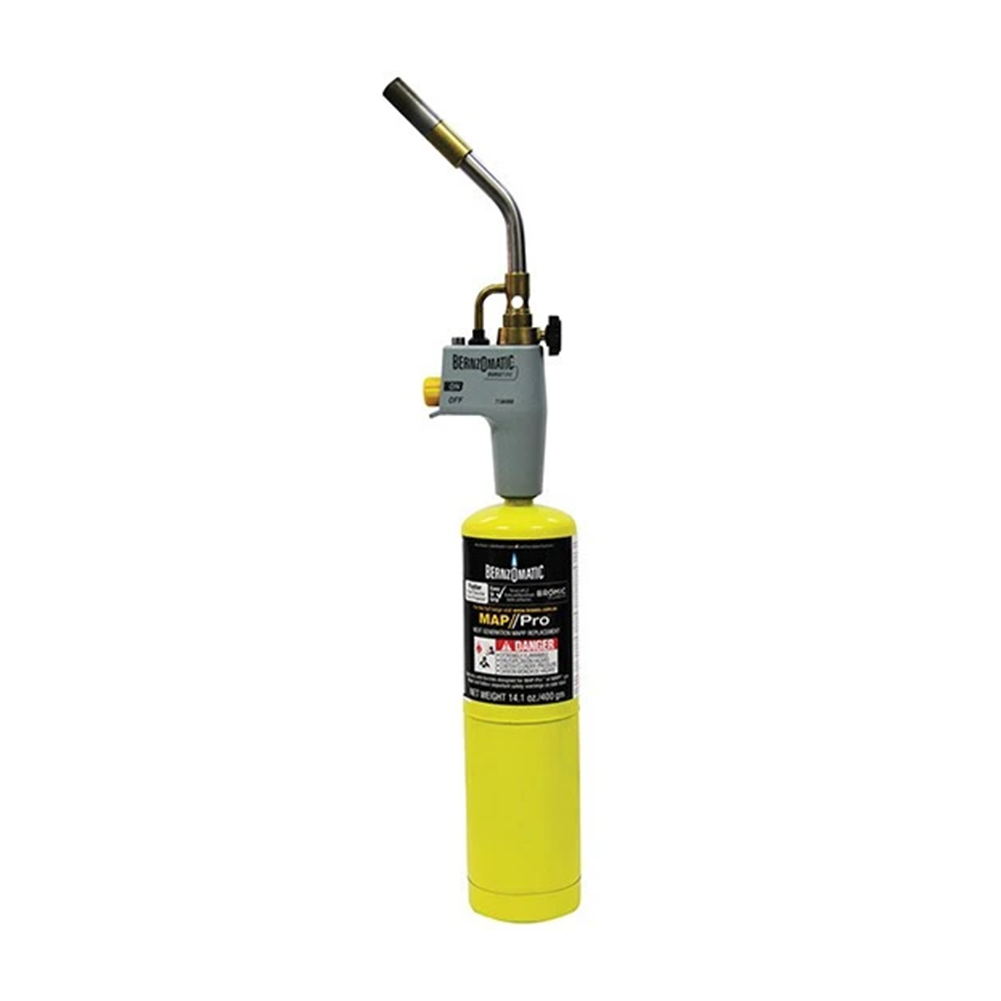
High-Intensity Trigger-Start MAP-Pro Torch Kit: What It’s For
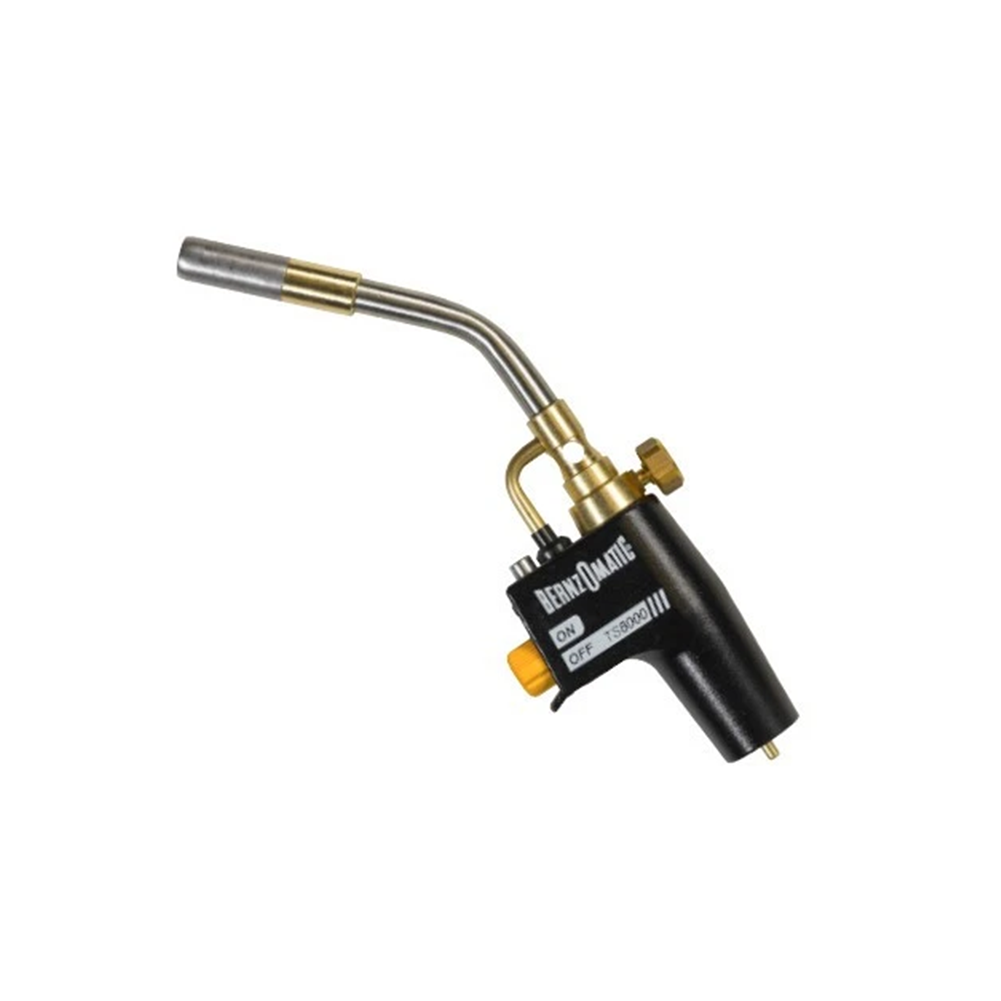
If you do hot work on copper often, a torch kit is not a “nice to have”. It’s part of your daily workflow. This high-intensity trigger-start MAP-Pro torch kit (with a MAP-Pro style cylinder included) is built for tradies who want fast ignition, steady heat, and less fuss on site.
On real HVAC jobs, this kind of kit usually shows up when you’re heating copper for brazing, warming larger fittings, or doing repeat joints across a full day of installs and service. The big benefit is not hype or “magic power”. It’s that the torch starts the same way each time, the flame is easier to control, and your process stays calm instead of rushed.
If you’re still getting your head around what “MAPP gas” means today (and why you’ll mostly see MAP-Pro style fuel), start with our guide to understanding MAPP gas properties. It clears up the naming and helps you confirm what you’re actually buying and using on the job.
Why Trigger-Start Matters for Safety and Consistency
When you’re using flammable gas, most problems don’t start with the cylinder “failing”. They start with small handling issues. A sloppy connection. A leak check that got skipped. Lighting up too close to clutter. Trigger-start ignition helps because it can reduce the awkward “where’s my striker?” moment and makes your start-up routine more repeatable.
Repeatable is safe. If every ignition step is the same, you’re less likely to do something different when you’re tired, rushed, or sweating through a Brisbane humidity day. Consistency also helps apprentices. A simple routine is easier to teach and easier to supervise.
It also matters for job quality. A torch that lights cleanly and holds a stable flame makes it easier to heat the joint evenly. That is what you want when you’re doing copper work that needs to last, not “just look good today”.
Did You Know?
A safe ignition routine is more important than raw heat. Most near-misses come from a rushed start, not from the actual brazing step.
What’s in the Kit and How It Fits Into Your Workflow
Think of this kit as a “ready-to-go” setup. You have the torch head and a compatible MAP-Pro style cylinder in one pack, which helps reduce the classic site problem: a torch head from one setup, a cylinder from another setup, and a connection that doesn’t feel right.
On a normal week, this kit fits neatly into three common jobs. First, split-system installs where you’re brazing refrigerant lines and you want fast heat-up without camping on the joint. Second, service work where you might be heating a section, making a repair, then moving on quickly. Third, workshop prep where you’re doing repeat joints and you want ignition to be quick and predictable.
It’s still not a “set and forget” tool. You’ll get the best results when you treat it like core safety gear. Store it properly, check it often, and keep the connection clean. When you do that, it becomes boring in the best way.
Torch Compatibility and Connection Checks
Before you standardise any torch kit across the van, do one simple thing: confirm your connection and thread fit. MAP-Pro style hand-torch cylinders commonly use the CGA 600 connection, but “common” does not mean “every torch head you own will fit everything you find”.
The safe habit is slow and simple. Inspect the threads on the cylinder and torch. Make sure they’re clean. Start the thread gently. If it feels gritty, crooked, or tight right away, stop. Don’t force it. Cross-threading is not just annoying. It can damage the seal and set up a leak that shows up when you’re already holding a lit torch.
Once it’s seated correctly, your next move should be a leak check before ignition. Do not “test the seal with the flame”. If you want a practical refresher on safe connection and control habits, read this guide on safe MAPP torch operation and compare it to what you do on your own jobs.
Setting Up a Safe Hot-Work Zone
Good torch work starts with the area around the job, not the torch itself. If the space is cluttered, dusty, or full of vapours, you’re taking risk for no reason. Clear your work area, remove flammable liquids, and move loose insulation and packaging away from where your flame will be.
Heat shields and fire-safe mats matter on HVAC jobs because you’re often brazing near wall linings, timber, wiring, or insulation. A few minutes of prep is cheaper than a call-back, and it’s much cheaper than fire damage. If you’re building a cleaner setup for the crew, it’s worth browsing the welding safety equipment section so your hot-work kit stays consistent across different sites.

Also, be realistic about Australian conditions. Sydney coastal air can speed up corrosion on tool parts and threads. Melbourne cold snaps can make people rush because “it’s freezing and I want it done”. WA dust can get into everything if you leave gear open in the back of the van. Your setup has to handle real work, not ideal conditions.
For a single official reference on flammable and combustible substances, SafeWork Australia’s guidance on flammable and combustible substances safety is a solid baseline for how workplaces think about hazards and controls.
Ignition and Flame Control That Feels Calm on Site
Trigger-start torches are popular because ignition is quick and the flame is easier to manage. The key is still the same: ignite in a clear area, away from the cylinder valve, away from your face, and away from anything flammable. Then adjust to a stable flame that suits the joint you’re heating.
On small copper, too much heat too fast can cook things around the joint. On bigger copper and heavier fittings, not enough heat can tempt you into camping on one spot. Flame control is about matching heat to the job. You want steady, even heating that lets the copper do the work.
If you notice odd behaviour like pulsing, flaring, or a flame that won’t settle, stop and sort it. Don’t keep going and “hope it behaves”. Torch issues are usually telling you something simple: a dirty connection, a poor seal, or a setup that needs attention.
For a deeper breakdown of safe ignition habits, flame adjustment, and shut-down routines, come back to our MAPP torch guide and treat it like a checklist you can teach to the whole crew.
Pro Tip
Do your leak check before every ignition, even if you only “moved it slightly”. Most leaks come from handling, not from the cylinder itself.
Using MAP-Pro for HVAC Brazing
This kit is commonly used for copper work where you want fast heat-up and steady flame control. On HVAC work, that usually means refrigerant line brazing, valve connections (where suitable), and repeat joints where consistency matters.
MAP-Pro style fuel often feels quicker than propane on copper, especially when the job is windy or the fitting mass is higher. The trap is thinking “faster” means “rush”. You still need the joint prepared properly. Bright copper. Correct fit-up. Even heating. Filler that flows because the copper is at the right temp, not because you melted the rod with the flame.
If you want a step-by-step workflow that keeps the safety and the joint quality together, read our brazing with MAPP gas guide. It’s the usage piece that connects the torch, the fuel, and the on-site method into one repeatable process.

Also keep the bigger picture in mind. Hot work is part of licensed refrigeration work. Strong joints protect the system, but safe habits protect people, property, and your business. If you haven’t read it yet, the MAPP gas safety guide is the safety hub for storage, transport, operating habits, and emergency steps.
Heat Control on Copper Without Cooking Everything Around It
When people say a torch is “good”, they usually mean it gives them control. Control is what stops burnt paint, damaged insulation, and toasted valve seals. With copper brazing, your goal is to heat the base metal evenly so the filler flows into the joint by capillary action.
If you camp on one spot, you can overheat the outside while the inside never really gets to a clean, even temperature. That can lead to ugly joints, weak wetting, and more oxidation. If you’re on a Sydney coastal roof with wind stripping heat away, the temptation is to “turn it up and hold it there”. A better habit is to move the flame and warm the whole joint area evenly.
On Melbourne cold mornings, copper can feel stubborn. That’s when a steady flame and patient heating matter most. When the joint is ready, the filler behaves differently. It doesn’t blob. It doesn’t fight. It starts to flow smoothly into the gap.
That is the moment you’re aiming for. Not “red hot copper everywhere”. Not “melt the rod with the flame”. Just clean, even heating that lets the joint fill properly and cool naturally without movement.
Storage and Transport: Don’t Let the Van Turn Into an Oven
MAP-Pro cylinders are pressurised fuel containers. They should be treated like fuel gear, not like “random consumables”. The back of a van in Australian summer can hit extreme temperatures, especially when the sun is on the windows and the van is parked on site all day.
A practical approach is simple. Keep cylinders upright where possible. Secure them so they can’t roll. Keep them shaded. Keep them away from ignition sources and away from oxygen cylinders. And don’t store them in sealed boxes that could trap gas if a valve weeps.
Organisation helps safety. If cylinders always live in one spot, it’s easier to check them and harder for them to get buried under tools. If your van setup is chaotic, your safety habits get harder to keep. That’s why a broader read like these HVAC van organisation tips can help, because safe storage is a lot easier when everything has a home.
For the full storage and transport playbook (including what to do when something goes wrong), use the MAPP gas safety guide as your reference and build the habits into your daily pack-up routine.
When to Swap Cylinders and How to Avoid “Running Low” Joints
One of the sneakiest causes of poor hot work is running low on fuel and trying to “make it work”. When fuel is low, flame behaviour can change. You might find yourself hovering longer. You might rush the joint. You might try to compensate with bad angles and too much heat in one spot.
The fix is not complicated. Keep spare cylinders. Replace before it becomes a problem. If you’re using this kit regularly, it makes sense to keep a small buffer of fuel so you can stay calm and consistent across the day.
If you need extra fuel on the van, you can keep your stock consistent with MAP-Pro gas cylinders for regular hot-work use once you’ve confirmed your torch compatibility and you know what your normal usage looks like.
On bigger days, the best outcome is boring: you finish the job, the last joint is as clean as the first joint, and nobody is doing “just one more” on a half-empty cylinder.
Common Problems on Site and How to Fix Them
Most torch problems are simple. They’re just inconvenient when you’re on a roof, in a ceiling, or trying to finish a job before the customer gets home.
If ignition feels rough or delayed, first check the basics. Is the connection seated properly? Do the threads look clean? Is the cylinder valve opened smoothly, not slammed open? A gentle, repeatable ignition routine usually fixes most “start-up drama”.
If the flame pulses or flares, shut down and re-check your seal and your setup. Don’t keep going and hope it settles. Pulsing can be a sign of a poor connection, a damaged seal, or an issue that needs attention before you continue.
If you smell gas, stop. Ventilate. Remove ignition sources. Confirm the source of the smell and do not ignite again until you’ve fixed it. The safe move is always to slow down for the minute it takes to confirm your setup.
If your torch feels “weak”, don’t jump straight to blaming the cylinder. Job conditions matter. Wind can strip heat away fast. Cold copper takes longer to warm. A poor flame angle can waste heat. Go back to basics: stable flame, even heating, clean joint, and a calm approach.
And if the job itself is the problem, remember you can change the setup, not just the torch. Heat shielding, better access, and a cleaner work zone can be the difference between a stressful job and a smooth one.
Training Apprentices: Build a Routine They Can Repeat
On many teams, the biggest risk is not the torch. It’s inconsistent habits. One tech does a leak check every time. Another tech never does. One apprentice is taught to ignite in a clear zone. Another apprentice lights up next to clutter because “it’s quicker”.
A trigger-start kit can help because it encourages a simple routine. But the routine still has to be taught and enforced. Inspect the cylinder. Check the threads. Connect gently. Leak check before ignition. Clear the work area. Ignite cleanly. Control the flame. Shut down properly. Let things cool. Pack away in a safe spot.
If your crew brazes regularly, tie the safety routine to the actual usage routine. That’s why the combination of the brazing with MAPP gas guide and the MAPP gas safety guide works well together. One explains how to do the job cleanly. The other explains how to do it safely.
Comparison Table: Common Torch Setups for HVAC Copper Work
There’s no single “best” setup for every job. The right torch and fuel depends on copper size, site conditions, and how often you do hot work. The table below is a practical comparison that helps you decide what suits your workflow.
| Setup | Where it fits best | Why techs choose it | Watch-outs |
|---|---|---|---|
| Trigger-start MAP-Pro hand torch kit | Regular HVAC hot work, repeat joints, day-to-day brazing and heating tasks. | Fast ignition, steady flame feel, easier to keep a consistent routine. | Still needs good prep and leak checks. Heat can punish sloppy technique. |
| Standard propane hand torch | Light heating and occasional hot work where speed is less critical. | Simple and common, often cheaper to run for light work. | Slower heat-up can tempt people to hover and overheat surrounding areas. |
| Oxy-fuel setup (higher intensity) | Heavier copper, larger fittings, and situations needing higher heat output. | Very fast heat and strong capability for thicker work when used correctly. | Narrower safety margin. More training and stricter storage separation needed. |
Keeping the Kit Reliable: Small Maintenance That Pays Off
This is the part most people skip, then regret later. Keep the threads clean. Keep the torch head protected in the van. Don’t throw it loose in a pile of heavy tools. If the torch gets knocked around, the connection can suffer, and the connection is where safety starts.
After a job, let everything cool. Shut down properly. Store the cylinder in a stable spot. Don’t leave it sitting in direct sun on a driveway. Don’t leave it rolling around behind the seats. The best van setups make the safe choice the easy choice.
If you’re ever unsure about what fuel you’re using, or how it should be stored and handled, go back to the complete MAPP gas guide and treat it like your reference page for the whole content hub.
Tech Specs
This kit is sold as a trigger-start MAP-Pro torch and cylinder bundle. Connection, storage limits, and handling warnings should be confirmed on the cylinder label and the torch instructions for your exact setup.
FAQs
Why does trigger-start ignition matter for safety on site?
Trigger-start helps make your ignition routine more repeatable, which reduces rushed starts and missed steps. A consistent routine is easier to teach, supervise, and follow when you’re tired or under pressure.
Do I need to leak-check every time before ignition?
Yes. Leak-check before every ignition, including after you’ve moved the torch or cylinder. Most leaks come from handling and connection issues, not from the cylinder itself.
What should I do if the flame pulses, flares, or won’t settle?
Shut down and investigate. Don’t continue and “hope it behaves”. Re-check the connection, cleanliness of threads, seal condition, and overall setup before lighting again.
How should MAP-Pro cylinders be stored in a van in Australian conditions?
Keep cylinders secured so they can’t roll, keep them shaded and away from heat and windows, and avoid sealed boxes that can trap gas if a valve weeps. Treat them like fuel gear with a dedicated storage spot.
What’s the biggest mistake when using MAP-Pro for HVAC brazing?
Confusing “faster heat-up” with “rush the joint”. You still need bright copper, correct fit-up, even heating, and filler that flows because the copper is at temperature—not because the rod is being melted with the flame.
Quick Safety Recap and the Next Step
If you want MAPP gas safety and performance to feel easy, keep the system simple. Store cylinders safely. Keep them cool, secure, and ventilated. Inspect before use. Leak check before ignition. Ignite in a clear area. Control the flame. Shut down properly. Pack away in a dedicated spot.
To connect the dots across the whole hub, use the complete MAPP gas guide as your foundation, keep the MAPP gas safety guide as your daily reference for handling and storage, and follow the brazing with MAPP gas walkthrough when you want a clean, repeatable method on copper.
If you’re building out a full hot-work setup for the van, browse compliant welding equipment so your heat shielding, mats, and safety gear match the way you actually work on site.
If you’re not sure whether this trigger-start kit matches your typical jobs, your copper sizes, or your team’s experience level, talk to our team to confirm compatibility. If you’re equipping a crew or standardising a van setup across multiple techs, contact us for a quote and we’ll help you choose a safe, repeatable torch-and-fuel workflow that suits Australian job conditions.