When You Actually Need It on HVAC Work
Why This Kit Exists
If you’ve ever stood there on a windy roof trying to heat a bigger fitting and thought, “This is taking forever,” you already understand why oxy-fuel kits exist.
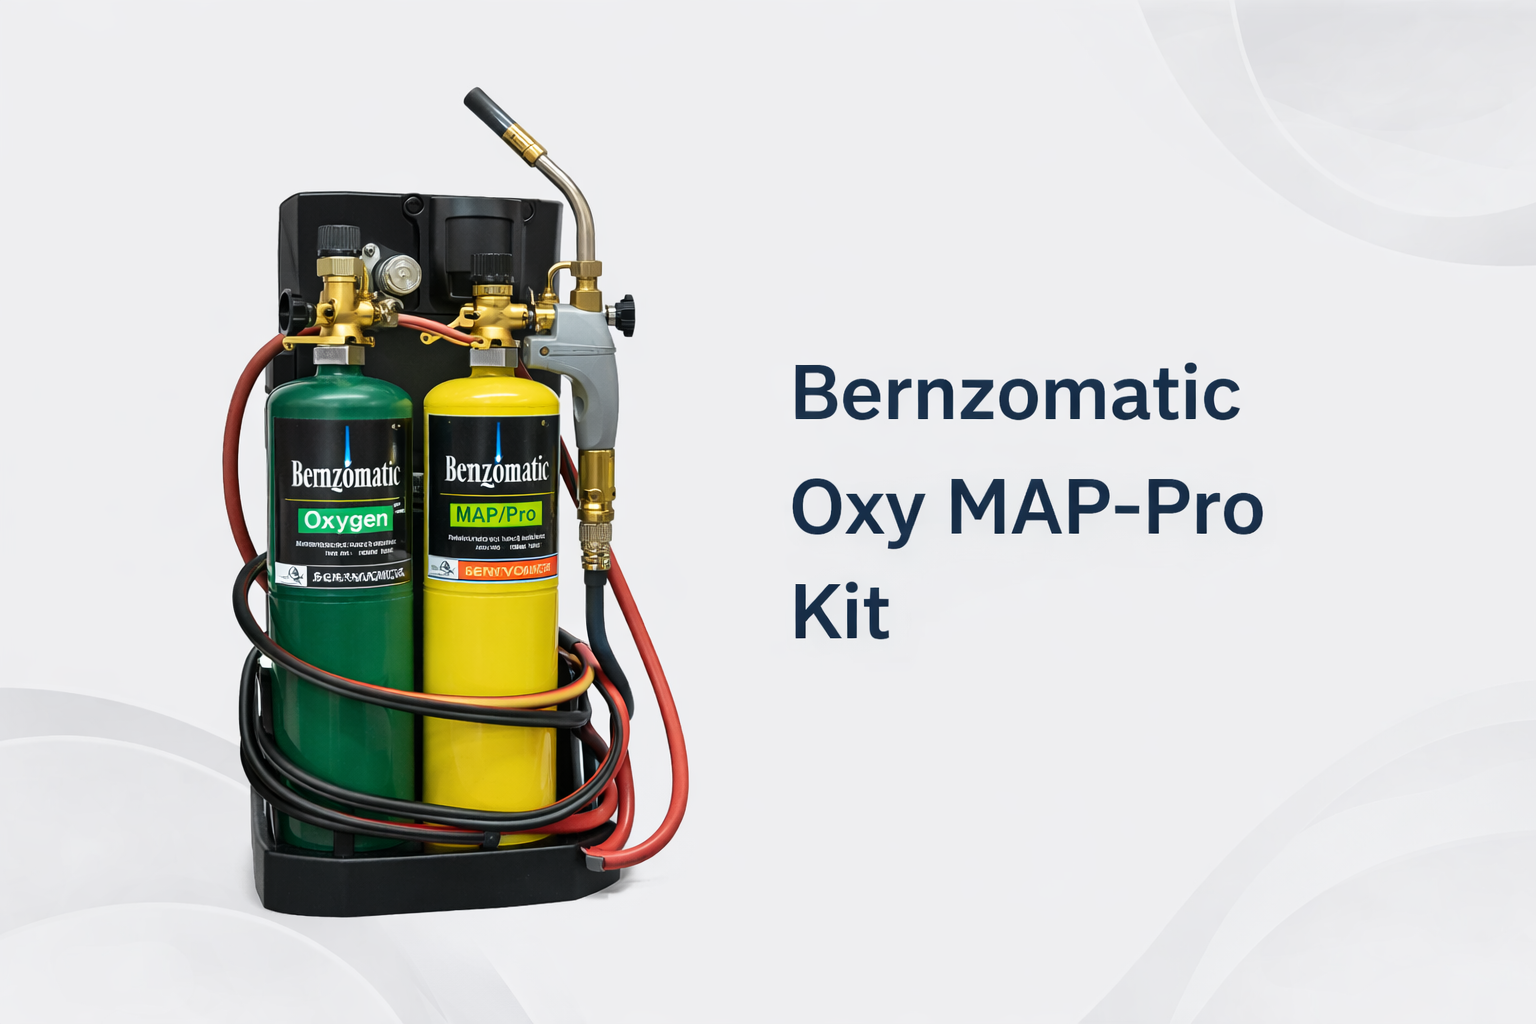
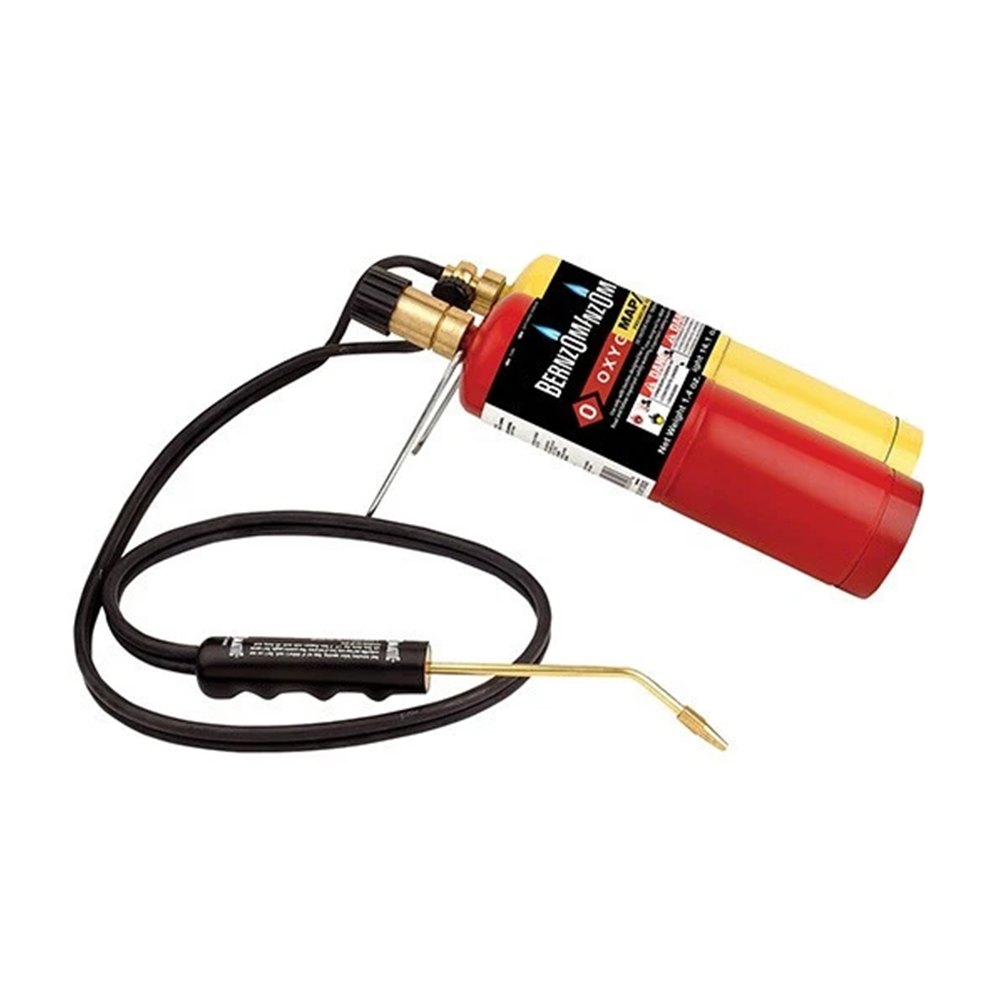
The Bernzomatic Oxy MAP-Pro kit is a step up from a standard MAP-Pro hand torch because it adds oxygen. That lets you run a hotter, tighter flame that can heat thicker copper and heavier valve bodies faster.
But it’s also a step up in responsibility. You’re now managing two cylinders, higher heat, and a bigger fire risk if your setup or habits are sloppy. This guide is written for Australian HVAC tradies who want the straight answer: what this kit is for, when it makes sense, how to use it safely, and how to store and transport it in real Aussie conditions.
If you want the bigger context first (what “MAPP gas” means today, what MAP-Pro is, and what to check before you buy), start with our hub guide on understanding MAPP gas properties.
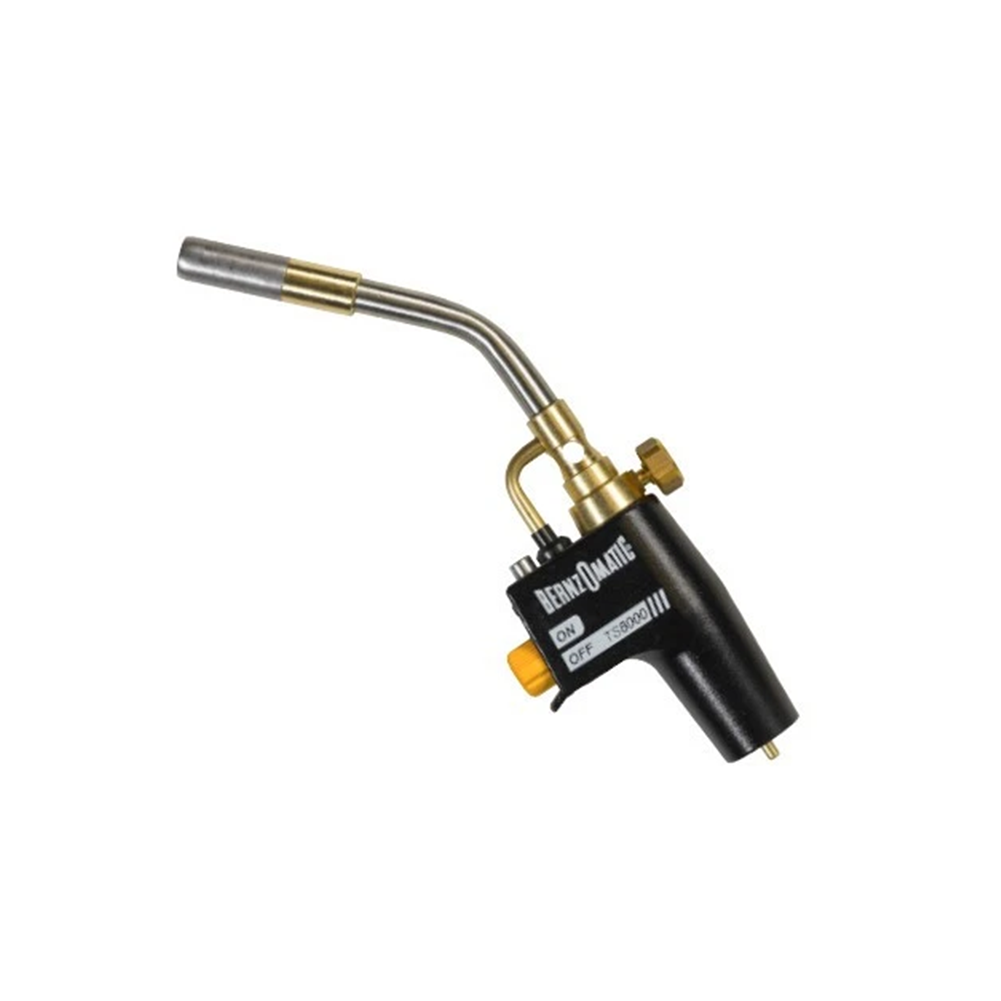
What This Kit Includes and Why It Matters
With any oxy-fuel kit, the first safety question is simple: what exactly are you running, and what does that change on site?
An oxy MAP-Pro kit is not just “a hotter torch head”. It’s a small oxy-fuel system. That means you have a fuel cylinder and an oxygen cylinder feeding a torch. The moment oxygen is part of the setup, storage and handling habits matter more, because oxygen can make other things burn harder and faster.
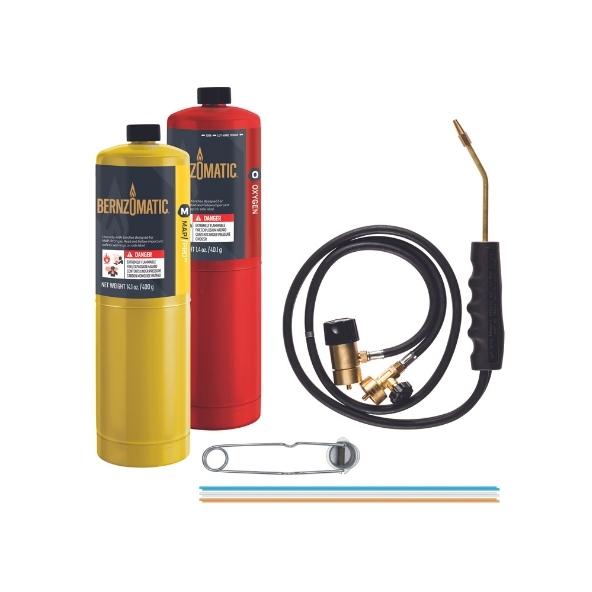
Depending on the kit configuration, these sets are commonly supplied with the torch assembly and the small cylinders needed to run it. The exact items can change between suppliers and pack versions, so the smart habit is to check the product listing and confirm what’s included before you plan storage in the van or workshop.
Why does “what’s included” matter? Because it affects how you pack it, how you separate it from other gear, and how you keep the cylinders protected from knocks and heat. It also affects training for apprentices. Two-cylinder gear needs a calmer routine than a single handheld torch.
Did You Know?
Oxygen doesn’t “burn” by itself, but it can make ordinary materials burn far more aggressively. That’s why clean hands, clean fittings, and good storage habits matter more once oxygen is in the mix.
Why Add Oxygen to MAP-Pro in the First Place?
MAP-Pro is popular on HVAC work because it’s simple: one cylinder, quick ignition, and strong heat for a handheld setup. For most split system line sets, that’s plenty.
The limitation is that a handheld torch uses air as the oxygen source. Air works, but it limits flame temperature and how focused the heat can be.
When you add oxygen, you get a hotter flame and a more concentrated heat pattern. On real jobs, that can reduce the time you spend “hovering” on a joint. Less hovering often means less heat soak into nearby insulation, paint, wiring, and wall linings. It can also mean cleaner filler flow, because the joint reaches working temperature more evenly.

That said, hotter is not automatically better. It’s a tool. Higher heat reduces your margin for error. You can overheat small joints faster. You can ignite nearby materials faster. And you can turn a small mistake into a big incident if you don’t control your setup.
The right mindset is simple: step up to oxy-fuel when you have a real reason, not because you want to “feel pro”. If a standard MAP-Pro torch already does your daily work cleanly, the safer choice is often to keep the wider safety margin of the simpler setup.
Common HVAC Use Cases for an Oxy MAP-Pro Setup
This kit tends to make sense when you hit the edge of what a basic handheld torch can do comfortably.
One common scenario is heavier copper work where the fitting mass soaks up heat and a standard torch feels slow. You see it on larger suction lines, thick-wall copper, and chunky fittings that feel like they’re swallowing your flame.
Another scenario is heavier valve bodies and components that pull heat away from the joint. When you’re trying to braze near a body that acts like a heat sink, being able to bring heat in faster and more focused can help you get the joint to temperature without cooking the whole area for ages.
Wind is a big driver too. On rooftop jobs, wind can strip heat away and make a normal flame feel weak. If you’re fighting wind and wasting time, an oxy-fuel setup can help you get in and out with cleaner control, as long as your fire safety prep is solid.
Tight access is the tricky one. In tight spaces, faster heat can reduce how long you’re exposing surrounding materials to warmth. But tight spaces are also where higher heat can bite you. If you can’t protect the area properly, you should not be lighting a hotter flame in the first place.
What it’s not for is “more heat on everything, all the time.” If most of your work is small split system line sets, a standard MAP-Pro torch setup is often the better daily driver because it gives plenty of heat with a wider safety margin and simpler handling.
Safety First: Oxy-Fuel Is a Step Up in Risk
When you move from a single-cylinder torch to oxy-fuel, your safety system needs to mature too. You now have two cylinders to manage, two connections, and a higher-energy flame.
That means your leak check habits, your storage habits, and your emergency readiness all matter more than ever. If you’re already a bit casual with gas gear, fix that first before you step up in heat.
If you want a full, practical baseline for handling, storage, transport, and what to do when things go wrong, use our MAPP gas safety guide as your overall playbook and then treat oxy-fuel as “that plus extra care” rather than “same thing, just hotter”.
Start with basics that should never be skipped. Keep cylinders upright. Keep them ventilated. Keep them away from ignition sources. Keep them away from excessive heat. And keep them protected from impacts that can damage valves.
With oxygen in the mix, separation becomes more important. Don’t treat fuel and oxygen like “two bottles in the same pile”. Give them their own stable, protected spots. Also keep oil and grease away from oxygen components. If you don’t know why that matters, treat it like a hard rule and don’t argue with it.
Finally, remember the human factor. Most hot-work incidents don’t start with a cylinder “randomly failing”. They start with shortcuts: someone skipping a leak check, someone lighting up before the area is cleared, or someone storing cylinders badly because they’re tired at the end of the day.
Tech Specs
This kit is an oxy-fuel MAP-Pro setup, designed to give a hotter, more focused flame than a standard handheld torch. Exact heat and flame behaviour vary by tip, airflow, and technique, so treat “hotter” as a capability to control, not a guarantee.
Set-Up and Connection Checks That Prevent Bad Days
Safe setup starts before you connect anything. This is where good tradies slow down for 60 seconds and save themselves hours of pain later.
First, inspect the cylinders. If either cylinder is dented, heavily rusted, valve-damaged, or looks like it’s been knocked around, don’t gamble. Swap it out. A cylinder is cheap compared to what happens when a leak meets a flame.
Next, check threads and sealing surfaces. Cross-threading is more common than people admit, especially when someone is rushing at the end of the day or trying to finish a job before the weather turns. If it doesn’t thread smoothly, stop. Back off. Check. Don’t force it.
Once connected, do a proper leak check before ignition. Use a suitable leak detection solution on the joints and look for bubbling. If you see a leak, shut down and fix the issue before you go anywhere near ignition.

Then prepare the work area. Clear dust. Clear insulation fragments. Move solvents and aerosols. Protect surfaces. Put heat shielding in place where needed. The highest heat in the world won’t save you if you light up next to flammable vapours.
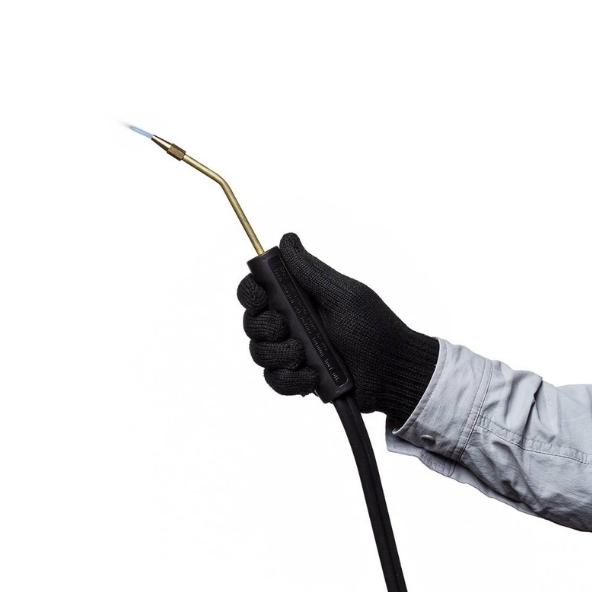
Ignition should be calm and controlled. If the flame behaviour is unstable, pulsing, or flaring strangely, shut it down and re-check your setup. Strange flame behaviour is often a warning sign that something isn’t right.
On coastal jobs around Sydney and Newcastle, salt air can speed up corrosion on threads and fittings. That can make connections feel gritty and increase the chance of cross-threading. If anything feels rough, stop and clean or replace parts before you light up.
Pro Tip
Practise your shut-down sequence until it’s muscle memory. In an emergency, you don’t want to “think about valves.” You want your hands to do the right thing automatically.
How to Use This Kit for Brazing Copper Lines Safely
For HVAC work, brazing is usually the main reason you’d consider an oxy MAP-Pro kit. The fundamentals don’t change: clean prep, correct fit-up, even heating, smooth filler flow, and natural cooling without movement.
What changes is the speed and intensity of heat. You can bring a joint up to temperature faster. That’s helpful, but it also means you can overcook a joint faster if you’re heavy-handed.
Start with prep. Cut square. Deburr properly. Clean the tube and fitting until the copper is bright. If the joint isn’t clean, filler won’t wet properly and you’ll be tempted to “fix it with more heat,” which is how joints get ugly and unreliable.
Then focus on fit-up and support. If the joint is not seated properly, you’ll chase it with heat and rod. If the pipe can move, you’ll crack the joint as it cools. Support the line so the joint stays calm while you work.
When you heat, heat the base metal, not the rod. With oxy-fuel, it’s extra tempting to chase the rod with the flame because everything feels fast. Resist that. If the copper is ready, the filler will flow like it’s meant to. If it isn’t ready, you’ll blob filler on the outside and end up with a joint that looks filled but isn’t properly bonded.
Use heat shielding and stay aware of what’s behind the joint. In plant rooms and ceiling spaces, there’s often wiring, insulation, paint, timber, and dusty surfaces. A hotter flame means the “oops moment” is shorter. You need your area prep locked in before you ignite.
If you want a clear, step-by-step workflow for prep, heating, filler flow, and job-safe habits, read our step-by-step brazing with MAPP gas guide and use it as your baseline procedure.
One more pro habit that matters is nitrogen purging on refrigerant lines. Purging is about keeping the inside of the pipe cleaner while you braze. It’s not just about passing a pressure test today. It’s about reducing internal oxidation that can become contamination and show up later as restrictions and weird faults.
After the joint is done, let it cool naturally. Don’t shock cool. Don’t move the pipe while the joint is still soft. Many “mystery leaks” start as tiny cracks from movement while the joint is cooling.
In Melbourne cold snaps, copper can feel stubborn early in the morning and techs can get impatient. In Brisbane humidity, everyone runs hot and wants to rush. In both cases, the safe move is the same: slow down for the prep, then let the heat do the work cleanly.
Choosing Between This Kit and a Standard MAP-Pro Torch
A lot of tradies buy hotter gear thinking it automatically equals better results. In reality, the best torch is the one you can control confidently on the jobs you do most often.
If you want a simple MAP-Pro torch setup with consistent ignition and a wider safety margin, a standard kit can be the better daily tool. If your work is mostly split systems, light commercial, and repeat line set brazing, a setup like the trigger-start MAP-Pro torch kit can cover a lot of jobs without adding oxygen complexity.
If you’re unsure which torch head style suits your copper sizes and job conditions, our guide to safe MAPP torch operation is a practical way to match flame style to your day-to-day work and keep your habits consistent.
And if you’re still deciding between fuels (and you want the honest trade-offs in plain English), the MAPP gas vs propane comparison helps you pick based on job reality, not internet myths.
| Setup | Best suited for | Safety margin (practical view) | What to watch |
|---|---|---|---|
| Oxy MAP-Pro kit | Heavier copper, bigger fittings, windy rooftops, faster heat-up on high-mass joints. | Lower margin if you rush. Higher heat means faster consequences. | Two-cylinder handling, oxygen safety, area prep, fast overheating if heavy-handed. |
| Standard MAP-Pro hand torch | Everyday HVAC brazing, line sets, service work, general hot work where control matters most. | Generally wider margin. Still needs respect and leak checks. | Slower on heavier joints. Wind can strip heat. Avoid hovering too long. |
| Full-size oxy gear | Workshop or heavy-duty hot work where full capacity and long run time are needed. | High capability, but needs training, correct storage, and stricter site controls. | More gear management, more compliance expectations, higher risk if stored poorly. |
Fuel Planning: Why Consistent Cylinders Make You Safer
Fuel planning sounds boring, but it’s one of the biggest safety levers on hot work.
When fuel is low, people rush. When cylinders are mixed and mismatched, people force threads. When the van stock is messy, people skip inspections because everything is buried under tools.
A simple improvement is standardising what you carry. If your team uses MAP-Pro regularly, keeping your supply consistent helps you avoid “random bottle” problems and the temptation to stretch the last cylinder through the last joint.
If you need a quick refresher on what MAP-Pro is and how it fits into the modern “MAPP gas” conversation, jump back to understanding MAPP gas properties and use that as the hub reference for the whole crew.
Consistency also helps with training apprentices. When the setup is the same every time, safe habits become automatic. That’s how you reduce incidents long term, and it’s how you reduce call-backs from rushed, messy hot work.
Storage and Transport: Two Cylinders, Twice the Discipline
On Australian job sites, storage and transport are where most bad habits live. It’s not glamorous, and it happens at the end of the day when everyone is cooked.
Start with a simple rule: cylinders should be upright, stable, protected, and ventilated. That’s true in a workshop, and it’s true in a van.
In a van, cylinders should not roll. They should not live loose on the floor. They should not be jammed under heavy tools. And they should not sit in direct sun behind glass.

Heat is the big Aussie trap. A cylinder left in a hot vehicle can climb to nasty temperatures fast. That increases cylinder pressure and increases risk. Shade, airflow, and a stable rack beat “it’ll be right” every day.
With oxygen involved, keep it separated from fuel as part of your storage habit. Don’t treat “two bottles” as a bundle. Treat them as two hazards that need proper control.
If you’re building a proper hot-work section in the van or workshop, it helps to view the whole category of welding and brazing safety gear so you’re not missing basics like heat shielding, safe ignition tools, and storage supports that make safe habits easy to repeat.
Troubleshooting: When the Flame Feels Wrong or Heat Isn’t There
Oxy-fuel gear gives you strong performance, but it also gives you strong signals when something is off.
If flame behaviour is unstable, pulsing, or flaring oddly, treat that as a warning sign, not an annoyance. Shut down and check your setup. Don’t keep working and hope it “settles down”.
If heating feels weak, don’t automatically assume the copper is “hard”. Check for airflow issues, check for connection issues, and check that you’re heating the joint evenly. Many heating problems are actually technique problems, especially when someone is chasing the rod with the flame instead of heating the base metal.
If you suspect a leak at any point, stop. Ventilate. Don’t introduce sparks. Re-check with leak detection solution before you ignite again.
If you’re working on a windy roof and the flame keeps getting pushed around, stop and improve your wind control and shielding. Wind can turn a controlled flame into a messy flame quickly, and messy flames are how nearby materials ignite.
The safest tradie mindset is simple: if anything feels unusual, treat it like a fault until proven otherwise. You can always relight. You can’t undo a fire.
Compliance and Site Rules in Australia
This isn’t legal advice. It’s the job reality. Hot work on Australian sites often comes with permit systems, fire watch rules, and strict work area prep requirements.
If you work on commercial or construction sites, expect hot work permits. Expect required extinguishers. Expect isolation of flammables. And expect site supervisors to ask what you’re doing and why.
Training and competency matter. If you’re stepping up to oxy-fuel, you should be confident in setup, leak checks, ignition, shut-down, and emergency response. If you’re not confident, treat that as a sign to slow down and get the right guidance and supervision.
For one clear, official baseline on controls around flammable and combustible substances, SafeWork Australia’s guidance on flammable and combustible substances is a useful reference for hazard awareness and risk control thinking.
On top of that, follow your workplace procedure and your site rules. Don’t assume that what’s acceptable on a domestic back patio is acceptable on a Tier 1 build. Different sites have different risk tolerances for a reason.
FAQs
When should I use an oxy MAP-Pro kit instead of a standard MAP-Pro hand torch?
Use oxy-fuel when you regularly hit heavier copper, bigger fittings, or windy rooftop work that makes a hand torch feel slow. If most of your work is split system line sets and everyday brazing, a standard MAP-Pro torch often gives a wider safety margin and simpler handling.
Is an oxy-fuel setup better for every HVAC brazing job?
No. Oxy-fuel is hotter and less forgiving. It’s great when you need it, but it can overheat small joints quickly and increases fire risk if the area is not prepared properly. Step up only when you have a clear reason and consistent safety habits.
What are the biggest safety differences once oxygen is added?
Oxygen can make other materials burn more aggressively, so separation, cleanliness, and storage discipline matter more. Keep oil and grease away from oxygen components, and give fuel and oxygen cylinders their own stable, protected positions.
What’s the safest way to leak-check an oxy-fuel setup?
Use a proper leak detection solution on connections after assembly and before ignition, and look for bubbles. If you see a leak, shut down and fix it before lighting. Never use a flame to “test” a connection.
Do I still need nitrogen purging on refrigerant lines when using oxy-fuel?
Yes. Purging is about keeping the inside of refrigerant pipework cleaner while you braze, reducing internal oxidation and contamination risk. Oxy-fuel changes heat intensity, not the value of purge habits.
Is the Bernzomatic Oxy MAP-Pro Kit Right for You?
If your work regularly hits heavier copper, larger fittings, and conditions that strip heat away, an oxy MAP-Pro kit can be a genuine time-saver and a control upgrade.
If your work is mostly standard split installs and light brazing, a standard MAP-Pro torch setup may be the smarter daily tool because it gives plenty of heat with a wider safety margin.
The best decision is the one that matches your jobs, your skills, and your safety systems. Heat is useful. Uncontrolled heat is a problem.
If you’re unsure what setup suits your typical copper sizes, job conditions, and team workflow, talk to our team to confirm compatibility. If you’re equipping a crew and want to standardise a safer hot-work setup, contact us for a quote and we’ll help you choose a practical, repeatable kit that fits Australian job reality.