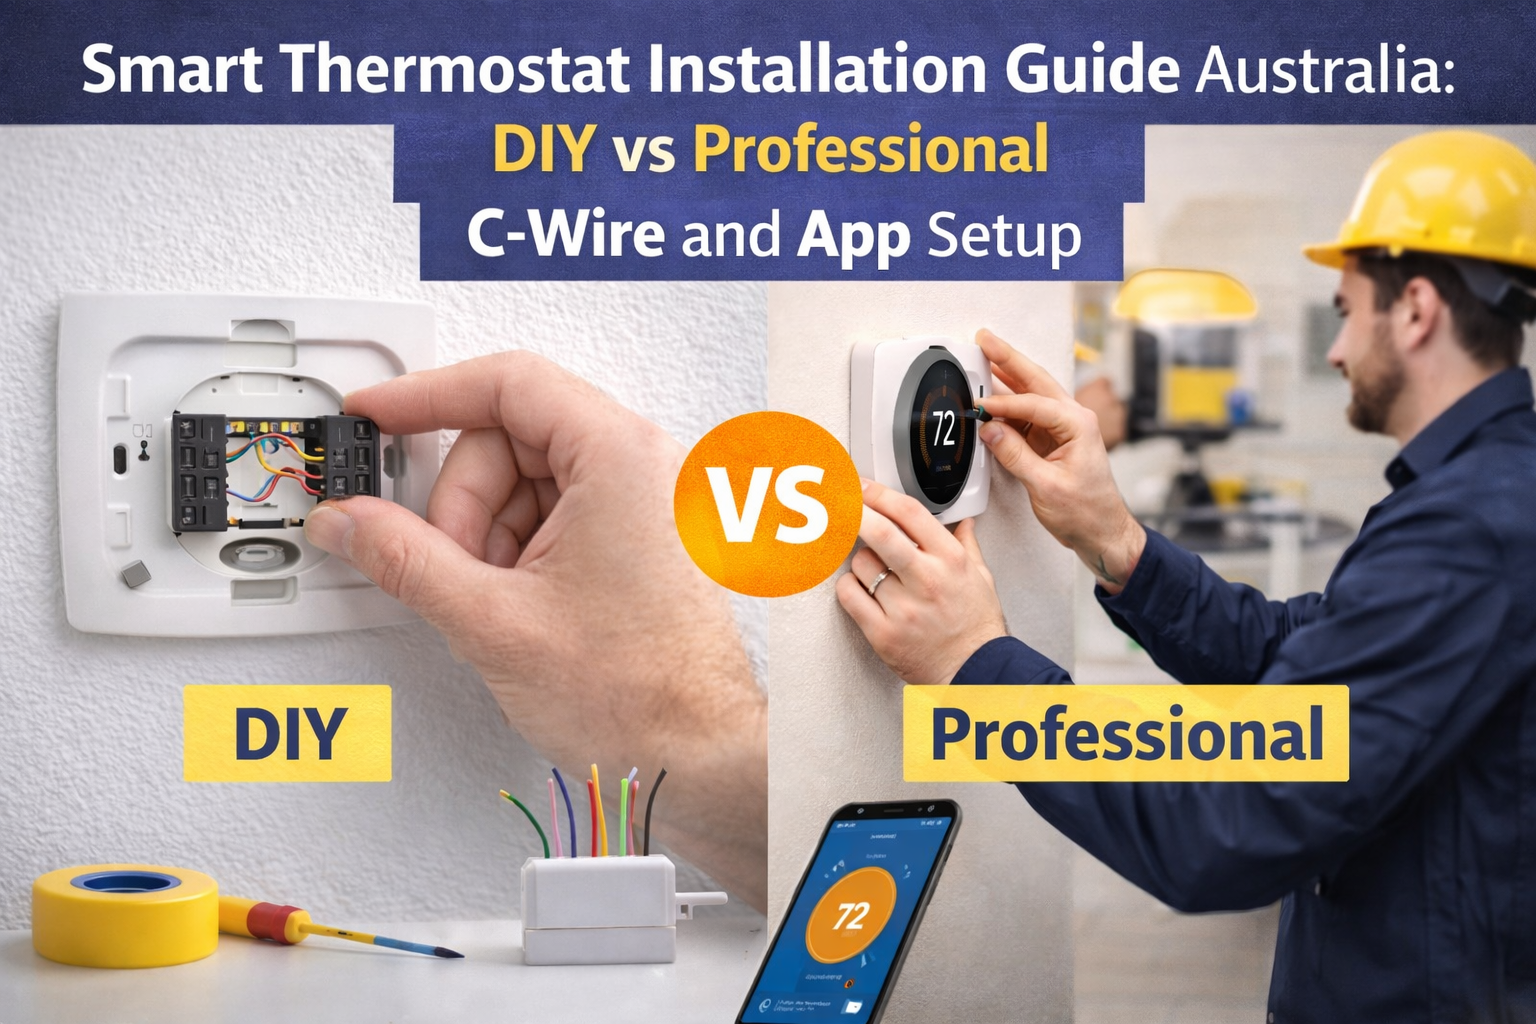
DIY or Professional Install

Smart thermostat installation looks scarier than it is. Most of the job is small, careful steps: turn power off, label wires, move wires to the right terminals, then set up the app. If you can follow instructions and take your time, a lot of installs are very doable.
The problem is the one thing that stops heaps of DIYers: the C-wire. People get halfway through, realise the new thermostat needs constant power, and then the old wiring doesn’t have the right spare wire. That’s when installs stall, or people start “making it work” with risky guesses.
This guide is the straight-up Australian setup walkthrough. We’ll cover compatibility first (because not every system can use a WiFi thermostat), explain the C-wire smart thermostat issue in plain English, then walk through smart thermostat wiring and app setup step-by-step.
We’ll also keep it grounded in Australian conditions. Brisbane humidity often drives long cooling runs, Sydney coastal air can make comfort feel “clammy” even at the same temperature, and Melbourne cold snaps can test your heating timing. The thermostat is not magic, but better control can stop a lot of waste.
If you want the basics first, start with understanding intelligent thermostats, then come back here for the practical install steps.
And if you’re comparing models while you read, our smart thermostat products page helps you see what sits where in the range, from simple wired controls through to full WiFi options.
Did You Know?
A big chunk of “high energy bills” is timing waste. A smarter schedule (or a smarter thermostat) can cut run time without making the house uncomfortable.
So, DIY or professional install? Here’s the honest answer. If your system is the right type, the wiring is straightforward, and you can confirm power is off at the right points, DIY can work. If your system has tricky wiring, no C-wire, zoning, or anything you’re not 100% confident about, a professional install is usually the cheaper option long-term because it avoids damage, call-backs, and frustration.
Before You Begin: Compatibility Check

Before you buy anything or pull a thermostat off the wall, do a compatibility check. This step saves the most time, because it stops you buying a thermostat that can’t control your system.
First, confirm your HVAC system type. In Australia, many smart thermostats are designed for systems that use low-voltage control wiring (often called “24V control”). This is common on ducted heating and cooling systems with a control board. A lot of split systems and many wall-mounted reverse-cycle units use their own proprietary controllers and communications, which do not work like a standard 24V thermostat. That’s why “WiFi thermostat installation Australia” searches can be confusing, because the right answer depends on what you’re installing it onto.
Next, check voltage requirements. A typical smart thermostat installation is based around low-voltage control circuits, commonly 24V in the thermostat wiring world. But Australian homes also have 230–240V mains power in the same building. The thermostat on the wall might be low-voltage, while the equipment nearby still contains mains power. Treat every panel with respect.
Now check your existing thermostat type. If your current controller is a simple display with multiple labelled low-voltage terminals behind it (often with small gauge wires), you’re more likely in the right “thermostat world”. If your current controller is part of a special brand system, uses a data cable, or looks like a proprietary room controller, compatibility needs extra checking.
This is where a thermostat compatibility guide is handy. It helps you spot red flags early, like systems that need brand-specific controls, or setups where WiFi thermostats need extra interface modules.
Then comes the big one: the C-wire (common wire). Many smart thermostats need constant power. If you don’t have a C-wire connected at the thermostat, you might still be able to install, but you’ll need the right approach. We’ll cover the options in the next section.
Also check WiFi signal strength at the thermostat location. Smart thermostat app setup is painful if the signal is weak where the thermostat sits. If your router is on the other side of the house or behind a concrete wall, pairing can fail, drop out, or run slow. A simple test is to stand at the thermostat location with your phone and check if 2.4 GHz WiFi is stable. Many smart thermostats prefer 2.4 GHz for reliability.
Finally, be honest about tools and comfort level. You don’t need fancy gear, but you do need patience and neat work. You’ll typically use a small screwdriver for terminals, a drill if you need new anchors, a level for the plate, and your phone camera to photograph the old wiring. People often use masking tape to label wires as they remove them, because it avoids mixing them up mid-job.
Tech Specs
Most smart thermostat wiring uses low-voltage control circuits. But the equipment you’re controlling can still contain 230–240V. Power isolation and safe access matter, especially if you need to open a control panel to find a spare C terminal.
If you’re unsure at this point, pause and ask for help before you start. The cheapest “fix” is often a quick compatibility check done by someone who installs these every week. It’s also the easiest way to avoid buying the wrong thermostat and then trying to return it after it’s been opened.
Understanding the C-Wire Problem

If you’ve googled “c wire smart thermostat” and felt more confused after, you’re not alone. Here’s the simple version.
The C-wire is the “common” wire in a low-voltage HVAC control circuit. Think of it as the return path that allows a thermostat to be powered continuously, like a small device that always stays on. Older thermostats often didn’t need constant power. Some were mechanical. Others used batteries. Many only switched a signal on and off and didn’t need to run WiFi, sensors, screens, and software.
A smart thermostat is different. It has a screen, a WiFi radio, and often background processing. It usually needs continuous power. That’s why many manufacturers say “C-wire required” for reliable operation.
So why do so many homes not have a C-wire connected? Often the cable in the wall has limited conductors, and the installer used only what was needed for the old thermostat. Sometimes the C-wire exists in the cable but is not connected at the thermostat. Sometimes it exists at the control board but never got run to the wall. And sometimes it doesn’t exist at all, because the original setup didn’t require it.
How do you check if you have a C-wire? Start by removing the thermostat faceplate (with power off) and looking at the terminals. If you see a wire connected to a terminal marked “C”, that’s a good sign. If you don’t see a C terminal used, look for an unused wire tucked in the wall. It might be a spare conductor that can be connected to C, but you still need to confirm the other end is available and safely connected at the control board.
Now let’s talk “smart thermostat without c wire” options, because this is where people get trapped in bad advice.
One option is a power extender or adapter. Some brands supply a module that mounts at the equipment end (near the control board) and lets you repurpose existing wires so the thermostat can get the power it needs. This can be a tidy solution when you have limited wires at the wall but access to the control board wiring.
Another option is an add-a-wire kit. This is similar in concept. It’s used when you’re short one conductor and you need a safe workaround that still keeps control signals correct.
Another approach is using an unused wire already in the cable. Sometimes the cable has more conductors than the old thermostat used. If there’s a spare wire, you can connect it to C at the thermostat and connect the same colour at the control board to the C terminal. The trick is doing it neatly and safely, and only if you can confirm the cable is the same cable end-to-end.
The “cleanest” fix is running a new cable with enough conductors. But in real houses, that can be easy or awful depending on wall access, insulation, and building style.
Now the important Australian 240V considerations. Even if your thermostat is low-voltage, the equipment cabinet is not a toy. Many ducted systems and air handlers have mains voltage present. If your C-wire work requires opening a panel where 230–240V is present, and you’re not qualified or confident, stop and get a professional. This is not about gatekeeping. It’s about avoiding electric shock and equipment damage.
Also, some “thermostats” in Australia are not 24V controls at all. Some are switching mains voltage directly or are part of a proprietary controller network. That’s why compatibility is step one. If you mix control types, you can damage the thermostat, damage the equipment, or create a serious safety issue.
Step-by-Step Installation Guide

This section is the practical “smart thermostat installation guide Australia” walkthrough. The steps are simple, but the quality comes from being methodical. Rushing is what causes wiring mistakes.
Also, a quick note: programmable thermostat installation follows a very similar physical process. The big difference is usually power requirements and software setup. So even if you end up choosing a programmable model, the safe workflow still applies.
| Step | What to do | Safety notes (Australia) | Common mistake to avoid |
|---|---|---|---|
| 1. Turn off power | Switch off the HVAC system at the breaker or isolator. Confirm the system won’t run. | Some cabinets contain 230–240V even if the thermostat is low-voltage. Treat panels with respect. | Turning off only the thermostat screen (or only the indoor unit) and assuming everything is safe. |
| 2. Remove old thermostat | Pop off the faceplate, then unscrew the base plate from the wall. | Keep wires from falling back into the wall cavity. | Letting wires slip back, then having to fish them out. |
| 3. Label existing wires | Take a clear photo. Label each wire by terminal letter, not just colour. | Colours vary. Terminal labels are what matter for smart thermostat wiring. | Assuming “red is always R” and “white is always W” without checking the terminal. |
| 4. Install mounting plate | Level the new plate, mark holes, drill if needed, then secure. | Use wall anchors if the old holes don’t match. | Mounting crooked, then living with a thermostat that looks off forever. |
| 5. Connect wires | Move each wire to the matching terminal on the new thermostat base. Add C-wire or adapter if required. | If you need to access the control board, be aware of mains voltage in the cabinet. | Loose wires not fully seated, causing intermittent faults later. |
| 6. Attach thermostat | Clip or screw the thermostat display onto the base plate. | Do not pinch wires behind the plate. | Forcing the display on and bending terminals or wires. |
| 7. Restore power | Turn the breaker/isolator back on. Wait for the thermostat to boot. | If anything looks wrong, turn power back off and re-check wiring. | Cycling power repeatedly without finding the real wiring issue. |
| 8. Configure the app | Connect to WiFi, select system type, test heating/cooling, then set schedule. | Use stable 2.4 GHz WiFi if available. Keep passwords handy. | Skipping system type setup, then wondering why the unit doesn’t respond correctly. |
If you’re choosing a model before you start, it’s worth sticking to quality smart thermostats that are designed for the control style you actually have, rather than chasing the flashiest screen online.
Pro Tip
Label wires by the terminal letter they were connected to, not by colour. In the field, colour is “nice to have”. Terminal ID is what stops expensive mistakes.
For safe work practices around electrical and workplace safety, you can refer to Safe Work Australia. That’s not a substitute for training, but it’s a useful baseline reminder: isolate power, verify before touching, and don’t guess inside live cabinets.
App Setup and Configuration

This is the part people underestimate. The physical install might take 20–60 minutes. The smart thermostat app setup and configuration can take another 15–45 minutes, depending on WiFi and how many features you want to use.
Start by downloading the manufacturer app. Don’t use random third-party apps that promise “universal control” unless the thermostat brand clearly supports it. Create an account, then follow the pairing prompts. Most apps will ask you to scan a QR code on the thermostat, or connect to a temporary WiFi network the thermostat creates during setup.
Next, connect the thermostat to your home WiFi network. This is where Australian homes can hit issues if the router is far away, if the network is 5 GHz only, or if the WiFi name/password has unusual characters that the thermostat struggles with. If you have the choice, 2.4 GHz often gives better range through walls.
After WiFi, the app usually asks for system type configuration. This matters more than people think. A heat pump setup is not the same as a conventional heat + cool setup. If the thermostat is told the wrong system type, it can run the wrong outputs or behave strangely during heating and cooling calls.
Once system type is set, do a basic test. Call for cooling and check the system responds. Then call for heating and confirm the system responds. Don’t skip this. It’s the fastest way to catch a wiring mismatch before you put tools away.
Then build a schedule. Even if you love the idea of “set and forget”, a basic schedule stops waste. For example, you might ease cooling back a little overnight in Brisbane, or bring heating on a bit earlier during Melbourne winter mornings so the house is comfortable when people wake up.
Now decide if you want geofencing. Geofencing uses your phone location to switch the thermostat into “away” when you leave and “home” when you return. It can be brilliant for variable routines. It can also be annoying if multiple people come and go at different times and the app setup isn’t done right. If you live in a busy household, set up each user properly so the system doesn’t think the house is empty when one person is still home.
Voice assistant pairing is optional. It’s a convenience feature, not a savings feature. If you want it, connect it after everything else is stable. That way you don’t mix two setup problems at once.
And if you’re building a wider smart home, it’s worth thinking through how thermostats fit into the bigger picture. Our article on smart home tool integration is a useful example of how people combine control, monitoring, and practical “real house” workflows rather than just buying gadgets.
Honeywell T6 Pro Installation Tips
This section is for people specifically searching “Honeywell smart thermostat setup” or planning a Honeywell T6 Pro install. The goal is not to replace the manufacturer manual. The goal is to help you avoid the common real-world mistakes that cause delays.
First, treat the T6 Pro like any smart thermostat: confirm system compatibility, confirm power requirements, and confirm whether you have a usable C-wire. If you get those right, the rest is usually smooth.
On wiring specifics, the main idea is matching the existing control terminals to the new thermostat terminals. Most low-voltage systems have a “power” side and a “call” side. You may see terminals like R (power), C (common), Y (cooling call), G (fan), and W (heating call). Heat pump setups add O/B (reversing valve) and sometimes AUX/E for auxiliary heat. Your exact terminals depend on the system.
Heat pump vs conventional setup is where people trip. A conventional system is usually simple: call cooling on Y, call heating on W. A heat pump may use Y for compressor, and O/B to set heating or cooling mode. If you set this wrong in the thermostat configuration, the system can do the opposite of what you asked for. That’s why app configuration matters as much as the wiring.
On WiFi connection process, set yourself up for success. Stand close to the router during pairing if possible. Use a stable network name and password. If the thermostat won’t see your WiFi, it’s often because it can’t see 5 GHz, the signal is weak at the wall, or the router settings block new devices.
App pairing procedure is usually straightforward if the thermostat is powered correctly. If you’re getting pairing failures, step one is not “reset everything”. Step one is confirming the thermostat has stable power. If the screen is browning out, rebooting, or behaving oddly, that can point back to the C-wire issue.
Common T6 Pro issues are usually one of these: the thermostat powers up but the HVAC doesn’t respond (wiring mismatch or wrong system type), the thermostat powers up but won’t connect to WiFi (network issue), or the thermostat loses power intermittently (power/C-wire problem).
Australian voltage notes still apply here. Most smart thermostats like the T6 Pro are designed around low-voltage control wiring, but the equipment side can still have mains voltage present. If your install requires access into a cabinet with 230–240V present and you’re not qualified or comfortable, this is the point where you call in a pro.
If you’re looking at this model specifically, you can jump to our Honeywell T6 Pro installation reference page to keep product context and compatibility questions in one place.
Troubleshooting Common Issues
Even a neat install can hit issues. The good news is most problems have simple causes. The key is to troubleshoot calmly, one variable at a time.
If there is no power to the thermostat, start with the basics. Confirm the breaker or isolator is on. Confirm the HVAC system itself has power. If the old thermostat was battery-powered, remember that the new smart thermostat may rely on a proper power circuit. If the thermostat is meant to run on C-wire power and that connection is missing or loose, it can appear “dead”.
If the WiFi won’t connect, check signal strength at the thermostat location. If your phone struggles there too, the thermostat will struggle. If the network is 5 GHz only, try enabling 2.4 GHz. If your router uses “smart connect” band steering, some thermostats connect better when the 2.4 GHz name is clear and separate. Also check the password is correct and not changing mid-setup.
If the HVAC system is not responding, this is often smart thermostat wiring or configuration. Confirm each wire is fully seated in the terminal. A wire that “looks in” but isn’t clamped properly can cause intermittent faults that drive you mad. Then confirm the system type selected in the app matches your actual equipment. Heat pump vs conventional is the classic mismatch.
If temperature readings seem incorrect, check placement and drafts. Thermostats are sensitive to airflow. If the thermostat is on a wall that gets sun, sits near a kitchen heat source, or is in the path of a draft, the reading can drift. Some thermostats allow calibration offsets, but don’t use that to hide a placement problem.
If you see app sync problems, check whether the thermostat is staying connected to WiFi. A thermostat that drops off the network will look “offline” in the app. This is usually a WiFi coverage issue, not a thermostat failure. A mesh node or a repositioned router can fix it.
And when should you call a professional? If you’re inside a cabinet with mains voltage present, if you’re unsure about wiring identification, if you have zoning or complex staging, or if the system is behaving unpredictably after setup. Paying for a professional hour is cheaper than damaging a control board or chasing a fault for three nights.
Get Professional Installation
At this point you know the whole process: compatibility check, C-wire planning, physical install, then app setup. If everything lines up, smart thermostat installation can be a tidy upgrade that improves comfort and reduces waste.
But if your home is the “tricky” category, professional install is not a defeat. It’s a smart decision. Systems with zoning, heat pumps, older control boards, or odd wiring layouts are where experience saves time and prevents damage.
People also ask about thermostat installation cost Australia (2025). The safe way to think about it is this: install cost depends on complexity. A straight swap on an already-compatible low-voltage setup is usually quicker. A job that needs a new cable run, a C-wire solution, or control-board work is more involved. That’s why the best next step is often a quick compatibility conversation before anyone quotes.
If you want help choosing the right model and confirming it will work with your system, we can help you avoid the common traps. Start by viewing professional installation support, then talk to our team to confirm compatibility and the cleanest install path for your home.
The goal is simple: a thermostat that fits your system, matches your routine, and works reliably through Aussie weather swings. Get that right and you’ll feel the benefit every day, not just when you open the power bill.