Protect Your Investment
A good pipe bender is one of those tools you only notice when it’s missing. When it’s working properly, your bends land where you want, the tube stays round, and your installs look tidy. When it’s not working properly, everything slows down. The bend goes oval. The angle drifts. The tube slips. You start “correcting” bends, and that’s when copper gets tired and call-backs get more likely.
That’s why pipe bender accessories matter. They’re not just add-ons. The right dies, guides, rollers, and wear parts can extend the life of your bender and improve the quality of every bend you make. They also help you do more types of work, like handling different tube sizes, bending in tighter spaces, or keeping repeat bends consistent on bigger jobs.
The common problem in the field is simple: using the wrong die or a worn guide can damage both the tool and the tubing. A former that doesn’t match the tube properly can flatten copper. A rough roller can mark soft tube. A tired ratchet can slip mid-bend. And a bender that’s “almost right” is often worse than no bender at all, because it gives you bends that look okay until the system vibrates and the weak spot shows up later.
This guide is a complete, job-focused look at pipe bender accessories and maintenance for Australian HVAC work. We’ll cover the essential accessories, how to choose dies and formers, what parts wear out first, how to lubricate and store your gear properly, and how to troubleshoot common mechanical and hydraulic issues. The goal is simple: better bends, fewer failures, and tools that last.
If you’re already shopping, start with the tube and pipe benders for HVAC copper work and then come back here to confirm what actually suits your bender and your tube sizes. If you’re not shopping yet, read on anyway. Knowing what wears, what matters, and what to check can save you hours on the next job.
Essential Pipe Bender Accessories
“Pipe bender accessories” is a broad category. Some accessories improve the bend itself, like dies and guides that support the tube. Some protect the tool, like storage cases and stands that stop it getting smashed around in the van. And some help you keep the tool accurate, like simple calibration checks and measuring aids.
The key idea is this: the bender is the system, but the accessories are the parts that control contact, pressure, and alignment. When contact and alignment are right, the tube stays round and the bend is predictable. When they’re wrong, you get slip, twist, flat spots, and bends that don’t repeat.
If you’re trying to match Aussie search intent like “pipe bending dies Australia”, “replacement bending shoes”, “pipe bender stand Australia”, and “pipe bender calibration”, it really comes back to one thing: control. Control of tube support. Control of movement. Control of repeatability. Accessories are what give you that control.
On a real job, you feel it straight away. A bender with clean dies and smooth rollers feels like it’s guiding the copper into place. A bender with tired wear parts feels like it’s fighting you. That “fight” often turns into rushed bends, which turns into ugly routing, insulation hassles, and vibration rub points later.

Bending dies and formers
Dies and formers are the heart of controlled bending. The former sets the bend shape and supports the tube as it curves. If the former is the wrong size, worn, or mismatched to the tube, you can get ovality and kinks even if your technique is good. This is where most bend quality problems start.
In HVAC, you’re commonly working with copper tube sizes that are familiar on the job, and the die needs to match the outside diameter properly. “Close enough” is how you get marks, drag, and flattening. If you’re replacing or upgrading, focus on getting the right die set for the work you actually do, not the full range you rarely touch.
Guide rollers and followers
Guide rollers and followers keep the tube seated and supported as the bend is formed. They reduce friction and help the tube feed smoothly around the former. When these parts wear, the bender can start to feel rough. You might see the tube trying to climb, twist, or mark up, especially on soft copper.
A small amount of wear can be hard to spot until you compare it to a new roller, but you’ll feel it in the bend. If a bender suddenly starts “fighting you” on sizes it used to handle easily, guides and rollers are one of the first things to inspect.
Bending shoes (replacement)
Bending shoes are often treated like they’ll last forever. On real jobs, they don’t. They wear, they glaze, and they can pick up grit that scratches tube. Once the shoe surface is rough or the profile is no longer true, you’ll see marks on copper and you may start getting minor ovality that makes insulation harder to fit.
Replacement bending shoes are a common wear item, especially in busy vans that are bending daily. Replacing a shoe early is usually cheaper than wasting time reworking bends or replacing damaged tube.
Pipe bender stands
A stand is about stability and repeatability. If you’re doing a run of bends in the workshop, a stable stand can make your results cleaner and faster. It also reduces fatigue because you’re not wrestling the bender on the floor or trying to hold it against a bench edge.
On-site, a stand can be handy when you’re doing heavier bending work or when you need consistent angles. If you’ve ever tried to do a neat offset on a slippery surface, you’ll understand why stability is an accessory, not a luxury. In Australia, where you can go from a tidy plant room to a dusty rooftop in the same week, keeping the tool steady is often the difference between “one bend, done” and “three bends and a swear”.
Storage cases and bags
Storage is where tool life often gets won or lost. A bender that’s thrown into the van without protection gets dinged, gets grit into moving parts, and gets knocked out of alignment. Even a small impact can cause a guide to sit slightly off, which then shows up as twist in the bend.
A proper case or bag also helps you keep dies organised. When dies are loose in the van, they bang into each other, and the profiles can get nicked. Those nicks become marks on copper, and marks on copper can become weak points over time.
Calibration tools
Calibration doesn’t need to be complicated. Most bender accuracy problems come from alignment drift, worn parts, or a slipped reference mark. Simple checks like confirming your bend angles against a reliable square or angle tool, and verifying that the tube stays centred through the bend, can tell you if your bender is still “true”.
For working techs, the goal isn’t lab-grade measurement. The goal is repeatability. If your 90s are coming out like 87s one day and 93s the next, something has changed. Calibration checks help you find that change early, before it turns into wasted copper and messy routing.
A practical calibration habit is to test on offcuts when something feels different. If you get a clean bend on offcut copper but the “real” bends look rough, the problem is usually setup, seating, or access. If the offcut bend is oval too, it’s usually a contact point issue like the die, follower, or roller condition.
Pipe bending safety accessories
Safety accessories get overlooked because they don’t feel like “bender gear”, but they matter. A stable stand, a secure mounting point, and a clean work area reduce slip risk and pinch points. When you’re bending hard copper or working with a ratchet mechanism, a sudden slip can hurt hands and ruin the tube at the same time.
Think of safety accessories as anything that keeps the tool steady and the operator in control. The goal is predictable force and predictable movement. That’s safer, and it also produces better bends.
Did You Know?
Most “bad bends” blamed on copper are actually caused by a mismatch or wear issue at the contact points. If the former profile is worn or the guide roller is rough, even good technique can produce oval bends and marks.
If you want to keep your accessory choices simple, start with what protects bend quality first. Dies, formers, guides, and wear parts usually deliver the biggest improvement. Then look at storage and organisation so the bender stays in good shape between jobs. If you’re comparing what’s available, the pipe bender accessories for HVAC copper work are a practical place to see options and then match them to your bender model.
Bending Dies: Sizes and Selection
If there’s one area where accessories can make or break your results, it’s bending dies. A die is not just a “chunk of metal that fits the tube”. It’s a shaped former that supports the tube through the bend. The die controls how the tube flows, where pressure is applied, and how likely the tube is to flatten or kink.
Choosing dies well is also how you avoid wasting copper. A kinked bend is not a cosmetic problem. It’s a restriction and a weak point, and it usually needs to be cut out. On a busy day, one kink can steal more time than the die would have cost in the first place.

Tube compatibility is the first check
When you’re selecting dies, match the die to the tube outside diameter. In HVAC, it’s common to talk in imperial tube sizes, but your bender and die system might include markings that reference metric as well. The best habit is to confirm what your bender expects and confirm what your tube actually is.
If you’re not sure, check the tube markings or your usual tubing supplier specs. Don’t guess based on “it looks like 3/8”. Guessing is how you end up with a die that pinches, marks, or allows the tube to slip.
If you want a low-drama way to confirm sizing on-site, measure the tube outside diameter and compare it to the die marking before you start bending. It takes a few seconds and it prevents the classic mistake where the bend looks fine until the last part of the sweep, then it flattens right where you don’t want it.
Standard vs metric dies
Standard dies often align with common HVAC tube sizing habits. Metric dies can make sense if you’re working in environments where everything is specified in millimetres and you want to keep your kit aligned to that. The important part is not which system you prefer. The important part is consistency and correct fit for the tube you’re actually bending.
Where mix-ups happen is when a van has a blend of dies, or when a new apprentice grabs a “near enough” die. That’s why storage and clear labelling matter. If your dies look similar at a glance, treat that as a risk and organise them so mistakes are harder to make.
Multi-radius vs fixed options
Some die systems offer flexibility in radius, while others are fixed. Fixed dies can be very consistent because the bend shape is always the same. Multi-radius options can be helpful when you want different sweep styles for different jobs, but they also add complexity. Complexity isn’t bad, but it does increase the chance of setup error if you’re rushing.
On real jobs, most techs benefit from repeatable bends more than “maximum flexibility”. If you’re doing split installs all week, a consistent die setup that produces clean bends every time will often beat a clever system that needs more setup and checking.
Material-specific dies (copper, aluminium)
Most HVAC bending is copper, but some work can involve aluminium sections or mixed material components. Material-specific dies can help reduce marking and cracking risk, especially on softer or more sensitive materials. Aluminium in particular can crack if bent too tight or if it has work-hardened from prior handling.
The safe approach is to treat material changes like a new job. Confirm what the material is, confirm what the tool is designed for, and test on offcuts when possible. If you’re bending on a cold Melbourne morning, expect materials to feel slightly different. That’s not a reason to panic. It’s a reason to slow down and confirm your method.
Australian availability
Availability matters more than most people admit. If you break a die on a Thursday afternoon and you’re booked solid, you don’t want to be waiting for parts while jobs pile up. This is where it’s smart to keep common wear items and commonly used dies on hand, especially if your work relies on a small number of sizes day in, day out.
When you’re choosing dies, consider not just the bend result but also the replacement path. If you can’t get a replacement quickly, that die becomes a single point of failure in your workflow.
| Die / former type | Best suited tube and use | Material compatibility | Radius control style | Practical selection tip |
|---|---|---|---|---|
| Standard size die (common HVAC tube sizes) | Day-to-day copper refrigerant lines where repeat bends matter | Usually copper-first; confirm if suitable for aluminium | Fixed profile for consistent centre-line radius behaviour | Pick sizes you bend weekly, and label them so the wrong die is harder to grab |
| Metric-marked die set | Jobs specified in millimetres, or mixed trade sites where metric is standard | Varies by system and finish | Often fixed profile, with clearer metric alignment | Use when it reduces confusion across the team and keeps sizing consistent |
| Multi-radius option | Varied work needing different sweep styles and bend approaches | Depends on the die material and finish | Adjustable or multiple profiles; more setup checking | Only worth it if your jobs truly need it, and you have time to set it correctly |
| Material-sensitive / low-marking former | Soft copper finishes, visible pipework, or materials that mark easily | Designed to reduce marking and drag | Fixed profile but gentler contact behaviour | Use when appearance and surface condition matter, or when marking is a known issue |
| Follower / guide matched to die | Consistent bends, reduced slip, reduced twist | Works with the die system it’s designed for | Supports tube through bend for rounder results | If you replace dies, inspect followers and guides too, because wear often travels as a set |
If you already know you need new dies or former options, the most direct path is to browse replacement bending dies and matched HVAC bender systems in the same range so you can confirm size coverage and fit. If your work is copper-heavy and you want cleaner shaping support, the copper pipe bending formers for HVAC refrigerant lines can help improve support and repeatability. The main point is not “buy more gear”. The main point is “match the die to the tube and the job so you stop wasting time on rework”.
Tech Specs
Die selection is a fit-and-support problem, not a strength problem. The die must match the tube outside diameter and support the curve through the bend. If the tube is slipping, twisting, or going oval, check die fit and guide condition before you blame copper or technique.
Replacement Parts and Wear Items
Every pipe bender wears. Even high-quality benders wear, because bending is controlled friction and force. The key to professional tool care is recognising what wears first, inspecting it regularly, and replacing parts before they cause bad bends.
In Australian conditions, wear can be accelerated by dust, coastal salt air, and heat in the van. Perth dust can get into moving parts. Sydney coastal air can encourage surface rust if tools are stored damp. Brisbane humidity can turn a “light film of moisture” into rust on unprotected steel faster than you expect. None of that is dramatic, but over time it adds up.
The tricky bit is that wear doesn’t always show up as a “broken tool”. It shows up as little changes. A bend takes more effort. The tube marks a bit more. The angle lands slightly off. That’s why a quick inspection routine pays off. It catches problems while they’re still cheap and easy to fix.
When to replace bending shoes
Replace bending shoes when you see roughness, glazing, or profile damage. If a shoe surface is no longer smooth, it can mark copper. If the profile is worn, it can allow the tube to flatten slightly. The result might still look acceptable at first glance, but it can cause insulation fit issues and can increase stress points.
A simple check is to compare bends before and after a shoe change on the same tube size. If the bend becomes noticeably rounder and cleaner, the old shoe was already costing you quality, even if it wasn’t “broken”.
Guide roller inspection
Guide rollers should roll smoothly and sit true. If they wobble, drag, or feel gritty, they can cause the tube to twist or slip. Rollers that are worn unevenly can also push the tube slightly off-centre, which becomes a bend that doesn’t sit in one plane.
If you see bends that are suddenly inconsistent, or if the bender feels rough under load, rollers and guides are a smart first inspection point. They’re also often easier to replace than people assume.
Hydraulic seals and o-rings
Hydraulic benders rely on seals and o-rings to keep pressure stable. When seals wear, you might see slow movement, drift, or loss of force. In practice, the bender starts feeling “lazy”, or it needs more pumping for the same result.
Seal wear can be accelerated by dirt and poor storage. If hydraulic tools are stored with grit on moving components, that grit can get into places it shouldn’t. Clean tools last longer, especially with hydraulics.
Springs and ratchet mechanisms
On ratchet or lever systems, springs can weaken and ratchets can wear. A ratchet that slips is more than annoying. It can cause sudden movement during a bend, which increases injury risk and can ruin the tube. If a ratchet feels inconsistent, don’t ignore it. Inspect it, service it, or replace parts as needed.
For busy vans, it’s worth treating springs and ratchet parts as routine wear items. They often fail gradually, which means people get used to “a bender that’s a bit off”. Then one day it slips badly at the worst time.
OEM vs aftermarket parts
OEM parts are usually the safest choice for fit and alignment, especially on tools where small tolerances matter. Aftermarket parts can work, but they can also introduce small alignment issues that show up as poor bend quality. If you go aftermarket, the safest approach is to confirm fit, confirm function, and test bends on offcuts before you use it on a real install.
The goal is not to win a price game. The goal is to keep your tool reliable. A cheap part that causes bad bends can cost you more in wasted tube and time than a quality part would have cost upfront.
Australian suppliers
On real schedules, downtime is the main enemy. If your bender is out of action and you’re booked, you either slow down, you change method, or you take shortcuts. Shortcuts on bends are risky because they create stress points that may show up later as vibration issues or leaks near joints.
That’s why it’s smart to keep common wear items on hand, especially for the tube sizes you bend most. If you’re unsure what to stock, start with what you touch most often: shoes, guides, rollers, and the parts that keep your bender moving smoothly.
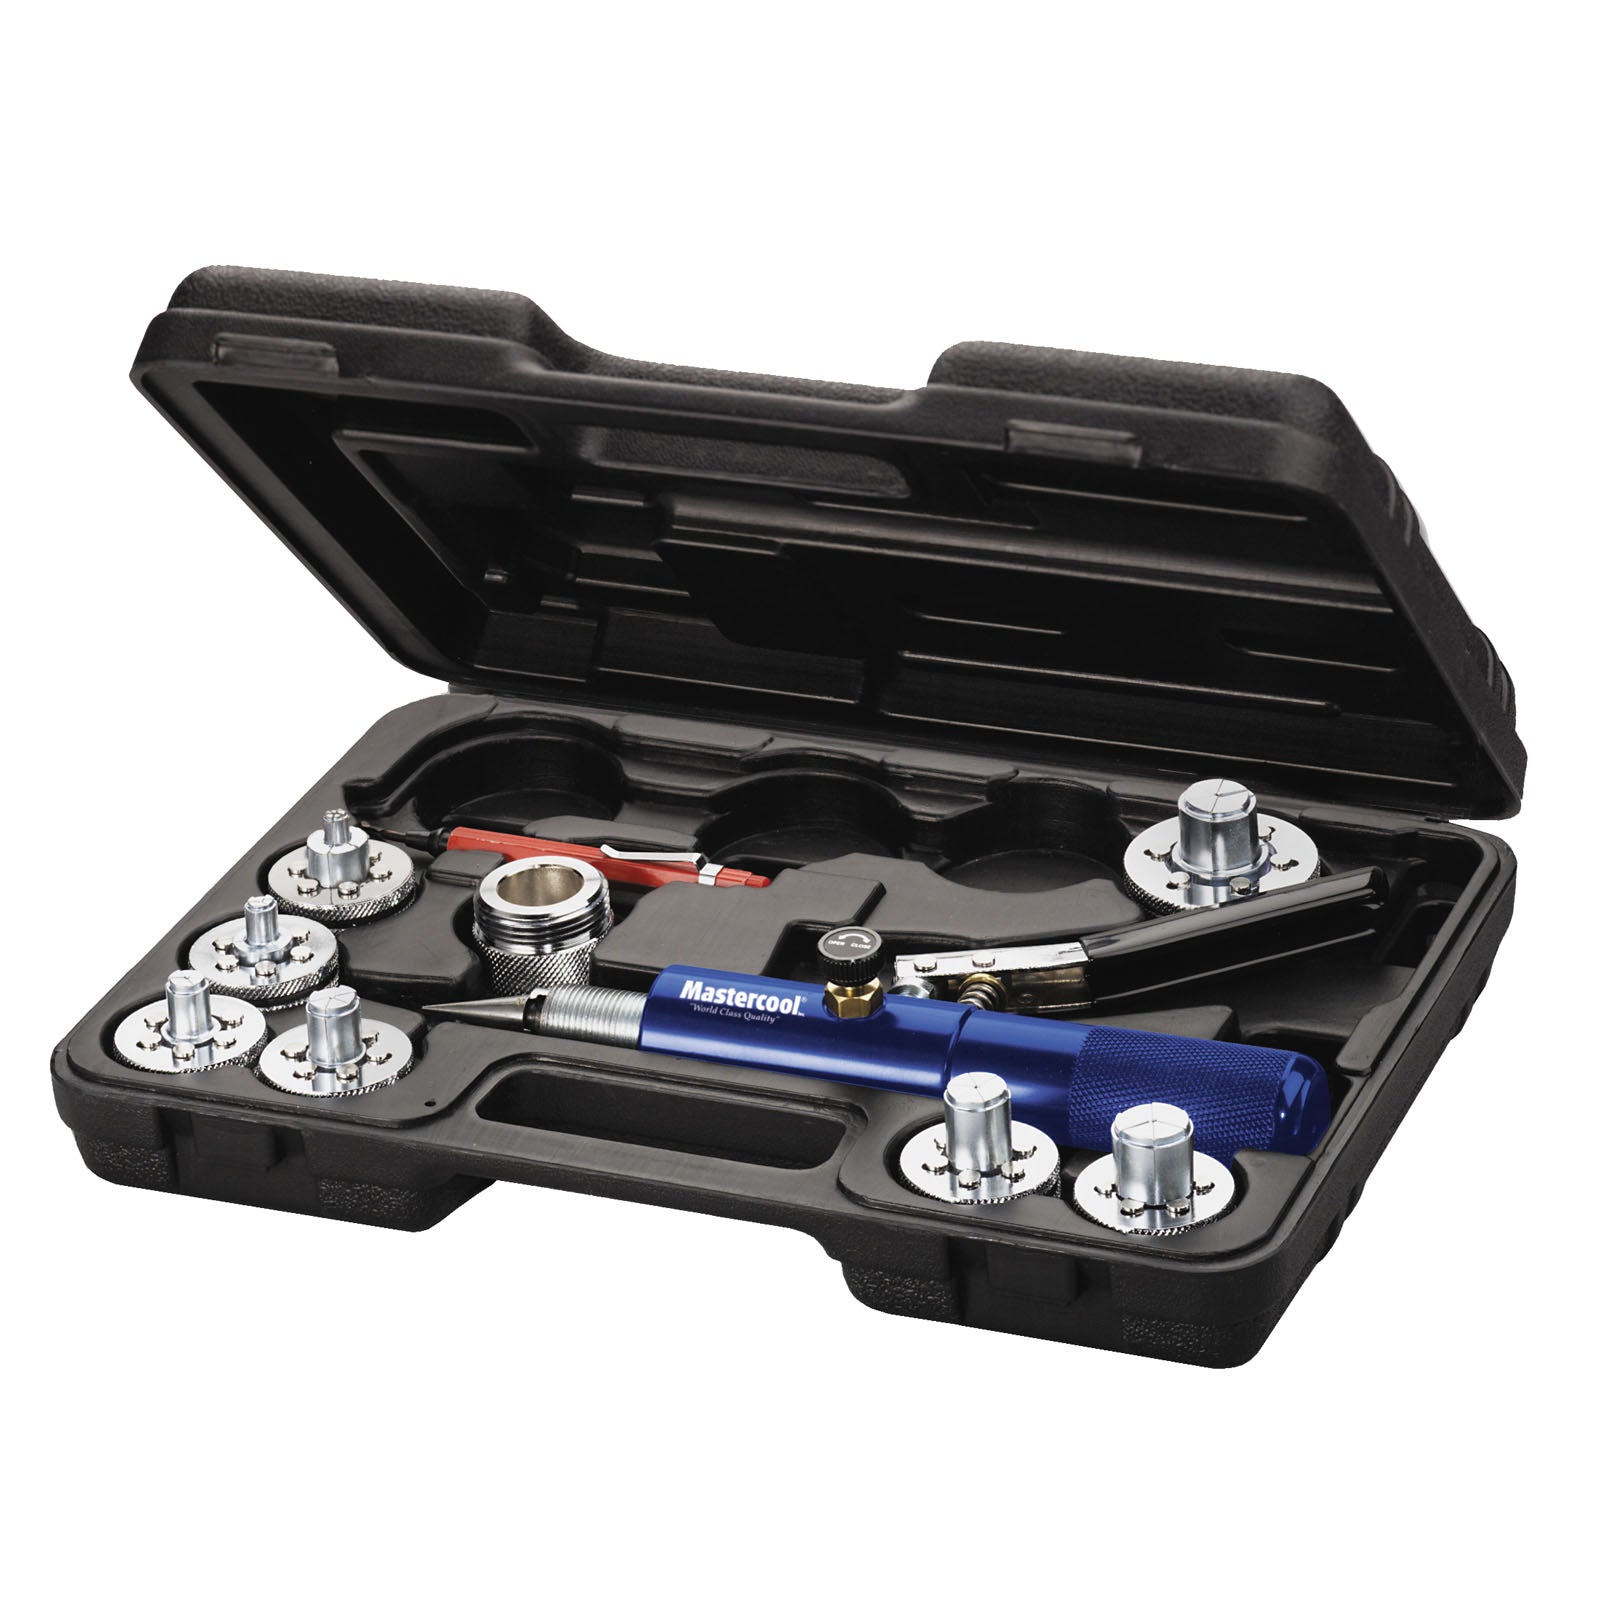
When you’re ready to source parts and accessories, Mastercool 180° Tube Bender 4-in-1 for HVAC copper tube bending and bender add-ons in the accessories range are a practical starting point, because it keeps your replacement path simple and reduces guesswork about fit and compatibility.
Lubrication and Care
Lubrication is one of the easiest ways to extend tool life, and it’s also one of the most commonly skipped habits. Most benders don’t fail because they’re “weak”. They fail because friction and grime slowly wear the moving contact points until the tool becomes rough, inaccurate, or hard to use.
A well-lubricated bender bends smoother, marks less, and produces more consistent results. It also reduces operator effort, which matters on long days. If you’ve ever done repeated bends on a bigger tube size, you know how quickly fatigue can turn a good bend into a rushed bend.
When people search “pipe bender lubrication”, they’re usually chasing two outcomes: smoother bends and longer tool life. Both happen when you keep friction under control and keep grit out of the moving parts. If you do nothing else, do the simple stuff consistently.
Proper lubricants for different benders
The right lubricant depends on the tool and where it’s used. Some benders need light lubrication at pivots and moving joints. Some benefit from a protective film on exposed steel surfaces. Hydraulic tools may require specific fluids and seal-friendly products, and the safest habit is to follow the manufacturer guidance for that tool.
What you want to avoid is using a product that attracts grit and then leaving that grit on the tool. A sticky surface can become a dirt magnet in a workshop or in a dusty van. Dirt plus force equals wear.
Application points and frequency
Think in “contact points” and “movement points”. Contact points are where tube touches the tool, like die surfaces and shoes. Movement points are pivots, rollers, and ratchets. Contact points need to be clean and smooth. Movement points need to move freely without grind.
Frequency should match use. A bender used daily needs more frequent checks than a bender used once a month. The fastest practical habit is a quick wipe down and inspection at the end of the day, with lubrication as needed. That habit takes minutes, but it can prevent the slow drift into “tool feels a bit ordinary” that costs you later.
Cleaning procedures
Cleaning doesn’t need to be fancy. The job is to remove grit, moisture, and residue. Wipe down die surfaces, guides, and rollers. Remove any visible build-up. If a tool has been used in a dusty plant room or on a dirty site, treat cleaning as part of pack-down, not as something you’ll “do later”. Later often never comes.
Also clean your storage case or bag. A clean tool put into a gritty bag becomes a gritty tool again. If your storage is dirty, it’s like washing your hands and then dipping them in dust.
Rust prevention in coastal areas
Coastal corrosion is a real issue in parts of Australia, especially around Sydney and other coastal zones. Salt air encourages surface rust, and surface rust can make moving parts rough. If your bender lives in a van that gets humid inside, moisture can sit on tools overnight and accelerate corrosion.
A simple protective wipe and sensible storage can reduce this risk. Also avoid storing tools wet. If a tool has been rained on, dry it properly before it goes into a case. Rust is easier to prevent than it is to remove.
Storage best practices
Store benders clean, dry, and protected. Keep dies separated so they don’t bang into each other. Keep moving tools from being wedged under heavy gear in the van. Even strong tools can be knocked out of alignment by repeated impacts.
In Brisbane humidity, it’s especially important to avoid sealing damp tools into airtight containers without drying them first. Trapped moisture is how you get rust that seems to appear “out of nowhere”.
Australian climate considerations
Australia gives you a wide range of tool conditions. Dry dust in WA can grind into moving parts. Humidity in QLD can encourage corrosion and sticky grime. Cold mornings in Melbourne can make materials feel slightly stiffer, which can tempt people to force bends. The best response is not to overthink it. The best response is to keep tools clean, keep moving parts smooth, and slow down when conditions change.
If you want a broader bender-focused framework that still covers care and maintenance basics, start with the essential pipe benders guide for HVAC copper line work. The same tool care checks apply to benders too: clean, lubricate appropriately, store properly, and replace worn contact points before they damage the work.
Pro Tip
Don’t lubricate over dirt. Wipe first, then lubricate. A gritty lubricant mix turns into a grinding paste on rollers and pivots, and that’s how benders become rough and inaccurate over time.
Organization and Storage Solutions
A well-organised bender setup is not about looking tidy. It’s about speed and consistency. When your dies are easy to find and clearly labelled, you’re less likely to grab the wrong one. When your bender is protected, it stays aligned and works smoothly. When your van storage stops tools from sliding, you reduce impacts that cause slow damage.
Organisation also makes training easier. Apprentices learn faster when the tool system is consistent. If your dies are always in the same spot, and the bender is always stored the same way, the workflow becomes repeatable. Repeatable workflows produce better bends.
This is where “pipe bender storage solutions” is more than a neat kit photo. It’s how you stop expensive little mistakes. If the wrong die is the easiest die to grab, someone will grab it. If the bender lives under heavy gear, it will cop knocks. If the case is full of grit, the tool will feel rough even after you cleaned it.
Van storage systems
In a working van, storage should prevent movement. Tool movement is what creates impacts, and impacts are what cause dents, misalignment, and cracked cases. A bender that’s bouncing around the van is also a safety issue. In a sudden stop, heavy tools become projectiles.
Good van storage keeps the bender accessible but locked in. It also keeps dies separated so they don’t smash into each other. If you’ve ever had to use a die with a chipped edge, you know how quickly that chip can mark copper.
Workshop mounting options
In the workshop, mounting options can make bends more consistent. A stable setup reduces twist and makes it easier to hit exact angles. It also reduces fatigue, because you’re not trying to hold the bender steady with your body while you bend with your arms.
If you do repeat work like pre-fabricating bends for a series of installs, a workshop setup can be a big time saver. It also makes it easier to train apprentices because the tool behaves more predictably when it’s stable.
Die organization systems
Die organisation is one of the simplest upgrades you can make. The goal is to make the correct die the easiest die to grab. Label sizes clearly. Keep them in order. Keep them protected. If you have both standard and metric systems in the same kit, make that obvious in the storage layout so mistakes are less likely.
Also keep an eye on “mystery dies”. If you have dies in the van that nobody can confidently identify, they become a risk. Either identify them properly or remove them from the main kit so they don’t get used by accident.
Tool protection in transport
Transport protection is more than a case. It’s also about where the tool sits. If your bender is stored under heavy gear, it can be distorted or dented over time. If it sits where it gets wet, it will corrode faster. If it sits where it gets covered in plaster dust, it will wear faster.
Set up a “clean tool zone” for precision tools like benders. It doesn’t need to be fancy. It just needs to reduce the daily punishment that ruins tools slowly.
Weather-resistant storage
Weather-resistant storage matters for techs who work in and out of the van in all conditions. If the tool is packed away wet, moisture sits on steel surfaces and can cause corrosion. If a case traps moisture, it can make the problem worse, not better.
The practical habit is simple: dry before you store. If you’re finishing up in the rain, do a quick dry-down before the tool goes into the case. That one habit can keep your bender smoother for longer.
Mobile vs fixed setups
Some techs work mostly mobile and need a compact, tough setup. Others do a lot of prep work in the workshop and want stability and repeatability. Neither is “better”. The right setup depends on your work mix.
If your work is mostly on-site, focus on protection and quick access. If you do a lot of repeat bends, consider a more stable workshop approach so accuracy is easier to achieve. For broader setup ideas that still apply to benders and accessories, the manual pipe benders guide for organised HVAC van setups keeps the mindset simple: protect the precision tools, label the parts, and make the right setup the easiest setup.
Troubleshooting and Repair
When a pipe bender starts producing poor bends, the first instinct is often to blame the tube or the operator. Sometimes that’s fair. Often it’s not. Many bend problems come from small mechanical issues, worn contact parts, or alignment drift that can be fixed quickly once you know what to look for.
The goal of troubleshooting is not to become a tool technician. The goal is to get back to clean, repeatable bends with minimal downtime. That usually starts with a simple rule: inspect the contact points and the moving points first.
If you’re searching “pipe bender troubleshooting”, you’re usually dealing with one of three outcomes: the bend is oval, the bend twists, or the bend angle is inconsistent. All three have common causes, and most of those causes are visible once you slow down and look closely at the die fit, follower support, and roller condition.
Common mechanical issues
Mechanical issues often show up as rough movement, slipping, or inconsistent bend angles. If the bender feels gritty, check rollers and pivots for dirt and wear. If the bender slips under load, check ratchet condition, spring tension, and any locking mechanisms.
If bends are twisting out of plane, check alignment. A guide roller that sits slightly off can push the tube sideways. A worn follower can allow tube drift. These are subtle issues that create real problems on the finished run.
Also check your seating habit. If the tube isn’t seated the same way every time, you won’t get repeatable bends. This is especially noticeable when two people share the same bender. One person seats hard, one person seats “close enough”, and suddenly the bender gets blamed for inconsistency.
Hydraulic system problems
Hydraulic problems show up as slow movement, drift, or reduced force. If a hydraulic bender needs more pumping than usual, or if it struggles to complete bends it used to handle easily, seals and fluid condition are common suspects. Leaks, even small ones, can indicate seal wear.
Hydraulics also hate contamination. Dirt and grit increase wear, and moisture can cause corrosion inside systems over time. Clean storage and clean handling are part of hydraulic reliability.
If you want a deeper maintenance angle that relates to hydraulic tools, hydraulic pipe benders maintenance and troubleshooting guide is a useful companion piece, because many troubleshooting steps overlap: keep systems clean, check seals, and confirm alignment before you assume the tool is “done”.
Alignment and calibration
Alignment issues often show up as bends that look fine until you try to fit them. The angle might be slightly off. The bend might not sit in one plane. The tube might show ovality that wasn’t there before.
Calibration checks can be simple. Confirm your 90s and 45s with a reliable reference. Check whether the tube stays centred through the bend. Compare bends made today against bends made when the tool was known to be good. If there’s drift, something has changed.
Also consider operator consistency. If multiple people are using the same tool, setup habits matter. If one person always seats the tube fully and another seats it slightly short, the bend results can differ. Standardising how the team sets up bends is part of “calibration” in the real world.
DIY vs professional service
Some fixes are safe DIY, like cleaning, lubrication, replacing obvious wear parts, and improving storage. More complex repairs, especially on hydraulic systems, can be better handled by professional service. The reason is not that DIY is “bad”. The reason is that mistakes can be expensive, and a tool that fails mid-job can cause bigger issues.
If you’re unsure, the safest approach is to do what you can confidently do well, and then escalate the rest. That’s professional tool care. It’s not about doing everything yourself. It’s about keeping the tool reliable.
Warranty considerations
Warranty can get messy when tools are modified or repaired incorrectly. If a tool is still under warranty and you suspect a major fault, it’s often better to follow the recommended service path rather than strip it and risk losing support. Keep purchase records, keep notes on issues, and document what you’ve observed. That makes service faster.
Even if warranty is not in play, good documentation helps you diagnose recurring problems. If a certain die keeps wearing faster than expected, that might indicate a storage issue, a technique issue, or a mismatch issue that needs addressing.
Australian service centres
On commercial sites and in regulated environments, maintenance of tools and plant is part of safe work practice. Keeping tools in good condition is not just about nicer bends. It’s also about reducing slip risk, avoiding sudden tool failures, and keeping work consistent.
For a clear safety reference point, Safe Work Australia provides guidance on plant and equipment maintenance for safer worksites. The practical takeaway for pipe benders is simple: inspect tools, maintain them, and don’t keep using gear that’s slipping or failing under load.
Pro Tip
If bend quality suddenly drops, don’t change three things at once. Inspect and fix one variable first, like the die fit or the guide roller condition, then test on offcuts. Controlled troubleshooting is faster than guessing.
Maintain Your Benders Like a Pro
Professional bender maintenance is not complicated. It’s consistent. It’s checking the wear points, keeping the tool clean, and replacing the parts that control bend quality before they start costing you time and tube.
Start with the high-impact items. Dies and formers that match the tube and support it properly. Guides and rollers that move smoothly and keep the tube centred. Wear parts like shoes and ratchet springs that can fail gradually. Then support it all with good storage so your tool doesn’t get smashed around between jobs.
It also helps to treat accessories as part of the job planning. If you know you’re heading into a run of installs that will need repeated bends, bring the right dies and keep them organised. If you’re doing workshop prep work, use stability and protection to keep bends consistent. If you’re working in coastal conditions, plan rust prevention and dry storage. Small habits add up.
When you’re ready to upgrade or replace, the simplest starting point is the pipe bender accessories and tube bending tools for HVAC copper work so you can narrow down into wear parts, die options, and organisation gear that suits how you work. If you’re also comparing bender systems and kits, the tube and pipe benders range for HVAC refrigerant line bending makes it easier to match accessories to the bender style you’re using.
If you’re not sure what accessories suit your bender model or your tube sizes, talk to our team to confirm compatibility. If you’re fitting out a van or setting up a workshop station and you want it right the first time, contact us for a quote and we’ll help you match the accessory kit to the work you actually do.
Most importantly, don’t let a “nearly fine” bender become your normal. A tool that slips, marks tube, or produces inconsistent angles costs you in ways that don’t show up on a receipt. It costs you in wasted time, wasted copper, and increased chance of a call-back later. Keep the wear points under control, keep the tool clean, and your bends will stay clean too.