How to Use Testo 420: Step-by-Step Measurement Guide
The Testo 420 is a professional flow hood used for volume flow measurement at supply and return air outlets in HVAC commissioning and TAB work. Getting accurate results depends not just on owning the instrument but on following the correct setup and measurement sequence every time. A poorly mounted hood, a skipped zeroing cycle or a reading taken before the instrument has stabilised will produce a figure that looks credible but does not reflect actual airflow.
This guide walks through the complete measurement process step by step, from initial setup and hood selection through to recording and logging your results. It also covers the most common errors that cause inaccurate readings and how to avoid them on a real job. Whether you are commissioning a commercial building in Melbourne, completing TAB work on a new industrial facility in Queensland, or simply getting familiar with the instrument for the first time, the same technique applies.
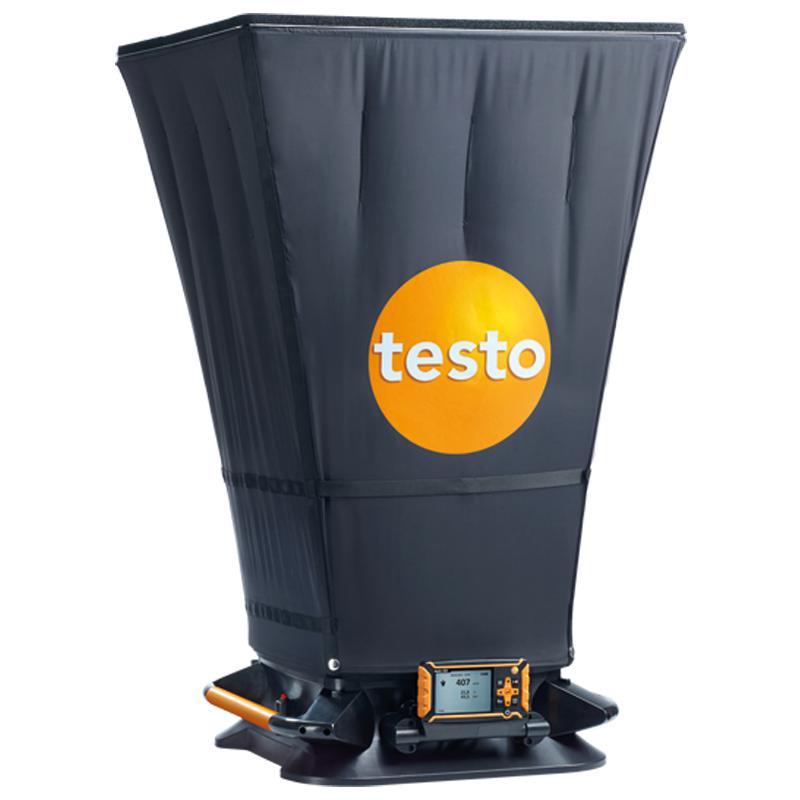
The Testo 420 complete flow hood kit with measuring instrument includes everything needed to begin TAB and commissioning work immediately.
Written by Rica Francia Macaspac, HVAC Shop content writer, in consultation with Aussie HVAC tradies and industry experts. Published: June 2026 · Last reviewed: June 2026.
Testo 420 Setup and Pre-Measurement
Before you take a single reading, the instrument and app need to be configured correctly for the job. Skipping the setup sequence is the most common cause of inconsistent readings across a day's work.
Start by selecting the correct hood for your outlet type and attaching it to the measuring instrument. The hood and instrument connect via a collar fitting that seats firmly without tools. Once the hood is fitted, power on the measuring instrument and allow it to complete its startup sequence. The instrument performs an automatic zero of the differential pressure sensor during startup. This zeroing step eliminates offset errors caused by temperature changes or barometric pressure differences between your last use and the current job. On a summer day in Darwin or Brisbane where ambient temperatures are significantly higher than the previous day, the zeroing step makes a measurable difference to reading accuracy.
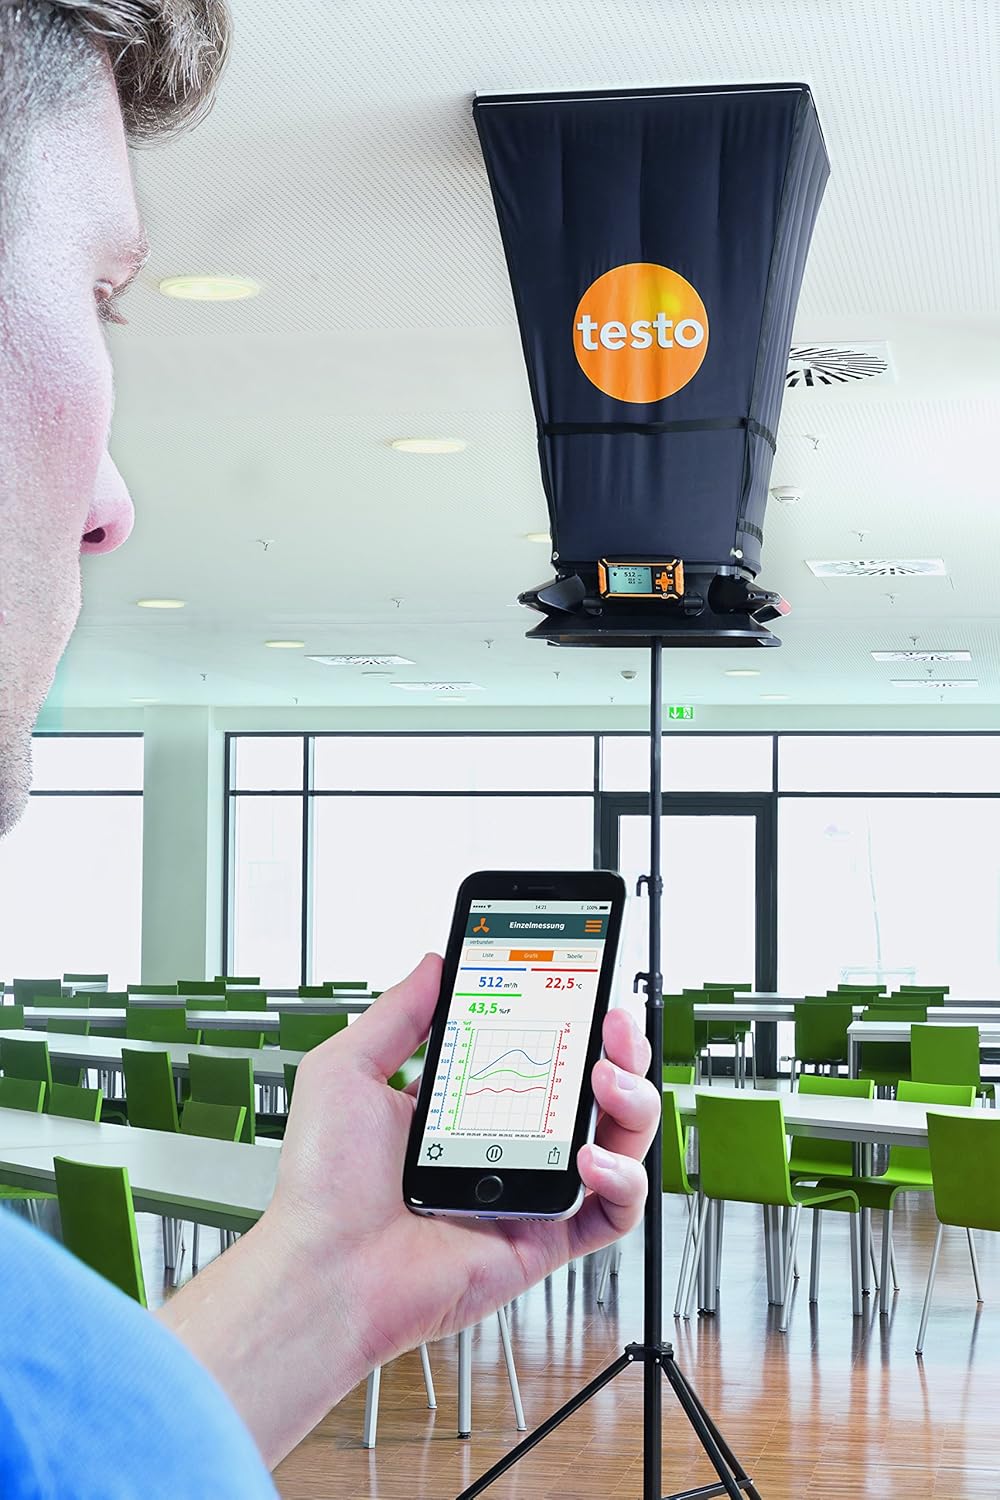
Open the Testo Smart App on your smartphone or tablet and pair the instrument via Bluetooth. The pairing process is a one-time setup for each device and takes under a minute. Once paired, the app displays live measurement data from the instrument in real time. You will use the app throughout the measurement session to configure the measurement protocol, monitor readings and log results.
Within the app, set up a measurement protocol for the job. A protocol in the Testo Smart App stores the outlet reference numbers from your mechanical drawings, the design airflow for each outlet, and the acceptance tolerance range. Setting this up before arriving on site means you can work through the outlet schedule efficiently without stopping to cross-reference documents. On a large Sydney commercial fit-out with 80 or 100 outlets across multiple floors, a pre-configured protocol is what makes the difference between a productive day and a chaotic one.
Check the duct geometry input settings if you are using the differential pressure function for duct static pressure measurements in addition to volume flow. Duct cross-sectional area needs to be entered correctly for the instrument to convert differential pressure into velocity and volume flow. Confirm the duct dimensions from your as-built drawings before entering this data.
Tradie Pro Tip: Do the Bluetooth pairing and protocol setup in the workshop or the site office before you start measuring. Standing on a step ladder trying to navigate the app for the first time is not the way to start a commissioning job. Five minutes of preparation on the ground saves thirty minutes of confusion at ceiling height.
Selecting and Mounting the Hood
Hood selection determines whether your readings are accurate or systematically wrong. The hood must completely cover the outlet face. Any portion of the grille face that extends beyond the perimeter of the hood allows supply or return air to bypass the measurement grid entirely, producing a reading that is lower than actual flow with no correction possible.
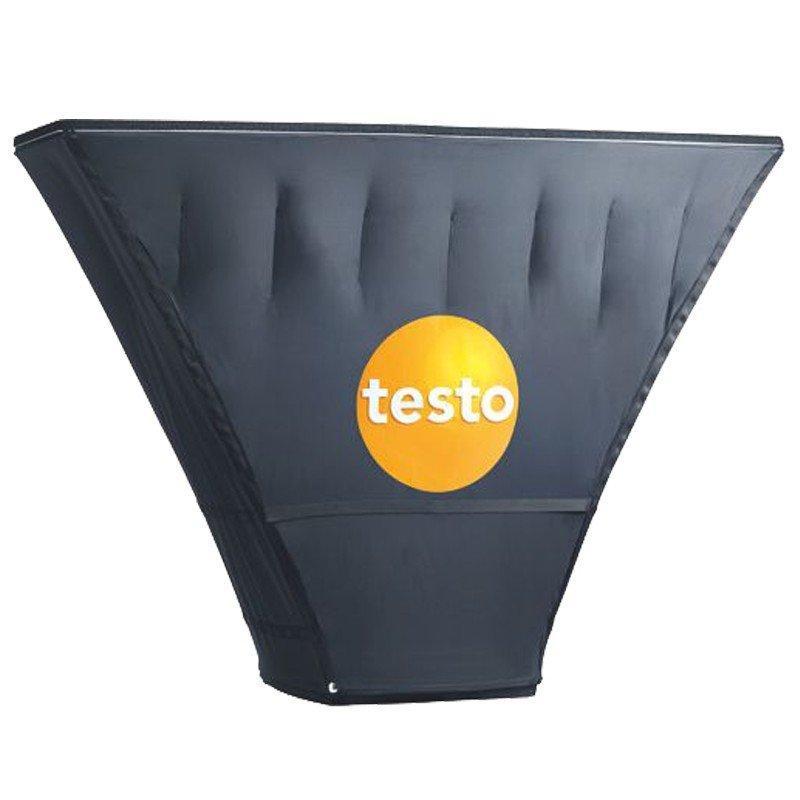
For most standard commercial ceiling diffusers with a 600x600mm or 600x1200mm face, the 610x1220mm hood is the correct choice. For smaller residential and light commercial grilles below 360mm face dimension, the compact 360x360mm hood for small outlets provides the right coverage without excess hood area that can introduce edge leakage. For linear slot diffusers commonly found in open-plan commercial offices, the 305x1220mm hood matches the elongated outlet geometry. Always match the hood to the outlet face dimensions, not to the duct size behind the grille.
To mount the hood, position it over the outlet so that the open face of the hood covers the entire grille. Press the hood perimeter flat against the ceiling surface around the full edge of the outlet. The hood fabric needs to contact the ceiling with no visible gaps. A gap at any point around the perimeter creates a path for uncaptured airflow.
On textured or irregular ceiling surfaces, achieving a clean seal can take a moment of adjustment. Older commercial buildings in Sydney or Melbourne with plasterboard ceilings that have been repainted multiple times sometimes have raised edges around grille cutouts that make full contact harder. Press the hood firmly and evenly across the entire perimeter before starting the measurement.
Alignment of the hood over the outlet matters for swirl diffusers. Centre the hood over the diffuser face so the flow straightener grid sits symmetrically over the swirling discharge pattern. An off-centre hood on a swirl diffuser will capture air from part of the swirl pattern and miss the rest, reducing measurement accuracy even when the hood appears to be covering the outlet.
The 610x1220mm hood for standard commercial ceiling diffusers covers the majority of outlet configurations you will encounter in commercial office and retail commissioning work across Australia.
Positioning and Stabilisation
Once the hood is correctly positioned over the outlet, the instrument needs time to produce a stable reading. The differential pressure sensor inside the measurement grid is averaging the airflow across the face of the hood, and turbulent or swirling airflow takes longer to average out than clean laminar flow. Reading too early is one of the most common causes of inaccurate TAB results on site.
Allow the reading displayed in the Testo Smart App to settle before recording it. A stable reading is one where the displayed value has stopped moving or is oscillating within a narrow range that reflects normal turbulence rather than a settling trend. On outlets with clean, low-turbulence discharge, stabilisation typically takes a few seconds. On swirl diffusers with the flow straightener doing conversion work, allow more time, up to 15 to 20 seconds with the hood firmly in position.
If the reading continues to drift significantly after 20 to 30 seconds, check the hood seal. A reading that keeps trending upward or downward rather than oscillating around a stable value usually indicates the hood is not fully sealed against the ceiling surface and air is entering or escaping through a gap in the perimeter contact.
Temperature stabilisation is a secondary consideration on jobs with large temperature differentials between the air stream and the ambient. On cold room applications or refrigerated warehouse work in QLD or WA where the supply air temperature is well below ambient, the measurement grid inside the hood takes longer to equilibrate. Rushing the reading on these applications leads to drift errors.
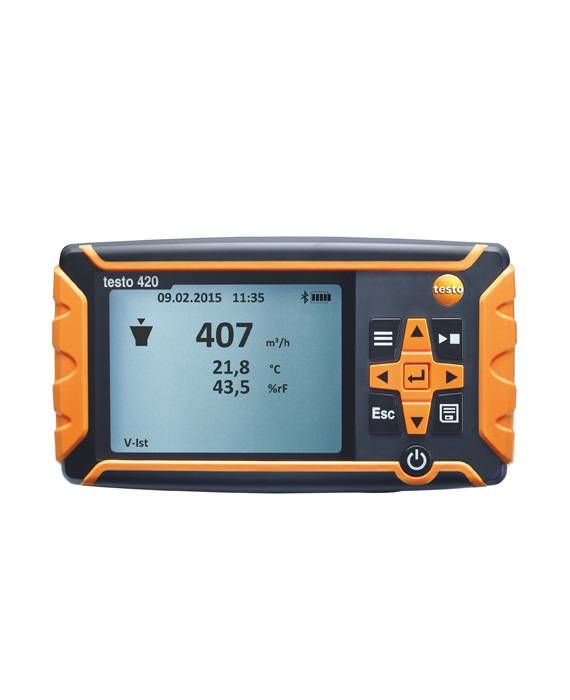
Multi-point measurement is available for outlets too large to be fully captured by a single hood placement. The Testo 420 differential pressure measuring instrument supports multi-point measurement sequences where readings are taken at several positions across a large outlet face and combined into a single volume flow figure. Follow the instrument's multi-point measurement protocol precisely to get a valid combined result.
Reading and Recording Measurements
Once the reading has stabilised, record it through the Testo Smart App by saving the measurement to the outlet reference in your protocol. The app timestamps each measurement automatically and stores it against the outlet ID you assigned during protocol setup. This creates a complete, traceable record of every outlet measured during the session without any manual transcription.
The app compares each recorded measurement against the design airflow and tolerance range you entered for that outlet. Outlets within tolerance are marked as passing. Outlets outside tolerance are flagged immediately, so you know before moving to the next outlet whether a balancing adjustment is needed at the current location. On a large-scale commissioning job across multiple levels of a Brisbane office tower, this real-time pass or fail feedback is what allows you to complete first-pass balancing in a single visit rather than returning for a second measurement session after office review.
For outlets that need to be measured more than once, the best practice is to take a minimum of two readings and verify they are consistent before recording the final value. Two readings that differ by more than a few percent suggest an inconsistency in hood placement, contact seal or reading stability. Investigate the cause rather than averaging two questionable readings.
| Recording Method | Advantage | Risk if Skipped |
|---|---|---|
| App protocol with outlet IDs | Automatic timestamping, pass/fail comparison, traceable record | No traceability, no real-time comparison against design |
| Minimum two readings per outlet | Confirms reading consistency, catches unstable measurements | Single bad reading recorded as final value |
| On-site report generation | Report emailed from site, no office transcription step | Manual transcription errors, delay in client delivery |
| Stable reading confirmed before saving | Accurate volume flow figure recorded | Drifting reading saved, incorrect balancing decision made |
At the end of each measurement session, use the app to generate the commissioning report directly from your phone. The report includes all outlet readings, design targets, pass or fail status and measurement timestamps. It can be emailed directly from the app to the client or principal contractor without returning to the office. For commercial contractors doing TAB and commissioning work across multiple Australian states, this on-site report capability removes a significant administrative step from the workflow.
Browse the full Testo HVAC instruments and tools range at HVAC Shop to see the complete Testo 420 lineup and accessories that support professional TAB workflows.
Common Measurement Errors
Understanding where TAB measurements go wrong is as important as knowing the correct technique. Most errors fall into a small number of categories that can be prevented with consistent site habits.
Hood leakage at the ceiling perimeter
This is the most common source of underreading in flow hood work. A gap between the hood perimeter and the ceiling surface allows supply air to escape without passing through the measurement grid. The reading will be lower than actual flow, and the error can range from a few percent to a substantial underread depending on the size and position of the gap. Press the hood perimeter firmly and evenly against the ceiling before starting any reading. On irregular surfaces, take a moment to check all four sides of the hood are in contact before allowing the reading to stabilise.
Outlet size underestimation
Using a hood that does not fully cover the outlet face because the outlet was larger than expected is a straightforward error with a predictable result: the portion of the outlet face outside the hood perimeter contributes flow that is never captured. The fix is to carry multiple hood sizes and select the one that covers the measured grille face dimension. The compact 360x360mm hood for small outlets is the right tool for small residential and light commercial grilles, but using it on a standard 600x600mm commercial diffuser will underread the outlet substantially. Always measure the grille face before selecting the hood on unfamiliar buildings.
Air bypass around the measurement grid
If the hood is correctly sealed against the ceiling but the flow straightener grid is fouled with dust or debris, airflow through the grid will be restricted and the reading will be lower than actual flow. Clean the flow straightener grid before each job or whenever visible fouling is present. This is particularly relevant on construction site commissioning work and industrial facilities in WA and regional Queensland where fine dust accumulates on everything during active construction or production.
Reading recorded before stabilisation
A measurement taken while the instrument is still settling will reflect the midpoint of the settling trend rather than the true stable value. On a large job where you are moving through dozens of outlets quickly, the temptation to record readings the moment the hood is in position is understandable. Resist it. A reading saved too early is not a fast reading. It is an inaccurate reading that will either cause unnecessary balancing adjustments or allow out-of-tolerance outlets to pass.
Unsecured hoods at ceiling height
Holding a large hood by hand at ceiling height introduces operator movement that affects the contact seal and reading stability. On tall ceilings, arm fatigue during a long measurement session changes the contact pressure over time, producing inconsistent readings for outlets measured later in the day compared to those measured earlier. Use the telescopic stand for any measurement above comfortable arm extension height, and particularly for the 610mm and larger hoods where the weight makes handheld work physically demanding.
Did You Know? Most TAB discrepancies found during commissioning audits trace back to one of three causes: hood perimeter leakage, reading before stabilisation, or hood size mismatch. None of these require expensive instrument recalibration to fix. They require consistent technique. Getting the fundamentals right on every outlet is what separates reliable commissioning results from results that need to be re-verified.
Using the Testo 420 Stand
The Testo 420 telescopic stand for high ceiling measurement extends up to 4 metres and is designed to hold the flow hood against ceiling-mounted outlets without the technician needing to hold it in place. For any commercial building with standard suspended ceiling heights of 2.7 metres or above, the stand makes a significant practical difference to how efficiently measurements can be completed.
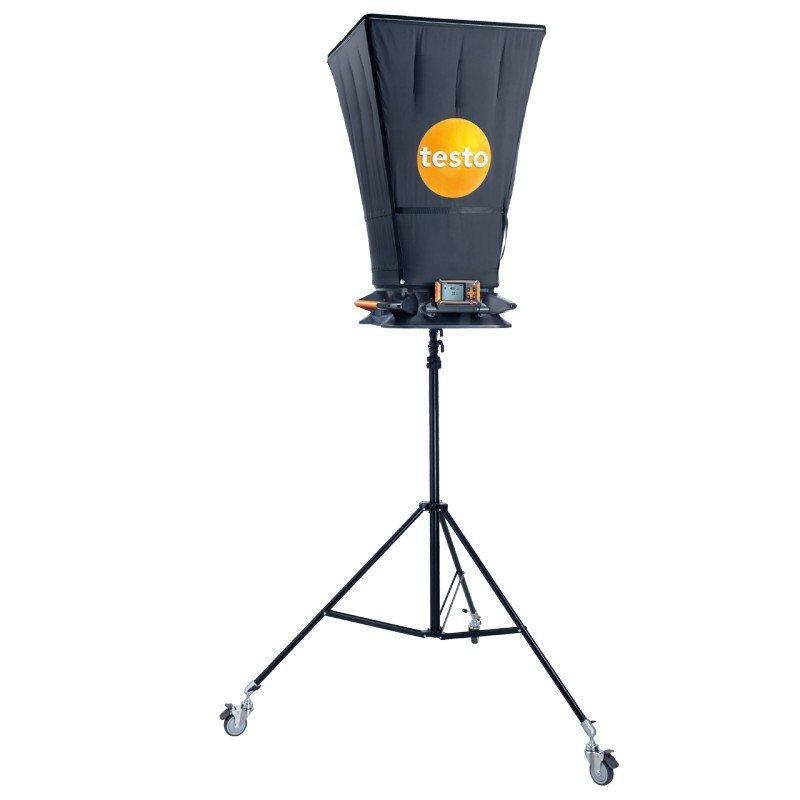
To set up the stand, mount the flow hood assembly to the stand head and extend the telescopic sections to the required ceiling height. The stand head positions the hood at the correct angle to seal flat against the ceiling face. Wheel the assembled stand into position beneath the outlet, then extend the final section to bring the hood into contact with the ceiling surface. Apply gentle upward pressure from the stand to maintain a consistent seal without overtightening.
The stand wheels allow the entire assembly to be rolled between outlets on the same floor without breaking the setup down between measurements. On a large commercial floor plate with dozens of outlets, this rolling workflow is substantially faster than assembling and disassembling the stand for each position. Lock the wheels before taking a reading to prevent movement during measurement.
Height adjustment is smooth and incremental, allowing the same stand to work across different ceiling heights on the same job. An office building with a mix of 2.7 metre suspended ceilings in open-plan areas and 3.2 metre ceilings in lobbies and common areas does not require a different setup for each zone. Adjust the stand extension and continue working.
For ceilings above 4 metres, a ladder or elevated work platform is still required, but the stand covers the ceiling height range found in the vast majority of Australian commercial buildings. Industrial warehouse facilities in Darwin and QLD with higher ceiling heights are the main exception, and for those applications, a working at heights assessment under Safe Work Australia guidelines applies before any elevated measurement work begins.
The stand also provides stability advantages at any height, not just tall ceilings. On a standard 2.4 metre residential ceiling, using the stand rather than holding the hood by hand produces more consistent contact pressure and more repeatable readings across the measurement session. If you are generating commissioning documentation that needs to stand up to client or auditor scrutiny, the consistency improvement from stand use is worth the extra setup time even at heights where hand-holding is physically feasible.
When working at any elevated height with the stand extended, maintain three points of contact on the stand frame before adjusting any section. On smooth commercial floor surfaces, wheel lock discipline is non-negotiable. An unlocked stand that moves during measurement does not just affect your reading. It is a genuine safety risk. Review working at heights requirements through Safe Work Australia's working at heights guidance and consult your state WHS regulator for compliance requirements relevant to your work type.
Tech Specs: All Testo 420 instrument and stand specifications including maximum extension height, load ratings and Bluetooth range should be confirmed against the current Testo documentation. Visit the Testo measurement technology site for current product documentation before using the instrument in compliance-critical commissioning applications.
Frequently Asked Questions: How to Use the Testo 420