Reviewed by: the HVAC Shop Technical Team
Published: April 2026
Last reviewed: April 2026
If you work on air conditioning and refrigeration systems in Australia, you already know that refrigerant leaks are one of the biggest causes of wasted time on the job. Not always the big blow-outs either. Most of the frustration comes from the small leaks that hide in plain sight. A flare that looks fine at first glance. A service valve that seeps only under certain conditions. A coil leak that shows up after the system has been running for a while. Those are the faults that turn into repeat visits, awkward customer calls, lost time in the arvo, and labour you never really wanted to donate for free.
That is why leak detection matters so much. A good leak detector is not just another gadget in the van. It is part of how you do a clean, professional diagnosis the first time. When you are working in Brisbane QLD humidity, Darwin heat, Perth coastal air, Sydney apartment installs, or Melbourne winter service calls, leak detection is not one-size-fits-all. The method that works in one job can be slow, messy, or unreliable in another.
👉 Browse leak detectors built for Aussie HVAC work
Why Leak Detection Matters more in Australian HVAC work
Australian HVAC jobs are all about conditions. In Darwin and Far North Queensland, heat and humidity can make diagnosis harder because systems run hard, evaporators stay wet, and jobsite comfort is not exactly ideal. In Brisbane, high moisture in the air can affect how quickly you move through a diagnosis if you are rushing. In Perth and other coastal areas, salt can attack exposed fittings and outdoor unit hardware over time. In Sydney, long apartment runs, tight balconies, and access limits can turn a straightforward leak check into a slow process. In Melbourne, seasonal load swings can change how and when a leak shows itself.
There is also the refrigerant mix you are dealing with. R32 is now common on newer residential installs. R410A is still everywhere in split and ducted systems. Older systems and some legacy equipment may still involve R22 or retrofit history. That matters because leak detection is not only about finding gas in the air. It is also about understanding the age of the equipment, where leaks usually develop, how the system was installed, and whether oil staining, vibration, poor support, corrosion, or repeated service work are part of the story.
Fair dinkum, one of the biggest mistakes on HVAC jobs is treating leak detection like a quick wave of the wand. A detector can help, but it does not replace a process. The best tradies combine tool choice, system knowledge, and patient checking. That is what prevents call-backs and protects customer trust.
Refrigerant work must be carried out with the right handling procedures, ventilation awareness, and licensed trade practice. For chemical handling guidance, refer to Safe Work Australia hazardous chemicals guidance.
What a Leak Detector is really helping you do
On paper, a leak detector helps you find refrigerant escaping from a sealed system. On the job, it is doing something more useful than that. It is helping you narrow down a fault in a way that you can prove, repair, and verify. That is the difference between a rough guess and a proper service result.
When a customer says the system is not cooling like it used to, there are a few possible stories. It might be airflow. It might be dirty coils. It might be a control issue. It might also be low charge caused by a leak that has been quietly growing for months. The detector does not solve all of that on its own. What it does is help you answer the key question: is refrigerant escaping, and if so, where from?
The answer matters because different leak points call for different fixes. A leaking flare might need remaking, tightening to the right spec, or correcting a poor seating surface. A leaking Schrader core might need a simple component change and retest. A leaking coil may raise a more serious repair-versus-replace discussion. A leaking braze might point to poor original workmanship, vibration stress, or corrosion. In every case, the detector is part of a bigger workflow that includes checking history, scanning carefully, confirming visually, repairing properly, and retesting after the work is done.
No worries if that sounds basic. Basic is what wins on-site. The problem is not that tradies do not know leak detection matters. The problem is that under time pressure, people skip steps. They move too fast with the probe, assume one alarm equals one confirmed leak, or fail to verify after repair. That is where the quality of your process matters more than the marketing on the box.
Main types of Leak Detectors used in HVAC
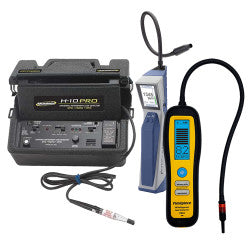
Electronic heated diode detectors
Heated diode detectors are common because they are fast, portable, and practical for general HVAC service work. They are often the first tool you reach for when you need to scan likely leak points around indoor and outdoor units, flare joints, service ports, coils, and valve bodies. For residential split systems and light commercial jobs, a decent heated diode tool can save a lot of time.
The trade-off is that they need proper technique. Move too fast and you miss the leak plume. Use them in contaminated air and you can get false positives. Run them with a tired sensor or weak battery and you may lose confidence in the readings. They work best when you give them time to stabilise, keep the probe path controlled, and treat them as a locating tool rather than final proof on their own.
For many tradies, this is the everyday option because it is quick to grab, easy to carry, and suited to the pace of normal service work. Built for Aussie conditions matters here. You want a unit that can handle van life, jobsite dust, and the reality that tools get knocked around.
Electronic infrared detectors
Infrared detectors are often chosen when you want more stability and fewer nuisance alarms. They are popular in situations where false positives waste time, such as busy plant rooms, commercial rooftops, or sites where contamination from solvents and general jobsite atmosphere can interfere with a basic check. They can cost more, but the better stability can be worth it for techs doing frequent diagnostic work.
They still need good technique. A premium detector does not fix bad scanning habits. If you rush the test around a suspect joint, you can still miss the source. The value of infrared is usually in consistency and confidence, especially when you need to compare one suspect point against another.
UV dye detection
UV dye is useful when the leak is hard to catch in real time or only shows itself intermittently. In those cases, a dye-based approach can help by leaving a visible trail after the system has circulated for a period. This is not always the first method used, but it can be very handy for repeated faults, awkward access situations, and problems that have already beaten a quick electronic scan.
That said, UV dye is slower. It is not your fastest first-pass tool on a standard service call. It is more useful when you need traceable evidence of where the leak path is developing over time. It can also be valuable in customer communication because visible confirmation is easier to explain than a detector chirp.

Bubble solution
Bubble solution is simple, cheap, and still one of the best confirmation methods in the trade. It is not the tool for scanning a whole system from scratch, but once you have narrowed down the area, bubble solution gives you visual proof at flares, service valves, Schrader cores, brazed joints, and other accessible points. When you want to show an apprentice what a confirmed leak looks like, this is often the easiest method to understand.
It also keeps you honest. A detector may tell you to look harder at a spot, but bubbles can confirm whether the joint is actually leaking. That is why a lot of experienced techs use electronic detection for search and bubble solution for confirmation.
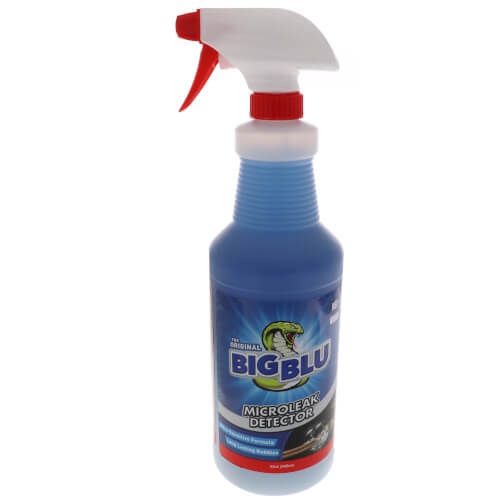
Start with an electronic detector to narrow the area, then confirm the exact leak point with bubble solution. That simple two-step method saves time and cuts down false positives.
Ultrasonic leak detection
Ultrasonic tools are less common in routine residential HVAC work, but they can help in specialised situations by listening for the sound of gas escaping. They can be useful where refrigerant concentration in the air is hard to interpret or where access and ambient conditions make other methods awkward. They are not the everyday first pick for most split-system techs, but they are worth knowing about because some commercial workflows benefit from them.
Like every other method, they are best used with context. They are not a magic shortcut. They are another way to narrow down the source when conventional scanning is difficult.
How Refrigerant type changes your Leak-check approach
Not every system tells the same story. R32 systems are common on newer residential equipment, and because they are so widespread now, your detector choice needs to be suited to routine split-system service and installation work. R410A remains heavily represented across existing systems, especially where older but still serviceable equipment is in place. On legacy equipment or older commercial jobs, you may still come across R22 history, retrofit records, or systems that have been repaired multiple times over the years.
This matters because leak location patterns can vary with equipment age, vibration, installation quality, and corrosion exposure. Newer R32 wall splits may send you straight toward flare joints, service valves, and installation-related points. Older R410A systems may show wear around repeated service areas, outdoor coil sections, or joints that have seen thermal cycling. Legacy R22 equipment often raises bigger questions about the economic sense of major leak repair versus replacement.
The detector itself is only part of the answer. Your real advantage comes from knowing what system you are looking at, how old it is, how it has been maintained, and what the usual failure points are on that style of equipment.
Small leaks often show up first as performance complaints, longer run times, or poor pull-down rather than a dramatic system failure. That is why a steady, methodical leak check can save a return visit later.
Comparison Table: Which Leak Detection Method suits which Job
| Method | Best Use | What It Does Well | Limitations | Typical Australian HVAC Use | Budget Level | Final Confirmation Needed? |
|---|---|---|---|---|---|---|
| Electronic Heated Diode | Fast general scanning | Quick to deploy, easy to carry, practical for daily service work | Can react to contamination and poor technique | Residential splits, ducted systems, light commercial servicing in Brisbane, Sydney, Melbourne, Perth, and Darwin | Low to mid | Yes, usually with bubble solution |
| Electronic Infrared | Higher-confidence diagnostics | More stable readings, fewer nuisance alarms in tricky environments | Higher buy-in cost | Commercial diagnostics, repeat fault jobs, higher-volume service businesses | Mid to high | Yes |
| UV Dye | Intermittent or hidden leaks | Visible trace helps prove difficult faults | Slower process and not always the first-pass method | Repeat call-backs, hidden leak paths, awkward access cases | Mid | Usually yes |
| Bubble Solution | Pinpoint confirmation | Clear visual proof at joints and valves | Not suitable for scanning an entire system from scratch | Flare checks, service valves, Schrader cores, final leak proofing after repair | Low | No, this is often the confirmation method |
| Ultrasonic | Specialised diagnostics | Can help where sound-based detection suits the site | Less common in everyday residential HVAC work | Selected commercial or access-limited jobs | Mid to high | Yes |
Real-World Leak Detection Workflow that Actually Works
The best leak detection workflow is not flashy. It is organised. Start with system history. Has the unit been repaired before? Has someone already regassed it? Were flares remade recently? Has the customer noticed the problem only in peak heat, or has capacity been fading for months? Those clues point you toward likely leak zones before you even switch a tool on.
Next, inspect the obvious areas visually. Oil staining, dirt tracking, vibration rub points, corroded sections, and disturbed service ports all matter. A lot of good diagnosis starts with your eyes before it starts with electronics. If the install quality is poor, suspect the workmanship points first. If the system is older and coastal, think corrosion. If it has recently been serviced, check whatever was last touched.
Then move to the electronic detector. Let the tool settle first. Follow the manufacturer’s operating guidance, keep the probe path controlled, and move slowly around likely points. One of the most common mistakes is moving the probe too quickly around a joint and then calling the system clear. Slow down. A leak plume is easier to detect when your movement is steady and deliberate.
Once the detector indicates a likely area, do not stop there. Narrow the point and confirm. This is where bubble solution shines, especially on valves, flares, and service fittings. If you have a difficult intermittent leak, dye may have a place in the process. After you have repaired the fault, test again. Then test again with the system running if appropriate. That final verification step is what separates a proper job from a hopeful one.
It also helps to support the leak-check workflow with the right broader gear. A solid set of refrigerant gauges helps you assess system behaviour properly, while a broader range of HVAC tools keeps your workflow consistent from diagnosis through repair and final testing.
Where Leaks Commonly Show up on Real Jobs
On residential split systems, flare joints are high on the list, especially if the original installation was rushed, poorly torqued, or disturbed during later service work. Service valves and Schrader cores are also common suspects. On ducted systems, access can make the process slower, so you often need to combine system knowledge and methodical checking rather than hoping for an instant hit from the detector.
On light commercial equipment, vibration, pipe support issues, repeated maintenance access, and general age can all contribute to leaks. Condenser coils, braze joints, service areas, and rubbed pipe sections can all cause trouble. On coastal jobs, corrosion needs to stay on your radar. In older equipment, the leak may be only part of the story. You may also be looking at whether repair remains the sensible path at all.
The point is simple. Leak detectors do not work in isolation. They work best when paired with a tradie’s understanding of where a system is most likely to fail. That is why the same tool can feel brilliant in one pair of hands and average in another.
Common Mistakes that Lead to Missed Leaks
The first big mistake is rushing. Tradies are busy. Everyone wants to get to the next job. But leak detection punishes impatience. If you swing the probe too quickly, skip stabilisation time, or do not isolate the suspect point, you can walk away thinking the system is fine when it is not.
The second mistake is relying on one method only. An alarm from a detector is not always the end of the story. It tells you to investigate harder. Confirmation is still part of the job. That is why pairing methods is so effective. Search with one tool, prove with another.
The third mistake is forgetting the repair check. A lot of call-backs happen because the tradie found the leak, repaired the leak, and moved on without a proper retest. That is risky. Even a small mistake in a flare remake or valve-related repair can leave the job half-finished. No worries, the fix is easy: always retest.
The fourth mistake is ignoring environment. Wind across an outdoor unit, contamination in the air, wet surfaces, tight access, and heat load can all change how easy the leak is to detect. That does not mean the tool is bad. It means the job conditions need to be read properly.
Leak detection is not just about finding the fault. It is part of responsible refrigerant handling and professional repair practice. The best result is not a quick alarm. It is a verified fix with clear follow-up testing.
How to Choose the Right Leak Detector for your Type of Work
If you mainly service residential split systems, you usually want a detector that is quick to deploy, portable, easy to trust, and sensible on price. That is why many technicians start with a reliable electronic detector and keep bubble solution close by. This setup covers a lot of normal service work without overcomplicating things.
If your workload includes more repeat diagnostics, commercial equipment, or jobs where false positives waste a lot of time, stepping up to a more stable electronic option can make sense. The added consistency can pay for itself across enough service calls. If you frequently deal with awkward intermittent leaks, UV methods may be worth adding to the kit as a secondary solution.
You should also think about how the tool fits your actual workday. Is it comfortable to carry? Is the sensor replacement practical? Does the probe shape suit tight spots? Can it handle a van that gets hot, dusty, and bounced around? Is the interface simple enough to use properly when you are tired late in the day? Those details matter more than brochure language.
That is why a lot of tradies buy by workflow, not by hype. The best leak detector for you is the one that helps you find leaks properly, confirm them, and move through jobs with confidence. Anything else is just shelf decoration.
Why Process beats Price on Leak Detection Tools
Price always matters, but it should not be the only filter. A cheap tool that gives inconsistent results can waste hours over a month. A better detector used badly can also waste hours. That is why process beats price. When you buy a detector, you are really buying a way of working. If the tool supports a clean, repeatable process, it earns its keep.
For apprentices and newer techs, this is even more important. A simple, dependable setup often teaches better habits than a complicated premium tool used without discipline. Learn to slow down, stabilise the tool, read the system history, confirm the leak, and retest after repair. That basic routine will still serve you when your kit gets more advanced later.
For business owners, leak detection quality also affects customer trust. When you can explain what you found, how you confirmed it, what you repaired, and how you verified the result, the job feels more professional. Customers may not understand the difference between heated diode and infrared, but they absolutely understand the difference between a one-visit fix and another return call.
Where to Buy Leak Detectors in Australia
If you are setting up a new service kit, replacing an older detector, or adding a confirmation method to tighten up your workflow, the easiest place to start is a dedicated range of tools that suits Australian HVAC work.
👉 Shop leak detectors Australia-wide with fast shipping
You can also round out the rest of your setup with related service gear, including refrigerant gauges for diagnosis and charging checks, plus a broader range of HVAC tools for day-to-day service work.
Final thoughts
The right leak detector does more than help you find escaping refrigerant. It helps you work in a cleaner, more confident, more professional way. In Australian HVAC work, that matters. Whether you are on a tight apartment balcony in Sydney, a hot outdoor unit in Darwin, a coastal job in Perth, or a busy residential call in Brisbane QLD, the goal is the same: find the leak properly, confirm it, repair it properly, and verify the result.
That is the fair dinkum difference between guessing and diagnosing. Choose a detector that suits your workload, keep your process tight, and you will save time, reduce call-backs, and do better work. No worries.