
Get a Fast Quote
🛠️ Need the Right HVAC Tool for the Job?
Whether you're quoting a bulk order or chasing hard-to-find tools, we’re here to help.
Get a fast, personalised quote—no pressure, no spam!
Fill out the form below and we’ll get back to you ASAP.
📩 Request a Quote
Description
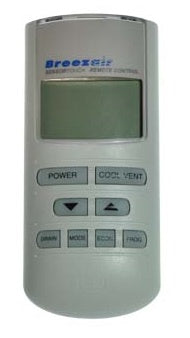
This genuine Breezair Horizon 3 Wall Controller, part number SY107950, is your direct replacement for maintaining comfort in your evaporative cooling system. It's the brain of your cooler, letting you manage temperatures, fan speeds, and operational modes with precision. Anyone who's done a few evaporative cooler swaps knows a reliable wall controller makes a big difference in customer satisfaction, especially on those scorching Australian summer days.
Best For
- HVAC service technicians replacing faulty units.
- Apprentices learning evaporative cooler diagnostics.
- Competent DIY owners maintaining their Breezair system.
Compatibility
This controller is designed specifically for Breezair evaporative cooling units, particularly those that originally shipped with the Horizon 3 series wall controller. It's a direct replacement for the Seeley PN 107950. If you're running a different model, check fittings and specs before ordering.
Features
- Genuine Breezair spare part, ensuring exact fit and function.
- Direct replacement for existing Horizon 3 wall controllers.
- Intuitive interface for controlling evaporative cooler functions.
- Durable construction, built to withstand daily use in Australian conditions.
What's in the Box
- 1 x Breezair Control Remote Horizon 3 (SY107950)
Using It on the Job
- Isolate Power: Before starting any work, always switch off the main power to the evaporative cooler at the circuit breaker and verify it's off with a suitable voltage tester.
- Remove Old Controller: Carefully detach the old wall controller from its mounting, usually by unscrewing it and gently pulling it away from the wall.
- Disconnect Wiring: Photograph the existing wiring connections before disconnecting them, noting wire colours and terminal positions.
- Connect New Controller: Wire the new Breezair Horizon 3 controller following your photographed guide, ensuring all connections are secure and correct.
- Mount Controller: Securely mount the new controller to the wall, making sure it's level and flush.
- Restore Power & Test: Re-establish power to the cooler and test all functions of the new controller – fan speed, pump operation, and mode selections.
Limitations & Safety Notes
- Always isolate power before attempting any electrical work.
- Ensure correct wiring to prevent damage to the controller or cooling unit.
- This controller is designed for specific Breezair units; confirm compatibility with your model before installation.
- Installation should only be performed by a qualified tradesperson or a competent individual with electrical experience.
- Follow Australian electrical safety standards and Safe Work guidance.
Tradie Pro Tip
When replacing any wall controller, always double-check your terminal connections against the wiring diagram if you're unsure. A quick photo before disconnecting the old one saves a lot of headaches later, especially if the wire colours aren't standard. It’s an easy fix to get wrong if you rush it.
Pair With
Pair with a new evaporative cooler filter pad and a quality evaporative cooler pump to give your Breezair unit a complete seasonal refresh.
Common Questions for Breezair Control Remote Horizon 3
Any question?
If we still haven't answered your question, you can contact us below and we will get back to you as soon as possible.
You may also like
Recently viewed
Popular Brands We Distribute