Darwin • Townsville • Brisbane • Deep Vacuums • Audit-Ready Logs
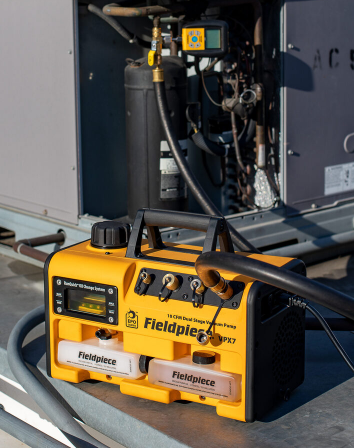
In humid North Queensland, moisture hides everywhere — in long line-sets, oil films, and micro-pockets behind valves. This guide shows how to use the Testo 557 vacuum measurement and external probe to pull reliable deep vacuums, pass rise tests, and send tidy, app-made reports that satisfy building managers, clients, and site auditors. We focus on probe placement that avoids oil vapour, repeatable evacuation steps, and documentation habits that reduce disputes throughout the wet season.
If you're building or upgrading your diagnostic setup, explore Testo HVAC tools for evacuation, manifolds and digital diagnostics to match your workflow with the right gear.
Why it matters for Aussie HVAC techs
Moisture Risk is Higher Up North
North Queensland and the Top End throw extra moisture at you — even a system that looks "dry" can hide dissolved or adsorbed moisture in oil films, line-set low points, and inactive branches. That moisture outgasses slowly, so if your probe is in the wrong place or contaminated with oil, you'll see misleading numbers: "false-low" microns when the system isn't truly dry, or a stubborn plateau that wastes time.
This matters because humid air is not just a comfort issue. On an HVAC job, it can become a system reliability issue. Moisture left inside a refrigeration circuit can react with refrigerant and oil, create acids, stress compressors, and make future service harder. In Darwin and Townsville, where humidity can sit high for long stretches, the gear may feel like it is fighting you all arvo. That is why clean setup, good hose conductance, correct probe placement, and patient logging all matter.
In Brisbane, the job may look easier because the site is more accessible, but wet-season moisture still creeps into open pipework fast. In Perth, heat and dry air can make a tech rush because the system pulls down quickly at first, then stalls as trapped moisture starts to boil off. In Melbourne, cooler conditions can slow outgassing and make a rise test look odd if you do not allow enough time. Different city, same lesson: microns only help when the probe is placed where the truth is.
Do not treat a fast pull-down as proof by itself. A system can reach a nice-looking micron number near the pump while moisture is still hiding in the circuit. Always place the probe on the system side, isolate, and confirm with a rise test before you call it done.
Audits Expect Proof — and ARCtick Expects Licences
Under Australia's refrigerant regime, techs need the appropriate Refrigerant Handling Licence (RHL) and businesses that acquire or deal in bulk fluorocarbon refrigerant typically need an RTA. Attaching your micron trends, timestamps, notes and licence details to the work order turns a "trust me" into audit-ready documentation, aligned with the national HFC phase-down's push for responsible handling.
That is important on commercial sites, body corporate jobs, schools, aged care buildings, hospitals, shopping centres, and larger residential installs where more than one person may review the job later. A building manager may not know what a good evacuation looks like, but they can understand a dated report, a stable rise test, clear notes, and a technician licence number. That small bit of proof can save awkward calls later.
Good documentation also protects your own workmanship. If another trade opens a system, changes a valve, or damages a fitting after you leave, your exported report gives you a clean record of what you achieved on the day. No worries, no drama, just clear proof. For Aussie HVAC techs working across humid coastal sites, that proof is often as valuable as the tool itself.
Less Arguing, More Approving
Facility managers and insurers respond to evidence. A clean log that shows a verified deep vacuum and a stable rise test is faster to approve than a paragraph of memory. Your goal is simple: systematic, repeatable proof on every evacuation.
This is where the Testo 557 workflow earns its keep. It helps you move from "I pulled it down" to "Here is the reading, here is the trend, here is the rise test, and here is where the probe was placed." That is a fair dinkum improvement when you are trying to close jobs cleanly and avoid callback arguments. The best techs do not rely on memory alone. They build a habit that works every time.
Moisture & Vacuum Basics in the Tropics
Moisture removal is about time at low absolute pressure plus good conductance. In plain English, that means you need the system exposed to a strong vacuum for long enough, with as little restriction as possible between the system and the pump. Short hoses, large internal diameter, removed valve cores, clean fittings, and fresh pump oil all help the pump do its job.
Under deep vacuum, water boils at a very low temperature, so bound moisture slowly migrates out of oil films and micro-porous surfaces. High ambient humidity means your system starts "wetter" and line-sets can act like sponges. Outgassing takes longer, and anything that adds restriction slows the process further. Long skinny hoses, Schrader cores left in place, kinked runs, dirty fittings, half-open core tools, or poor pump oil can all make a good vacuum pump look weak.
A clean evacuation setup starts with a strong pump, clean oil, and low-restriction hose routing.
The two most common traps in humid regions are oil mist contamination reaching the sensor, which can fake better readings than reality, and a probe placed too close to the pump, which sees vacuum at the pump rather than where it matters. If the probe sits near the pump, you may be measuring the easiest part of the setup, not the wettest part of the system.
Think about a long line-set in a Brisbane apartment block. The pump may pull hard at the service port, but moisture at the far end of the run needs time to boil off and travel back through the circuit. If you only watch the pump-side reading, you might pack up early. Then the customer calls back later with poor performance or a system that does not settle properly. A better probe position helps catch that before it becomes your problem.
In Darwin, this can be even more obvious. Open a system for longer than planned, and warm humid air gets inside quickly. If the pipework has been open during repair, or the system had a leak that allowed air ingress, the evacuation may need more time than a dry-climate job. There is no shame in a slower pull if the final result is clean and proven. The mistake is pretending moisture is gone because the first number looked good.
A micron gauge does not remove moisture by itself. It tells you what is happening. The pump, hose setup, core removal, oil condition, and time under vacuum do the work. A good reading comes from a good process.
Probe Placement that gives Honest Microns
Think of your vacuum probe as a courtroom witness: you want their testimony from the scene, not from the police station down the road. That means placing the Testo vacuum sensor on a clean, oil-free service point away from the pump's exhaust path so oil vapour can't skew readings.
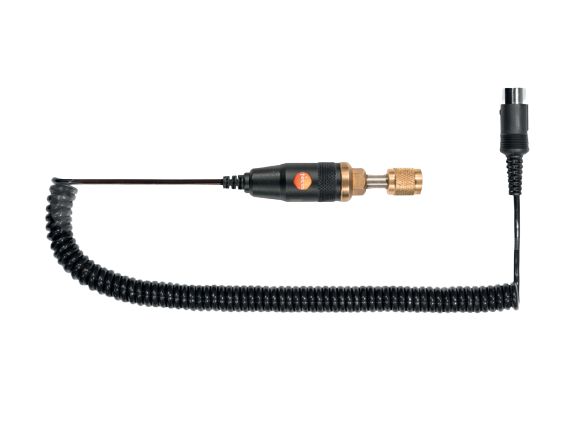
The external Testo 557 vacuum probe lets techs place the sensor where the system reading matters most.
Good probe placement gives you a more honest view of the system. On a small split system, that may mean using a service port that is as close to the system side as practical. On a longer commercial run, it may mean using a core-removal tool side port or moving the probe during diagnostics to compare sections. The aim is not to make the number look pretty. The aim is to know whether the system is actually dry.
Placement Rules of Thumb
Avoid the pump side: if the probe sits on the pump manifold or a tee that's too close, it reads an unrealistically low pressure. That number may look good on the screen, but it can hide moisture still sitting inside the pipework.
Use a system port: mount on the liquid line service port or a dedicated core-removal tool port, downstream of restrictions. This gives you a better read on what the system is doing, not just what the pump can achieve.
Keep it clean: cap the probe in transit, wipe fittings, and don't let oil wick into the sensor cavity. A dirty probe can waste time because you start chasing faults that are not in the system at all.
Mind the adapters: match threads properly. A 1/4 inch SAE connection is common on many tools, while many R410A and R32 service valves use 5/16 inch. Poor adapters, tired seals, and damaged O-rings can turn a simple evacuation into a long afternoon.
External Probe vs. Built-in Measurement
The Testo 557 supports vacuum measurement and works superbly with an external vacuum probe. The benefit of an external probe is flexibility in placement, letting you measure where the system is hardest to evacuate, not just where it's convenient.
Built-in measurement can be handy because it keeps the setup simple. But external placement is powerful when the job is awkward. For example, on a rooftop package unit in Sydney, you may want the sensor positioned away from the pump and closer to the circuit section you are checking. On a Perth commercial site with long pipe runs, you may use the probe to confirm whether one section is holding moisture more than another. On a Melbourne winter job, you may use the external probe to watch how slowly moisture comes out when components are cooler.
The real win is control. Instead of guessing from one fixed point, you can place the sensor where the answer matters most. That helps you separate three common problems: a real leak, trapped moisture, or a bad setup on your own vacuum rig.
The workflow: Probe → Pull → Prove
👉 Using a matched setup improves consistency. You can browse Testo digital manifolds and HVAC diagnostic tools to build a reliable evacuation and measurement workflow.
A) Mount the Probe Right
Fit the external probe to a clean, oil-free service point on the system side. Confirm a tight seal at the probe connection; any weep becomes a "mystery rebound" later. If you're segmenting a long run, multi-split, VRF, or long riser, move the probe between segments during diagnostics to find which side is dragging.
Before you start the pump, take a moment to look at the whole setup. Check the hose path, check that the core tool is fully open, check that the pump oil is clean, and check that the probe is not hanging where it can be knocked or filled with oil. This is simple work, but it saves time. A rushed setup often creates a fake problem that looks like a wet system or leak.
B) Pull Down with Purpose
Short, large-bore hoses: minimise restrictions. Where the job allows it, go direct to service ports instead of routing everything through a restrictive manifold path.
Remove cores: a vacuum-rated core tool dramatically reduces restriction and speeds the pull. This is one of the easiest ways to improve evacuation performance on real jobs.
Fresh pump oil: saturated oil lowers performance. A quick swap often improves the slope of the pull-down and stops you blaming the system for a pump problem.
Watch the trend: use the Testo app to verify a continuous downward micron curve. Plateaus can hint at trapped moisture, restrictions, poor oil, or a leak on your setup.
Nitrogen break: a brief, low-pressure dry nitrogen break can help dislodge moisture pockets before your final pull, when used correctly and safely.
Line-set management: open high points first where practical. On steep risers, check for valve caps and service fittings that are not sealing cleanly.
Isolation valves: verify which solenoids, EEVs, and service valves are open during evacuation. Some systems need a specific OEM sequence so you are not pulling against a closed path.

A smart manifold kit helps keep evacuation, temperature checks, and reporting tied together on one workflow.
Pulling down with purpose also means watching how the system behaves, not just waiting for a target number. A smooth pull that slows as it gets deeper is normal. A pull that drops fast then stalls hard may point to moisture or restriction. A pull that never gets moving may point to poor pump oil, a leak, or a valve that is not open. The trend tells a story, and the Testo 557 setup helps you keep that story visible.
C) Run a rise (decay) test
Close isolation valves to trap vacuum in the system, then watch the micron climb. A small, slow rise that stabilises is normal; a rapid rise that keeps climbing usually signals moisture or a leak. Once stable within your spec, annotate the result and export the report. Attach it to the work order before you leave the roof.
Do not skip this step because the pull-down number looked good. The rise test is where many hidden issues show up. If the system rebounds then settles, you may be seeing moisture still boiling off. If it climbs and keeps climbing, suspect a leak or a poor fitting. If it behaves differently each time, check your hoses, seals, and core tools before blaming the customer's equipment.
Rise Test Patterns (and what they mean)
Fast rebound that plateaus: this often points to desorption. Moisture is coming out of oil films, pipe walls, or internal surfaces, then slowing as the system settles. Wait, pull again, and consider a dry nitrogen break if the job calls for it.
Fast rebound that keeps rising: suspect a leak or a fitting that wasn't quite snug. Soap test and re-seat vacuum-side connections. Check the probe fitting, hose ends, core tool seals, valve caps, and any adapters.
Slow, stable rise within spec: this is your green light when it matches the equipment requirement and your site procedure. Document the target reached, the rise test result, and the probe location before moving on.
Sawtooth trend during pull: check hose kinks, pump oil, valve position, and core tool flow. Replace oil if needed and confirm the core tool valve is not partly throttled.
Rise test patterns can look different from Darwin to Melbourne because ambient conditions change how fast moisture moves. Warm humid sites can give you more stubborn outgassing. Cooler Victorian mornings can slow moisture movement and make the test take longer. The key is to watch the pattern, not just one moment on the screen.
QLD/Tropical Troubleshooting (Darwin • Townsville • Brisbane)
When microns won't drop
Probe too close to pump: move it to the system side. Oil mist often fakes a "good" low reading near the pump but not inside the system.
Old pump oil: swap oil. You'll often see an immediate improvement in the slope of the pull-down, especially after a wet job or after a pump has sat in the ute for too long.
Hidden moisture traps: long horizontal low points, inactive branches, accumulators, and sections behind valves can hold moisture. Segment and conquer instead of guessing.
Valve position: ensure EEVs and solenoids are open for evacuation per OEM steps. Some VRF systems need a specific sequence, and a closed valve can make a good pump look useless.
On tropical jobs, the first question should not be "what is wrong with the tool?" It should be "what is the setup telling me?" Check the basics first. Clean oil, open path, short hoses, removed cores, sound seals, and correct probe position solve many problems before they become a drama.
When microns drop, then bounce back
Micro-leak on a fitting: re-seat and test. A tiny leak near the probe gives dramatic rebound curves and can waste a lot of time.
Warm, humid air ingress: check caps and hoses for wicking. Replace suspect O-rings and keep fittings capped when not in use.
Component outgassing: allow more time at low pressure and consider gentle warming where it is safe, allowed, and within OEM limits.
A bounce-back does not always mean the installed system has a leak. Sometimes it is your vacuum rig. That is why a careful tech checks the probe seal, adapter, core tool, and hose ends before making a big call. A five-minute check can save a false diagnosis.
Phone & Bluetooth in the wet
Keep the phone dry and shaded: sweat, drizzle, and roof heat cause mis-taps and app interruptions. A phone left baking on a Colorbond roof can quickly become the weakest link.
Battery savers off: aggressive Android battery management can interrupt logging. Whitelist the app before the main pull if your phone has caused dropouts before.
Line-of-sight start: pair within a few metres on a metal roof. Once stable, step back. Concrete, metal plant rooms, lift overruns, and rooftop screens can all reduce practical Bluetooth range.
When the app drops out, the evacuation may still be fine, but your proof trail is damaged. Do a short test log before the real pull, confirm export works, then start the job record. That small habit is gold on commercial work.
Testo 557 app & Reporting (PDF/CSV)
The Testo Smart App gives you live micron graphs and one-tap PDF/CSV exports. Always take a 30–60 second "proof capture" before the real pull to confirm that the phone, permissions, and gauge are playing nice. After the rise test, export the final report, annotate probe placement and valve positions, then attach the file to your work order or CMMS. This habit alone cuts a tonne of follow-up calls.
Naming standard: use a clear file name such as 2025-03-14_TSV_Harbour-T3_VRF-East_EVAC_WO39107. A clear file name helps office staff, project managers, and site contacts find the right report without chasing you.
Foldering: keep reports under client, site, asset, date, and then store reports, photos, and licence details together. A clean folder is boring until there is a dispute. Then it becomes your best mate.
On weak reception: save locally on the roof and sync to cloud when back under coverage. Do not rely on mobile signal in plant rooms, basements, or roof areas with poor coverage.
Reporting is not just admin. It is part of the job. A well-made PDF or CSV export can show the pull-down curve, the rise test, timing, and notes. It can help prove that the system was evacuated properly before charging or commissioning. For businesses trying to improve quality control, this also makes it easier to train apprentices because they can review real trend data after the job.
Quick Comparison: Testo 557 vs Fieldpiece SM480V
The Testo 557 and Fieldpiece SM480V are both strong choices for HVAC techs, but they suit slightly different workflows. The Testo 557 stands out when you want flexible external probe placement and tidy proof-first reporting. The Fieldpiece SM480V is popular with techs who like the Job Link ecosystem and built-in micron measurement. The right choice depends on how your crew works, what sites you service, and how you prefer to document jobs.
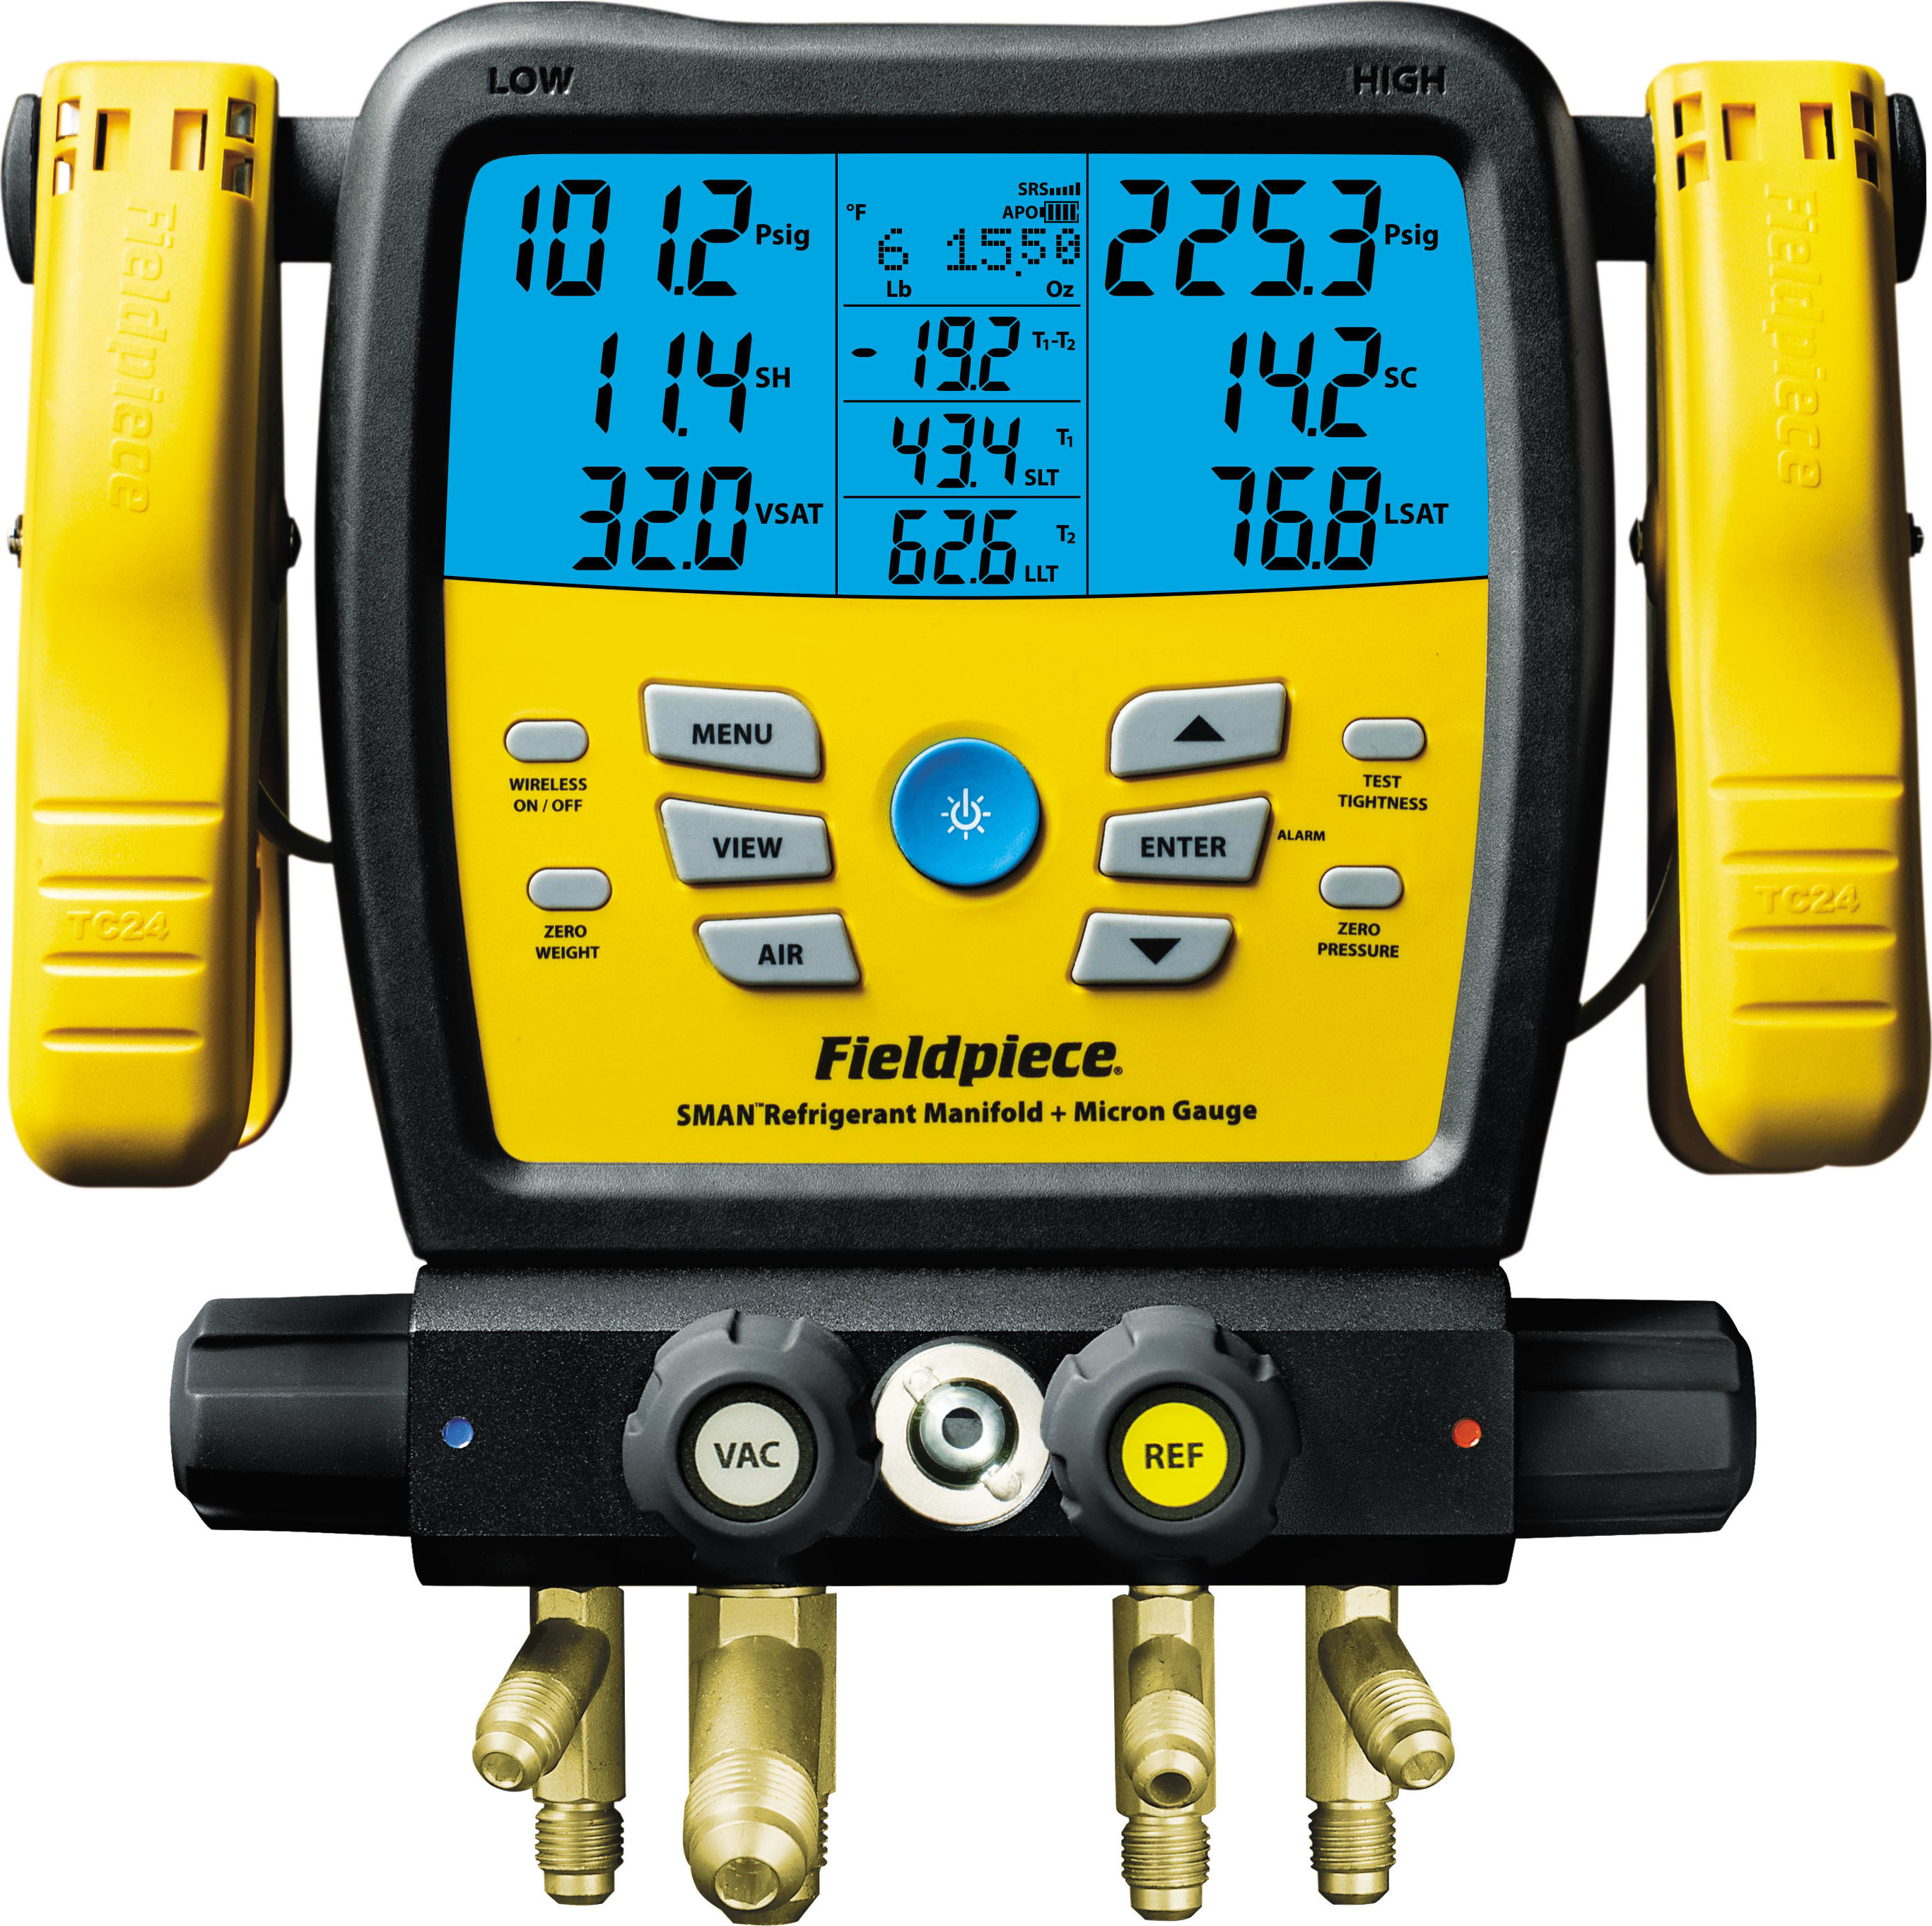
The Fieldpiece SM480V is a strong comparison point for built-in micron measurement and Job Link workflows.
| Feature | Testo 557 | Fieldpiece SM480V |
|---|---|---|
| Vacuum measurement | Supports external vacuum probe (Pirani); flexible placement | Built-in micron gauge |
| App & exports | Testo Smart App; PDF/CSV reports | Job Link® App; mobile job reports |
| Wireless notes | Classic Bluetooth (practical short/medium LOS). The 558s Smart Vacuum Kit uses Bluetooth 5.0 for stronger coverage. | Manual indicates ~350 ft / 106 m LOS to mobile; Job Link tool family advertises long LOS within the ecosystem |
| Ports/build | 4-valve manifold; robust housing | 4 ports (1×3/8″ + 3×1/4″); rugged case |
| Best fit | Proof-first evacuations and flexible sensor placement | Large sites needing extended LOS and Job Link integration |
For a residential split in Brisbane, either tool can do the job when set up well. For a humid commercial plant where you want to prove dryness at a specific point in the system, external probe flexibility can be very useful. For a large site where your phone may be far from the manifold, long line-of-sight performance may matter more. Do not buy based on a single spec. Buy based on your real work.
Compatibility & Threads (R32/R410A/R22)
Refrigerants: typical libraries cover R32, R410A, R22 and more. Keep your app and instrument tables updated so your readings, saturation values, and reports line up with the refrigerant in the system.
Threads: manifolds are commonly 1/4″ SAE, while many R410A and R32 valves are 5/16″. Pack adapters and a vacuum-rated core tool so you are not stuck on site trying to make the wrong fitting work.
Thread compatibility sounds small, but it can make or break the job. A poor adapter can leak under vacuum even if it seems tight by hand. A worn O-ring can cause a rise test fail that looks like a system leak. A cheap hose or wrong fitting can cost more in lost time than a proper adapter kit. For Aussie techs moving between older R22 equipment, R410A splits, and newer R32 systems, a tidy fitting kit is not optional.
R32 also brings extra safety awareness because it is mildly flammable. Follow OEM procedures, site rules, and Australian requirements. Evacuation work should be planned, documented, and done with the right gear. The Testo 557 setup is part of that workflow, but safe refrigerant handling is still the technician's responsibility.
Maintenance Must-Knows for Humid Seasons
Cap the probe: prevent oil wicking and dirt ingress that throw off micron readings. A probe rolling around uncapped in the van will not stay trustworthy for long.
Keep the path oil-free: an oily sensor cavity can fake "good" values or slow response. Clean or replace O-rings if readings wander or do not match expected behaviour.
Update the app and test exports: a 30-second mini-log in the carpark saves you 30 minutes on the roof. Check app permissions, Bluetooth pairing, battery settings, and export format before the serious work starts.
Calibration and records: keep calibration dates and certificates associated with each instrument ID in the same folder as your logs. This is handy for internal quality checks and site audits.
Pump oil discipline: swap oil more often in humid months. Contaminated oil slows everything down and makes diagnosis harder. If the pump has handled a wet system, do not expect the oil to stay fresh.
Humid-season maintenance is mostly about discipline. Keep caps on, keep seals fresh, keep fittings clean, keep the pump oil clear, and keep records in order. These small habits reduce bad readings and help you trust your own numbers. That matters when you are standing on a hot roof, the client wants the system running, and the micron trend is not behaving.
When to Upgrade (558s & long-range options)
If you're battling flaky Bluetooth on older phones or want a smoother, longer-range platform, consider the Testo 558s Smart Vacuum Kit with Bluetooth 5.0 and modern app integration. For sprawling plants where line-of-sight range is king, many crews like the SM480V within the Job Link tool family for extended LOS workflows. Pick based on your sites: high-rise LOS and roof-to-plant paths reward longer-range radios; tight residentials reward flexible probe placement and quick documentation.
An upgrade makes sense when the old setup is slowing the job, weakening reports, or creating avoidable repeat visits. If the manifold still reads accurately, exports cleanly, and suits your site work, keep using it. But if your crew is losing logs, fighting Bluetooth dropouts, or needing better job reporting, a newer platform can pay for itself in time saved.
For a small residential crew in Sydney or Melbourne, a practical upgrade might be about better app use and quicker handover notes. For a commercial crew in Brisbane, Darwin, or Perth, the upgrade may be about range, rugged handling, and smoother documentation across larger sites. Either way, match the tool to the work. Do not upgrade just for the shiny screen. Upgrade when it fixes a real jobsite pain.
👉 If you're upgrading your setup, explore Testo HVAC tool range for professional technicians to compare manifolds, probes and smart diagnostic systems.
Exploring a newer Testo platform? See the Testo 558s Smart Vacuum Kit.
Client story (Brisbane)
Nadia's maintenance team looked competent on paper but kept copping "no proof" pushback. They standardised two things: a probe-placement SOP on the system side, away from the pump path, and an always-export habit with micron trend, rise test, notes, and RHL details on the PDF. Within a month, callbacks dropped; by the next quarter, audits were "thanks for the PDF" rather than "can you resend".
The biggest change was not a fancy trick. It was consistency. Every tech used the same probe placement rules. Every tech checked pump oil. Every tech ran the rise test. Every tech exported the report before leaving site. That made it easier for the office team to answer client questions, easier for apprentices to learn, and easier for supervisors to spot jobs that needed follow-up.
On one humid Brisbane job, the team saw microns drop well at first, then rebound hard during isolation. Instead of guessing, they checked the vacuum rig and found a tired seal at the core tool. After replacing it, the system pulled down cleanly and held a stable rise test. Without the report and trend, that could have turned into a false leak hunt. With the right workflow, it became a quick fix.
FAQs
Does the Testo app log microns and export reports?
Yes. The Testo Smart App logs data and exports PDF/CSV you can email or save on site. Take a 30–60 second test export before the main pull.
Why place the probe away from the pump?
Oil vapour near the pump can fake "good" low numbers. Placing the probe on the system side gives a truer picture of dryness.
Do I need ARCtick to do this work?
Yes. If work on RAC equipment carries a risk of emission, the technician needs a current RHL; businesses handling bulk fluorocarbon refrigerant generally need an RTA. Add these IDs to your exported reports.
What if microns won't drop?
Swap pump oil, remove cores, shorten hoses, re-seat fittings, and check for closed valves. Segment long runs and gently warm components within safety limits.
Will longer wireless help?
It can. The 558s Smart Vacuum Kit's modern Bluetooth stack improves robustness. On huge sites, Job Link® gear is known for strong LOS inside the Fieldpiece tool family.
Which refrigerants are supported?
Check your instrument/app list. R32, R410A and R22 are commonly included; keep refrigerant tables updated in the app.
Humid months are unforgiving — don't lose a log to a damaged sensor. Keep a spare Testo 0638 1557 external vacuum probe in the van. A spare probe is cheap insurance when you are working through busy summer callouts. If the main probe gets dropped, contaminated, or gives readings you do not trust, a spare lets you confirm the result and keep moving.
Useful Resources
Testo Smart App (Google Play) — creates digital measurement reports with PDF/CSV export.
Testo 558s Smart Vacuum Kit — current platform replacing the discontinued 557s, with Bluetooth 5.0. See the Testo 558s Smart Vacuum Kit at HVACSHOP.
Fieldpiece SM480V operator manual — LOS range, ports, and Job Link family notes.
ARCtick — Refrigerant Handling Licence requirements.
DCCEEW — Australia's HFC phase-down overview and FAQ.
Follow OEM procedures and current Australian regulations/standards for your state/territory and site. This guide is practical advice, not a substitute for compliance documents.
Written by: Rica Francia Macaspac, content writer at HVACSHOP. Rica helps Aussie tradies and homeowners understand HVAC gear without the jargon, working with industry experts to ensure accuracy and local relevance.
Date Updated: Nov 11, 2025