Understanding R32 Recovery Methods and Service Pressures
R32 has become one of the most important refrigerants in modern Australian air conditioning work. It is now common in newer split systems, carries a lower GWP than R410A, and is increasingly relevant for technicians who need recovery tools and procedures that match current equipment. Recovery is not just about removing gas from a system. It is about doing it safely, efficiently, and with equipment that suits both the refrigerant and the job.
For many technicians, the real-world question is not just what R32 is. It is how R32 changes the workflow compared with older service patterns built around R410A — including compatible machines, correctly rated hoses, approved recovery cylinders, safe cylinder handling, and how recovery speed shifts depending on whether refrigerant is being pulled as vapour, recovered as liquid, or removed using a push-pull process on a larger charge.
In Australia, that also includes licensing, safety classification, and the practical difference between older installed R410A systems and the newer R32 systems becoming more common in residential and light commercial work.

Browse refrigerant recovery units at HVAC Shop
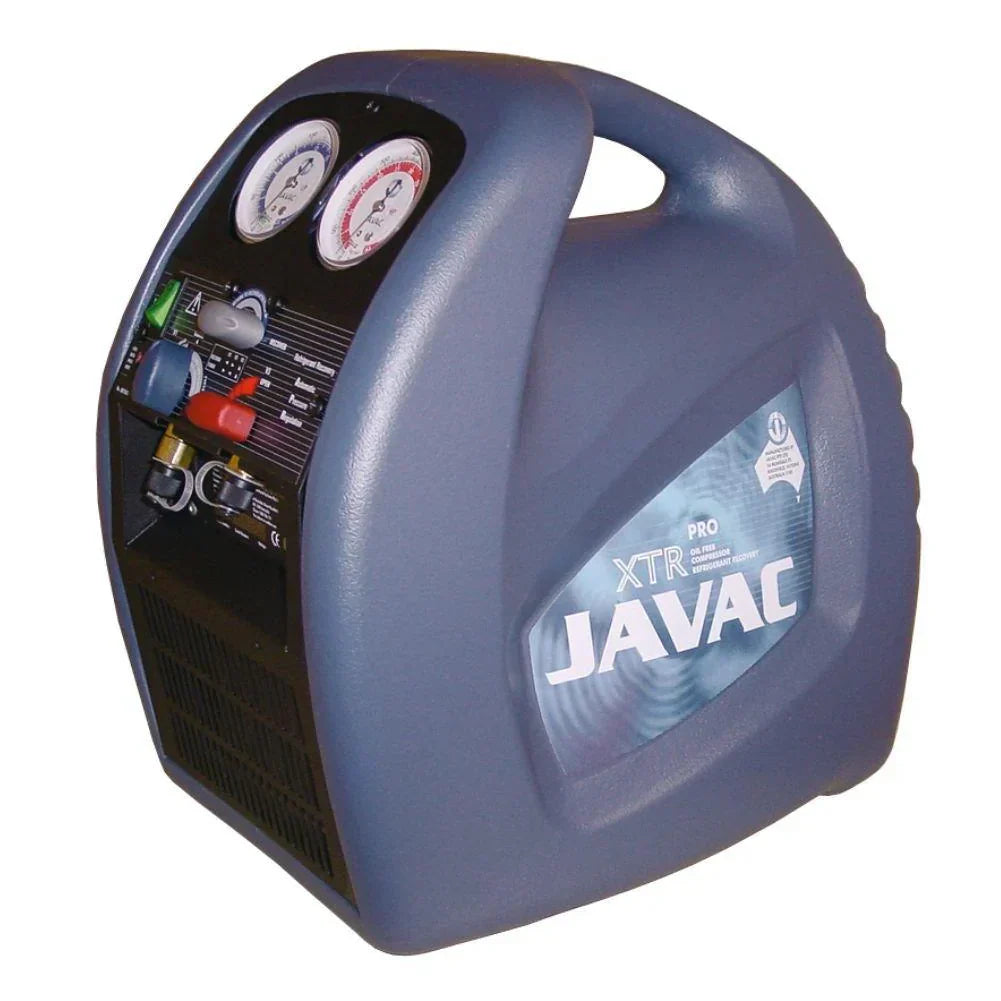
Compact portable units for residential callouts, A2L-rated machines for R32 work, and higher-capacity options for larger liquid recovery jobs. Bosch, Promax, Robinair, JAVAC and Mastercool — ships Australia-wide.
Quick note: R32 is classed as an A2L lower flammability refrigerant, not an A1 non-flammable refrigerant. That means technicians need the right recovery procedures, the right equipment, and a licensed handling approach before working on it.
Why R32 Matters in Australian HVAC Work
R32 has become a major refrigerant in newer split systems because it offers lower global warming impact than R410A while still delivering strong cooling performance in many designs. That lower GWP is one of the biggest reasons manufacturers moved toward it. In practical field work, though, refrigerant choice affects more than environmental numbers. It changes service habits, safety thinking, tool compatibility, and how recovery jobs are planned.
R410A still dominates the installed fleet across Australia. Technicians are servicing, repairing, and recovering it on jobs every day. But newer systems increasingly use R32, which means workshops and service vans need equipment that supports both legacy fleet work and newer refrigerant types. A recovery machine matched to older high-pressure work but not suited to R32 can slow the job down or create unnecessary risk.
That is why technicians increasingly compare recovery machines and cylinders as a complete system rather than separate purchases. Recovery speed, refrigerant compatibility, hose setup, and cylinder safety all work together. A strong machine paired with poor cylinder practice is still a weak recovery setup overall.
R32 vs R410A: What Actually Changes on the Job?
On paper, R32 and R410A sit in a similar pressure class and are both used in split-system air conditioning. In the field, though, there are important differences that affect how the job is approached.
R32 is a single-component refrigerant. R410A is a blend. That does not make R32 recovery effortless, but it does influence how technicians think about refrigerant handling and recovery quality. R32 also has a lower GWP, which is why it is the more future-facing option for newer systems.
The biggest service difference is safety classification. R410A is generally treated as an A1 refrigerant, while R32 is A2L — lower flammability. That does not stop recovery work, but it does change how technicians think about ventilation, ignition sources, tool suitability, and general workshop behaviour.
Technicians doing more R32 work need to think beyond just the machine. The full recovery path — including the recovery unit and recovery cylinder setup — matters just as much as the machine itself.
What Is the Running Pressure of R32 Refrigerant?
R32 typically runs in a working pressure range of around 12 to 26 bar depending on operating conditions, temperature, system load, and where in the cycle the measurement is taken. That is one reason it is often compared closely with R410A — both refrigerants sit in a high-pressure service environment compared with older refrigerants many technicians learned on.
In practical terms, manifolds, hoses, gauges, and recovery equipment need to be rated for the pressure class involved. Similar pressure range to R410A does not mean identical service thinking, because R32 still carries a different safety classification and handling expectation.
Running pressure changes with ambient temperature, indoor load, system design, and operating state. That is why "what is the running pressure of R32?" is useful as a guide question, but it should never replace proper measurement against actual system conditions. The takeaway: R32 sits in a high-pressure service class and must be handled with equipment and procedures that reflect that reality.
Is R410A Better Than R32?
For most newer split-system comparisons, R32 comes out in front as the stronger long-term choice. It has a lower GWP, broad manufacturer support, and strong performance in many smaller-system applications. That does not make R410A irrelevant — the installed fleet is large and technicians will continue servicing those systems for years.
| Factor | R32 | R410A |
|---|---|---|
| Type | Single-component refrigerant | Blended refrigerant |
| GWP | Lower (675) | Higher (2,088) |
| Ozone depletion potential | Zero | Zero |
| Safety class | A2L — lower flammability | A1 — non-flammable |
| Recovery unit requirement | Must be A2L-rated | Standard A1 machine suitable |
| Typical role today | Dominant in newer systems | Large installed legacy fleet |
For buying and servicing decisions, the right answer is to match the recovery setup to the refrigerants you actually work on most often. If your service work increasingly includes modern split systems, a recovery unit suited to current refrigerant work is more valuable than ever.

Promax RG5410A-E — A2L-rated, recovers R32, R410A and common HFCs/HCFCs
Oil-less compressor, liquid and vapour recovery, built-in protections. A reliable everyday all-rounder for technicians working across both R410A legacy systems and newer R32 installs.
Why Refrigerant Recovery Matters
Recovery is one of the most important parts of refrigerant handling because it affects compliance, safety, contamination control, and the rest of the service workflow. It is not just about getting refrigerant out of a system. It is about recovering it cleanly, containing it properly, and setting up the repair or replacement work that follows.
Venting is not acceptable — legally or practically. Beyond the compliance side, good recovery practice makes every subsequent step easier. Leak diagnosis, repair, evacuation, and recharge all work better when recovery has been done cleanly with suitable equipment.
That is why machine choice matters, but the full recovery setup matters just as much. A good machine needs a proper cylinder, short and rated hoses, sensible manifold routing, and a scale that prevents overfilling. Recovery is a system, not just a box with a handle.
Step by Step Refrigerant Recovery Process
The exact workflow varies depending on refrigerant type, system layout, and whether the job starts with liquid or vapour, but the overall process follows the same field logic. The goal is to recover refrigerant safely into an approved cylinder using equipment that matches the job.
Step 1: Identify the refrigerant and confirm the job
Before connecting anything, confirm what refrigerant is in the system and what condition the system is in. Do not guess. This protects the recovery machine, the cylinder contents, and the rest of the job from cross-contamination.
Step 2: Gather the full recovery setup
You will need a compatible recovery machine, short rated hoses, manifold gauges, a scale, and an approved recovery cylinder. On R32 jobs specifically, the machine must be A2L-rated — a standard A1 machine is not appropriate. Cylinder choice matters as much as the machine because cylinder pressure rating and fill management directly affect safety.
Step 3: Weigh and prepare the recovery cylinder
Put the cylinder on a scale before recovery begins. Confirm it is suitable, in good condition, and not overfilled from a previous job. Recovery must not push the cylinder beyond safe fill limits. Watching cylinder weight is not optional — it is part of correct recovery practice.
Step 4: Connect the manifold, machine, and cylinder correctly
Connect the system to the manifold, then route the centre hose to the suction side of the recovery machine. Connect the outlet side of the machine to the recovery cylinder. Keep the hose path tidy and as short as practical to reduce restriction and improve recovery speed.
Step 5: Purge the hoses
Before starting recovery, purge air and non-condensables from the hoses according to proper procedure. This reduces contamination and improves system control once recovery begins.
Step 6: Start the recovery process
Open the required valves and start the recovery machine. Monitor the manifold, the machine condition, and the cylinder weight throughout. Recovery is not a set-and-forget task. Watch what the system is doing and adjust if conditions change.
Step 7: Complete the recovery and purge the machine if required
Once the machine reaches its target shutoff condition, complete the manufacturer-recommended purge cycle if applicable. This clears the machine and reduces refrigerant cross-contamination before the next job.
Step 8: Close valves and isolate the cylinder
When recovery is complete, close all relevant valves and the recovery cylinder valve. Recheck cylinder weight and confirm the recovery stage is done before disconnecting hoses.
Pro Tip: Recovery often slows because of hose restriction, loose connections, poor cylinder prep, or heat load on the cylinder — not because the machine is underpowered. A cleaner setup usually improves recovery speed more than swapping to a bigger machine.
Method 1: Liquid Recovery
Liquid recovery is usually the fastest option where the system allows it. Refrigerant is being moved while still in liquid form, which means the machine is shifting mass more efficiently than pulling vapour. On systems with a usable liquid path and a charge large enough to justify the method, liquid recovery can save meaningful time on the job.
The main limitation is that not every system layout or service condition makes it practical. If the liquid path is not clear, access is poor, or the job is small, vapour recovery is more common. Even where liquid recovery is possible, the cylinder must still be monitored carefully because liquid transfer increases cylinder weight quickly.
Method 2: Vapour Recovery
Vapour recovery is the most familiar everyday method for most HVAC technicians. The recovery unit pulls refrigerant vapour from the system, condenses it internally, and sends it to the recovery cylinder as liquid. Slower than liquid recovery, but it suits the widest variety of systems and service conditions — which is why it remains the standard go-to on most field jobs.
This is also often the method that finishes the job even when it starts with a liquid stage. Once the easy liquid transfer is done, the remaining refrigerant comes out as vapour. A well-matched all-round recovery unit handles that transition cleanly without the technician having to change the setup mid-job.
Method 3: Push-Pull Recovery
Push-pull recovery is more specialised and generally used where there is enough liquid refrigerant in the system to justify the extra setup. Pressure difference is used to help move liquid refrigerant more quickly into the cylinder, which can save time on larger jobs. On smaller residential systems, the extra setup is usually not worth it.
Once the liquid stage is effectively complete, technicians switch back to standard vapour recovery to clear the remaining refrigerant from the system and lines. If your work regularly includes larger charges, comparing recovery units as a complete setup — machine, cylinder, and hose configuration — is worth the time.
Tips for a Smooth Refrigerant Recovery Job
Recovery work goes better when the setup is disciplined. Keep hoses short where possible. Reduce restrictions. Use a scale from the start. Confirm refrigerant identity before connecting. Keep cylinders in good condition and test date. Use recovery-only hoses where practical to reduce contamination risk. Ambient conditions affect recovery speed more than many technicians expect — on a 35°C day in western Sydney, a heat-soaked cylinder slows recovery noticeably compared to a shaded one.
Technicians doing regular R32 and R410A work also benefit from consistency. A repeatable setup with a dependable machine, correctly matched cylinder, and clear recovery workflow usually saves more time over a working year than chasing any single "faster machine" claim.

Bosch RG 4.0 — A1/A2L/A3 capable, 38.5 bar, 410.5 kg/hr push-pull
A strong option for technicians who need reliable performance on A2L refrigerants including R32 and modern low-GWP systems. Compare the full range at HVAC Shop.
Final Thoughts
R32 and R410A both sit inside modern Australian HVAC service work, but R32 increasingly shapes the direction of new systems and the recovery equipment technicians need on the van. Good recovery protects the environment, protects the refrigerant from contamination, and makes the rest of the service process cleaner and safer.
Whether the job begins with liquid recovery, finishes with vapour recovery, or justifies push-pull on a larger system, the best results come from matching the method to the charge and matching the equipment to the refrigerant. A well-chosen recovery setup starts with the machine but also includes the cylinder, hoses, scale, and the habits around them.
To compare suitable options for current R32 and R410A work, start with the full range of refrigerant recovery units at HVAC Shop and use that as the starting point for both machine choice and recovery cylinder planning.