
Vacuum Gauge Essentials: Enhancing HVAC Maintenance
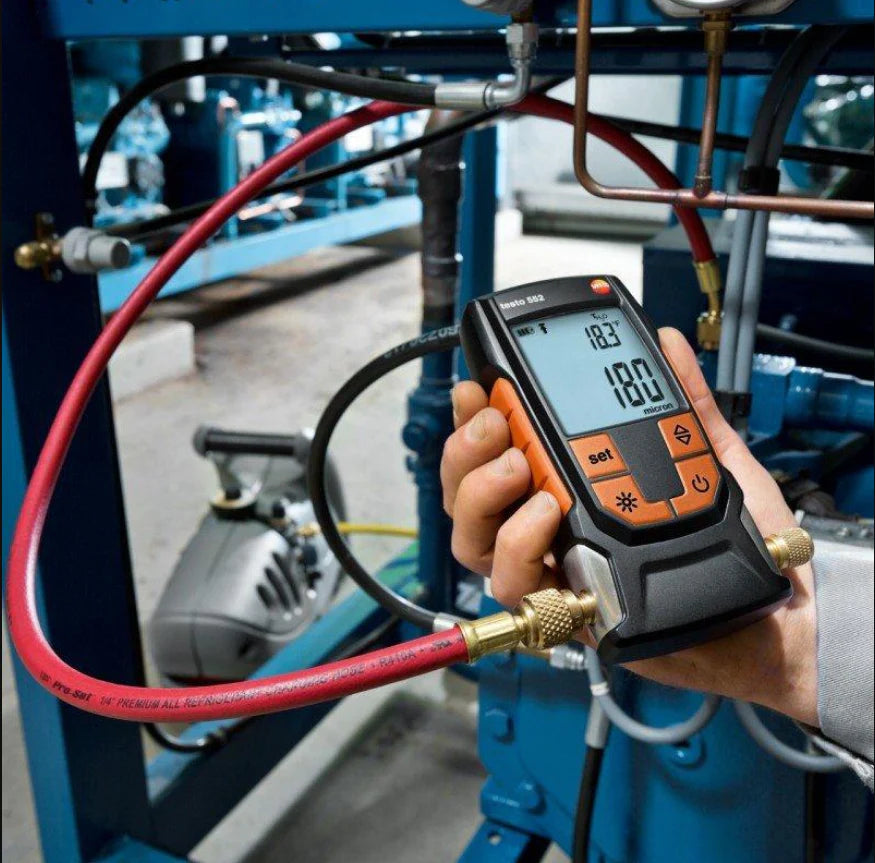
If you're involved in the world of HVAC (Heating, Ventilation, and Air Conditioning), or are merely curious about the intricate workings of your home's climate control system, one device you should become intimately familiar with is the vacuum gauge. This unsung hero of the HVAC world plays a crucial role in AC maintenance, ensuring that systems function efficiently and reliably. In this blog post, we're going to uncover the vital role of vacuum gauges, why they're essential for your AC unit, and how they facilitate more effective AC maintenance.
What is a Vacuum Gauge?
Before we dive into the specifics, let's start with the basics: what exactly is a vacuum gauge? This handy tool measures pressure levels in an AC system. However, it's not measuring positive or atmospheric pressure, but rather a vacuum – the absence of pressure, typically in enclosed systems.
By measuring this vacuum, the gauge can indicate whether there's moisture or air present in the AC system – contaminants that can significantly affect its performance. There's a broad range of vacuum gauges available, from basic analog models to advanced digital versions, each with their unique pros and cons.
The Role of Vacuum Gauges in AC Systems
The vacuum gauge's primary role is to ensure the HVAC system is free of any non-condensable gases and moisture before refrigerant is added or after maintenance has been completed. This is known as pulling a vacuum and is a crucial step in AC maintenance.
Failure to pull a proper vacuum can lead to numerous issues down the line, such as inefficient cooling, increased energy consumption, and potential damage to your AC unit. That's where vacuum gauges come in, providing a precise measurement of the vacuum level to ensure it's at the appropriate level.
Why Vacuum Gauges are Essential

Without a vacuum gauge, technicians would be operating blind when it comes to pulling a vacuum. Having an accurate gauge reading is essential for several reasons:
Diagnosing Problems
A vacuum gauge can help identify common issues with the AC system, such as leaks or blockages. If the gauge shows a pressure that's too high or too low, it can be a sign of a problem that needs to be addressed.
Ensuring System Efficiency
Vacuum gauges are essential for maintaining the efficiency of the HVAC system. Moisture or air within the AC system can cause a reduction in efficiency, leading to increased energy consumption and higher energy bills.
Ensuring System Longevity
By providing accurate readings and helping diagnose issues early, vacuum gauges play a crucial role in ensuring the longevity of your AC system. Regular use of a vacuum gauge can prevent damage and prolong the lifespan of your AC unit.
The Different Types of Vacuum Gauges
There are a variety of vacuum gauges available, each designed to suit different types of HVAC systems and specific tasks. Here are a few common types:
Bourdon Tube Gauge
This is the most common type of gauge, which measures vacuum by the deflection of a curved, spring-loaded tube.
Digital Vacuum Gauges
These gauges use electronic sensors to measure vacuum and provide a digital readout. They offer high precision and are perfect for complex HVAC systems.
Thermocouple Gauge
Thermocouple gauges use a heated wire to measure vacuum, providing a reading based on how much heat the wire loses. These are often used in high-vacuum situations, such as industrial applications.
Ionization Gauge
Ideal for very high-vacuum situations, these gauges measure vacuum by ionizing gas atoms and measuring how many ions are produced.
How to Use a Vacuum Gauge

Using a vacuum gauge might sound complex, but it’s a straightforward process once you understand the basics. Here’s a simplified guide:
-
Connect the Gauge: Start by connecting your vacuum gauge to the service port of the AC system. The location of this port varies by system, so consult your unit's manual if you're unsure.
-
Turn On the Pump: Next, turn on the vacuum pump and allow it to run. This starts to remove air and moisture from the system, creating a vacuum.
-
Monitor the Gauge: As the pump operates, keep an eye on the vacuum gauge. The gauge's needle (or digital reading) should start to move towards the higher numbers, indicating that a vacuum is forming.
-
Check for Steady Readings: Once the gauge's reading stops increasing and remains steady, the system has been evacuated of moisture and air. This might take anywhere from 15 minutes to several hours, depending on the system and the vacuum pump.
-
Shut Off the Pump: After achieving a steady reading, you can shut off the vacuum pump.
It’s important to note that this is a basic guide, and there might be other steps involved depending on the system you're working on. Always consult your AC unit's manual or a professional if you're unsure.
Understanding Vacuum Gauge Readings
Understanding how to read a vacuum gauge is just as important as knowing how to use it. Vacuum gauge readings are typically given in units of pressure, commonly inches of mercury (inHg) or millimeters of mercury (mmHg), with a higher number indicating a stronger vacuum.
A vacuum gauge doesn't simply give a "good" or "bad" reading. Instead, the readings should be interpreted in the context of what is typical for the system you're working on. For instance, a reading that's perfect for one AC system might indicate a problem in another. This is why it's essential to understand your specific HVAC system and what its normal operating parameters are.
The Future of Vacuum Gauges in HVAC
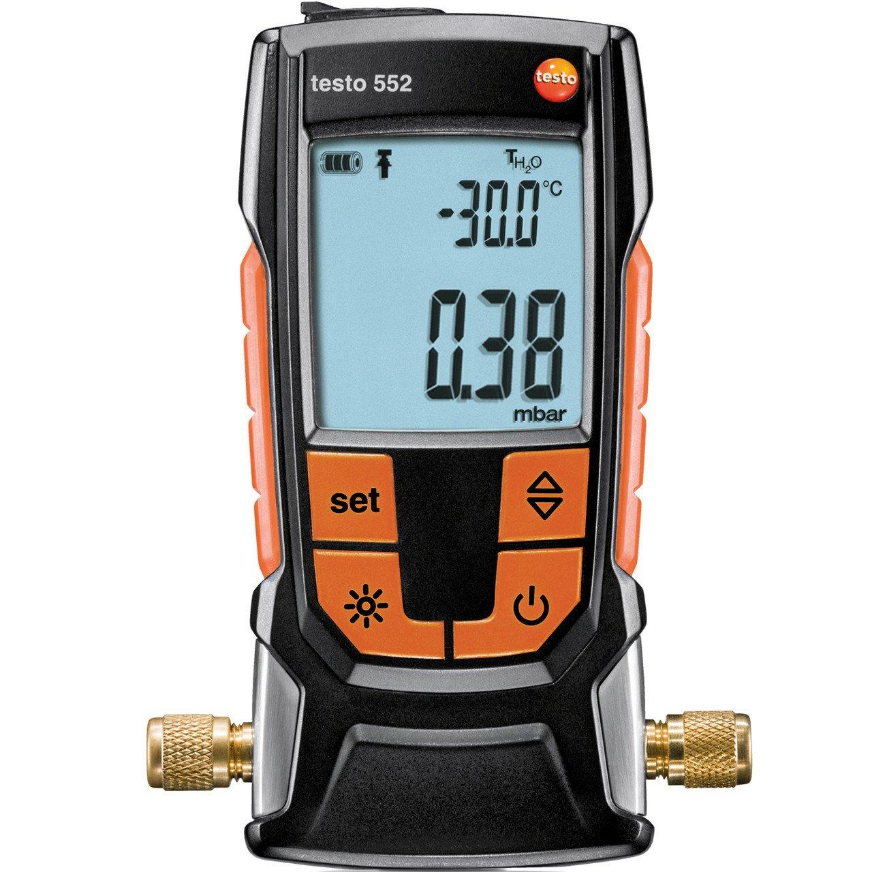
As with many aspects of HVAC, vacuum gauge technology is continually evolving. More advanced digital vacuum gauges are becoming increasingly popular, thanks to their higher accuracy and additional features. These gauges can provide more detailed diagnostic information and even connect to smartphones or other devices for remote monitoring and data logging.
Moreover, some advanced vacuum gauges now include features like leak rate indicators, which can alert technicians to small leaks that might be missed during a regular check. This can be invaluable for preventative maintenance, allowing issues to be spotted and addressed before they develop into more significant problems.
Conclusion
While vacuum gauges might not be the first thing that comes to mind when you think of HVAC, they're undeniably vital for effective AC maintenance. Whether you're an HVAC professional looking to enhance your toolkit or a homeowner keen to understand your system better, getting to grips with vacuum gauges and their uses can be incredibly beneficial.
So, the next time you're maintaining your AC unit, remember to pay homage to the humble vacuum gauge – an unsung hero in the world of HVAC, ensuring our systems work efficiently and keep us comfortable year-round.
For more information about vacuum gauges and other HVAC tools, or to schedule a maintenance appointment, don't hesitate to reach out to us at www.hvacshop.com.au. We're always here to help make your HVAC journey smoother and more efficient.